The holiday season brings a special kind of magic that store-bought decorations simply cannot capture. There is something deeply satisfying about creating beautiful Christmas pieces with your own hands, especially when the craft itself is as enjoyable as the finished result. These eighteen projects were chosen specifically for adults who want meaningful, creative experiences — not childish busywork. Each one produces something you will genuinely be proud to display or gift.
Dried Orange Slice Garland

There is a reason dried orange garlands appear in every stylish holiday home — they are stunningly beautiful, smell incredible, and cost almost nothing to make. Start by slicing fresh oranges into quarter-inch rounds, then pat them dry with paper towels to remove excess moisture. Arrange the slices on parchment-lined baking sheets and bake at two hundred degrees Fahrenheit for about three hours, flipping halfway through. The low heat slowly dehydrates the fruit while preserving its vibrant amber color. Once cooled, the slices become sturdy, translucent discs that glow beautifully when light passes through them. Thread them onto twine with a large needle, alternating with cinnamon sticks, dried cranberries, or small pinecones for added texture and visual interest.
I spend far too much time saving home ideas.
If you'd like the best ones, I'll send a short email once or twice a month.
The beauty of this project lies in its meditative simplicity — slicing, arranging, and threading become a calming ritual that fills your kitchen with the most wonderful citrus-spice aroma. Hang your finished garland across a mantel, drape it along a staircase railing, or wind it through your Christmas tree branches for a natural, old-world feel. The garland lasts for several seasons if stored carefully in a dry place, making it both economical and sustainable. Many crafters find that making a few extra strands to give as gifts is just as rewarding, since recipients always marvel at how professional the results look. Pair this activity with holiday music and a warm drink for the perfect December evening.
Miniature Pinecone Christmas Trees
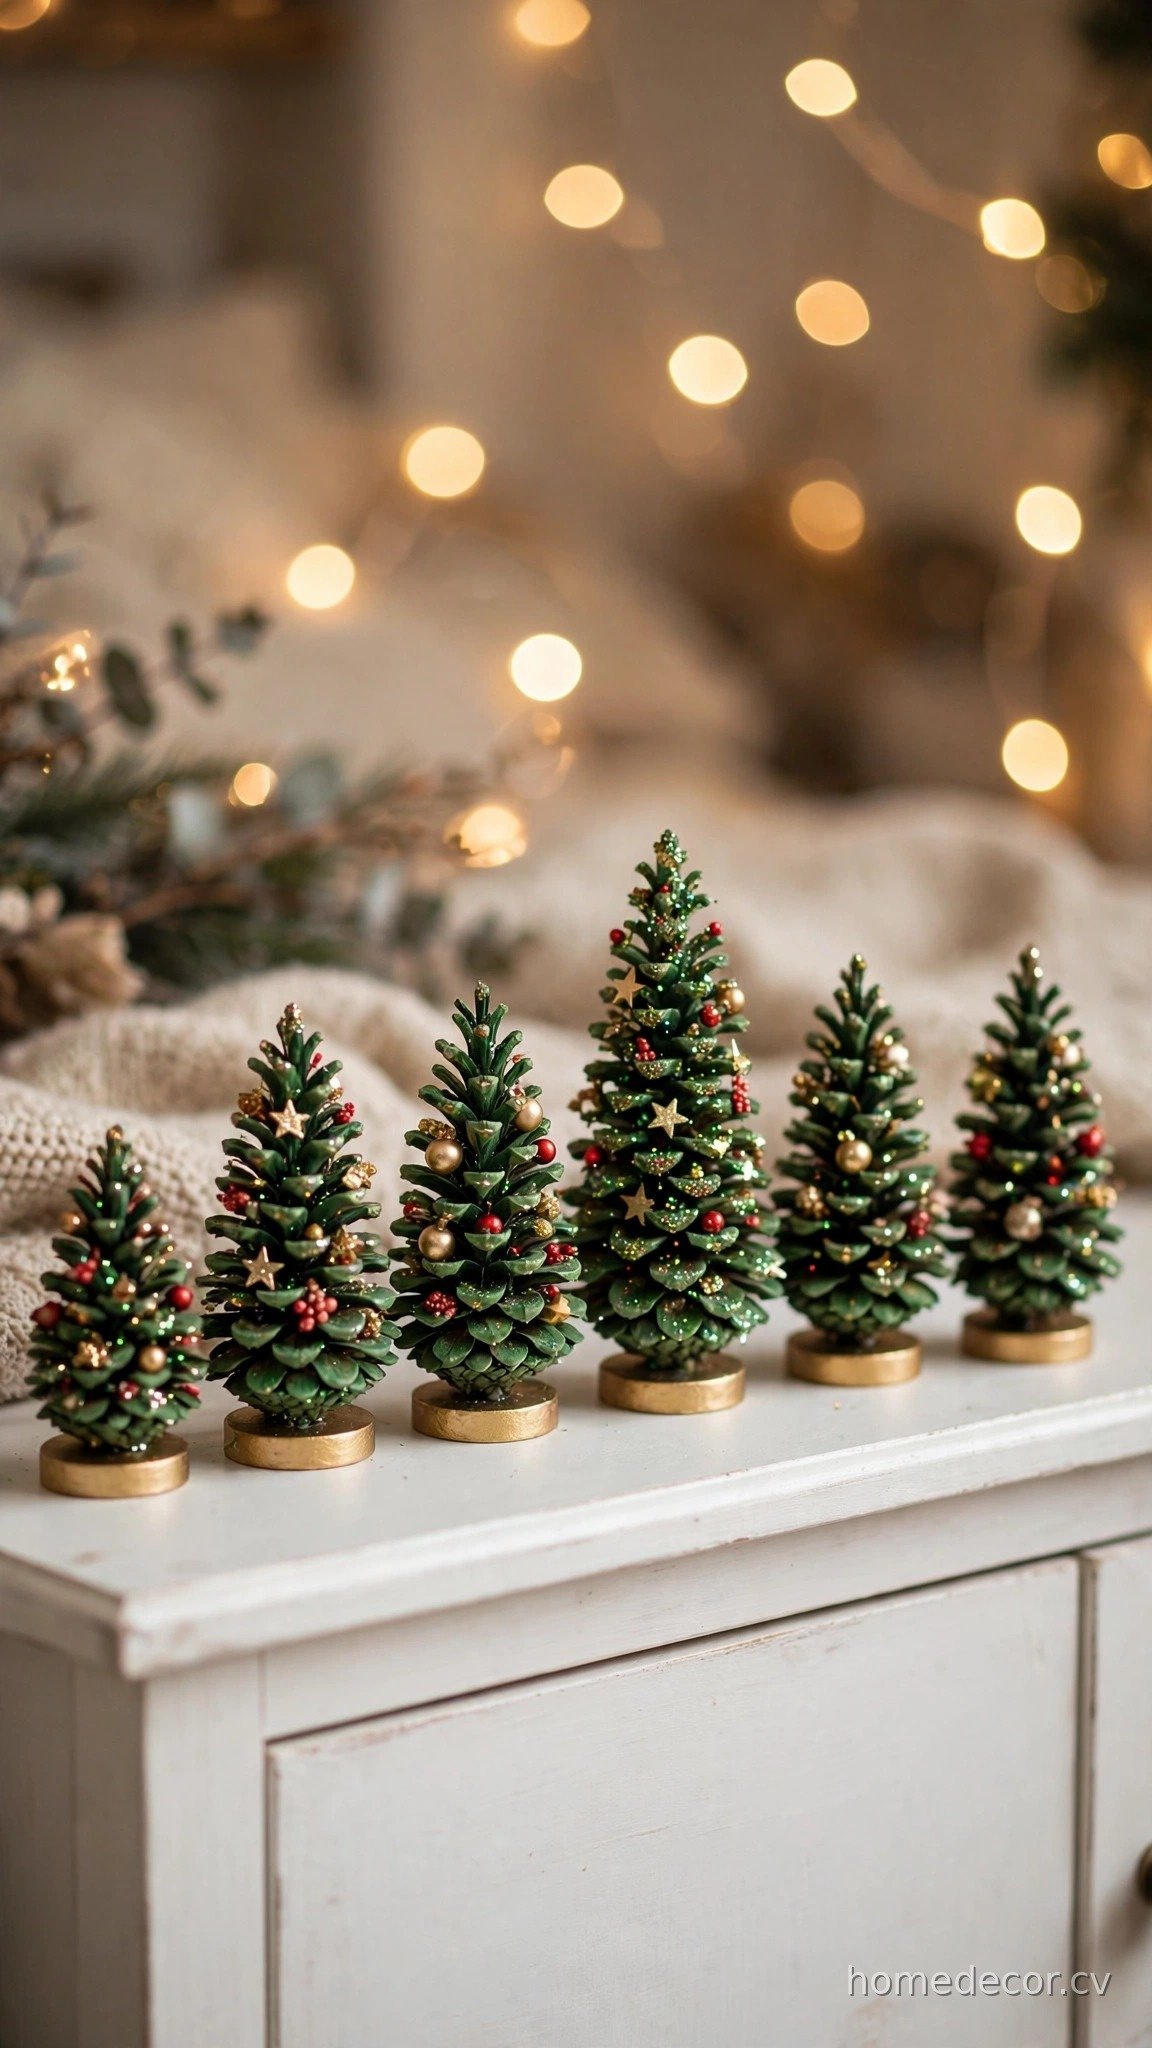
Transform ordinary pinecones gathered from your yard or a local park into the most charming miniature Christmas trees you have ever seen. Begin by cleaning your pinecones thoroughly — soak them in warm water with a splash of vinegar for twenty minutes, then let them dry completely for a day or two. Once dry, apply a base coat of green acrylic paint using a small brush, working the paint into all the crevices between the scales. While the paint is still slightly tacky, sprinkle fine glitter over the surface for a frosted, magical effect. After drying, use a hot glue gun to attach tiny pom-poms, miniature beads, or small star toppers as ornaments. Mount each finished tree on a small wooden disc or a bottle cap painted gold for a sturdy base.
What makes this craft so delightful is how quickly it comes together while still looking impressively detailed. A batch of six to eight trees can be completed in a single afternoon, making it perfect for a craft night with friends. Arrange your finished trees as a village scene on a sideboard, tuck them into wreath arrangements, or use them as place card holders for your holiday dinner table by attaching small name tags. The natural texture of the pinecones gives each tree a unique character that no two pieces share. For an extra festive touch, dab the tips of the scales with white paint to simulate freshly fallen snow.
Natural Element Wreath
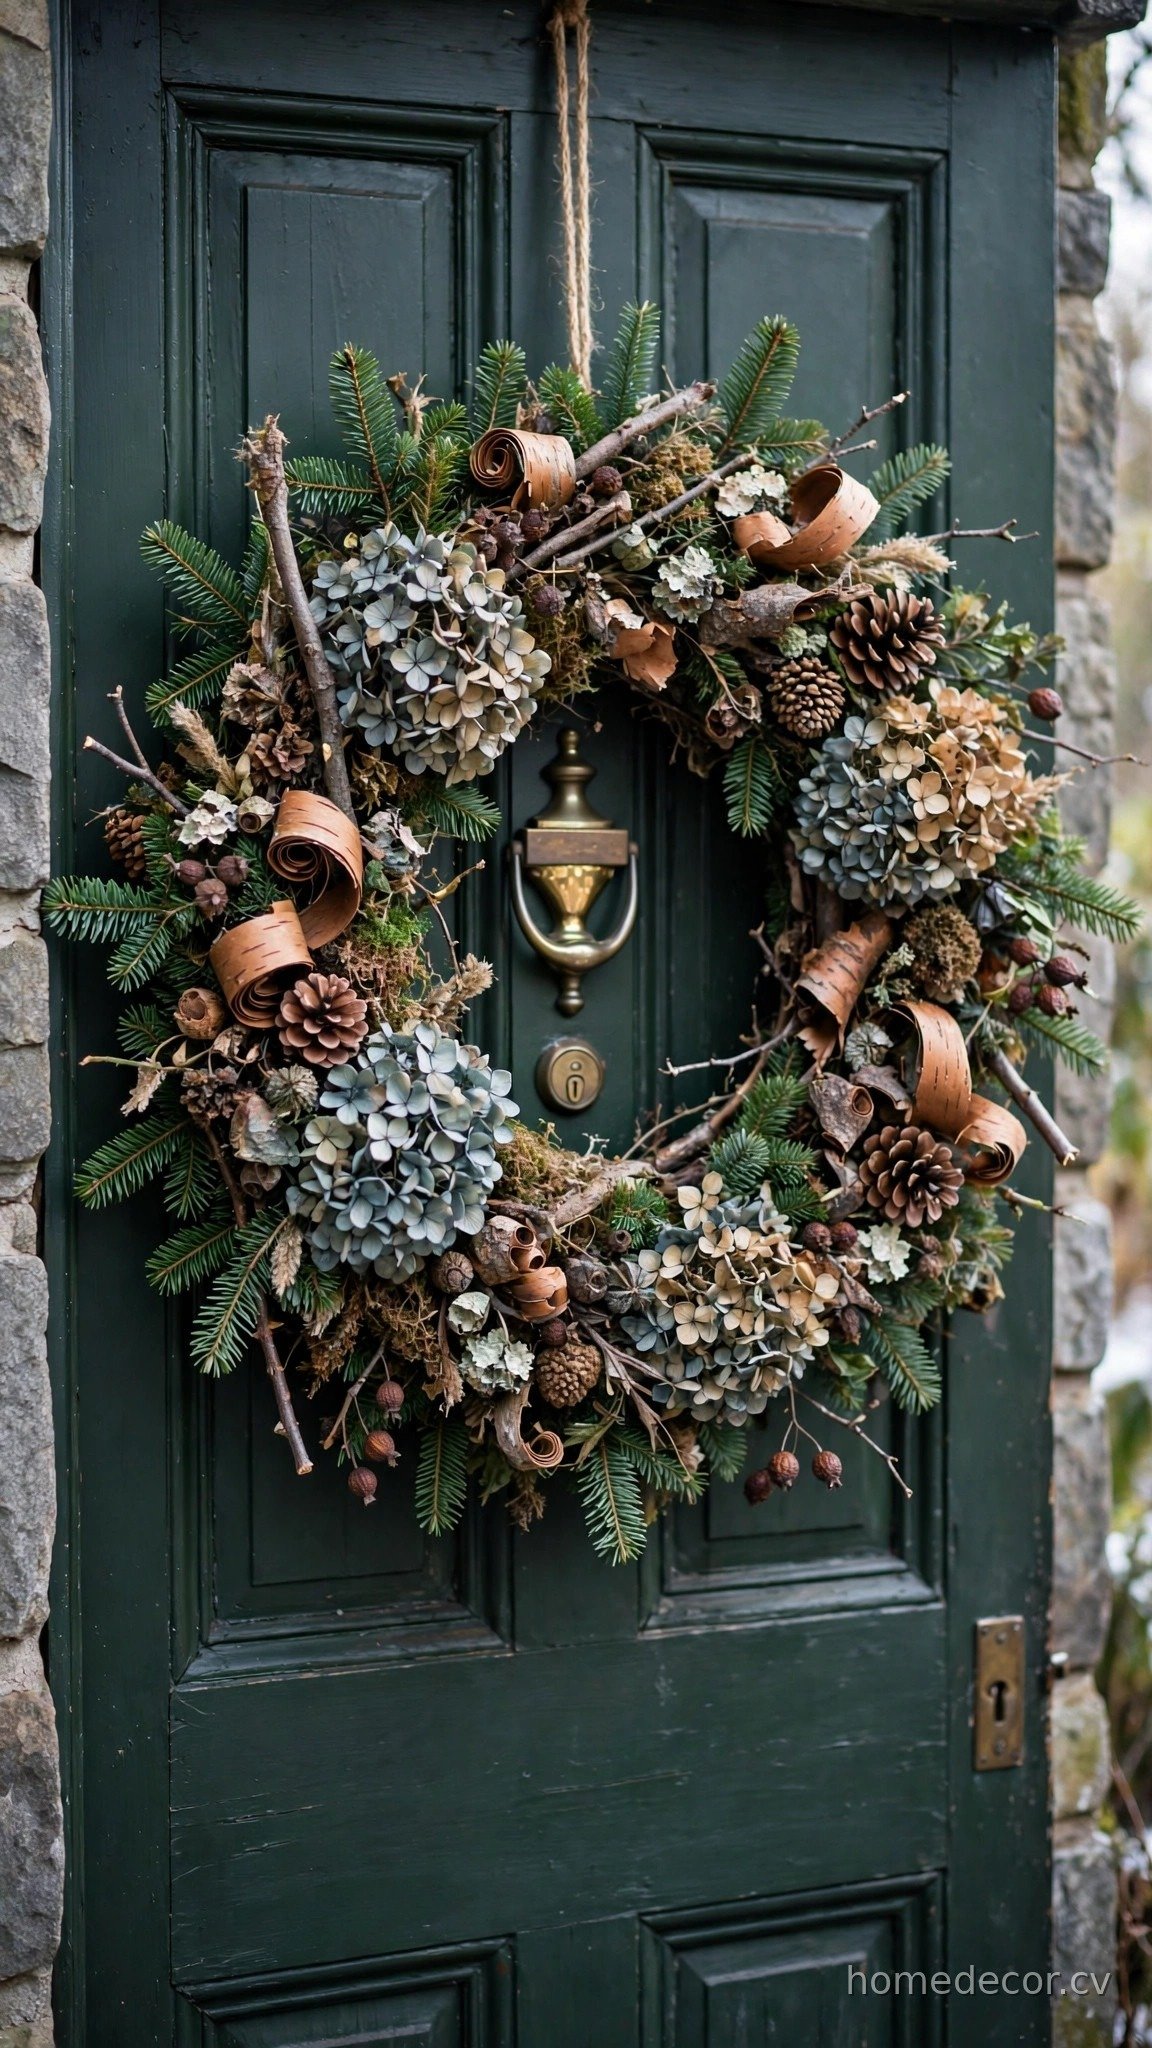
Creating a wreath from foraged natural materials connects you to the season in a way that assembling a kit never could. Start with a grapevine or wire wreath form as your base — these are inexpensive and available at any craft store. Head outside to gather interesting materials: evergreen branches, dried hydrangeas, pinecones, interesting twigs, dried seed heads, and even curled bark. The gathering expedition is half the fun and gets you outdoors during the beautiful early winter days. Working in small sections, use floral wire or a hot glue gun to attach your materials to the form, layering greens first as a foundation, then adding textural elements like pinecones and dried flowers. Step back frequently to check the balance and fullness from a distance.
The finished wreath will look like something from an expensive boutique, yet it cost you almost nothing but time and creativity. Unlike artificial wreaths that look identical year after year, a natural wreath has an organic, slightly wild beauty that feels alive and authentic. Mist it lightly with water every few days to keep the greens fresh, or embrace the dried look as the season progresses — both stages are gorgeous. Hang it on your front door to welcome guests, or make a smaller version for an interior wall. Many people find wreath-making so satisfying that it becomes an annual tradition, with each year’s creation reflecting the particular materials the season offered.
Salt Dough Ornaments
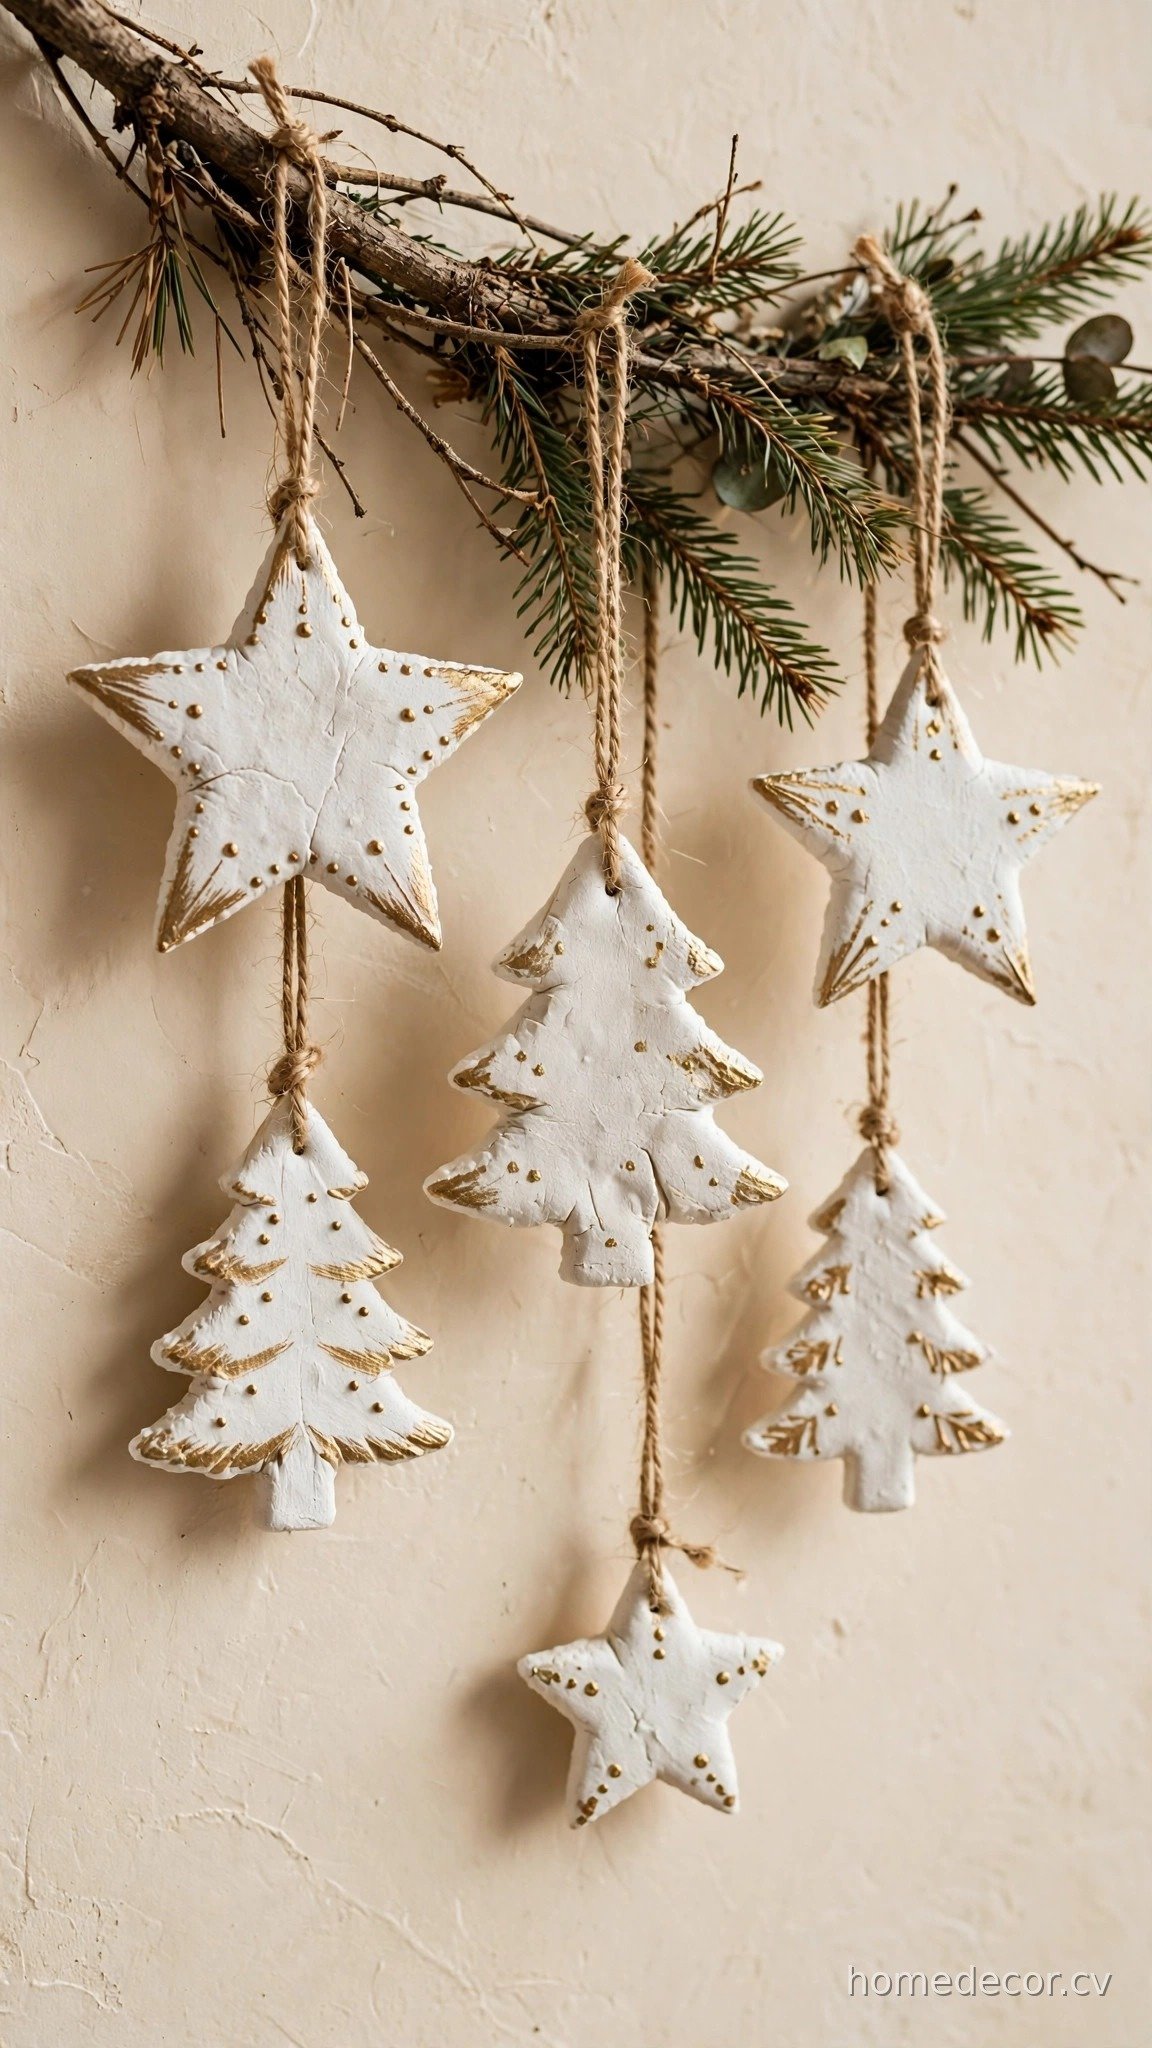
Salt dough ornaments are a classic for good reason — the dough is foolproof, the possibilities are endless, and the results have a lovely handmade charm. Mix two cups of all-purpose flour, one cup of fine salt, and one cup of water in a large bowl, kneading for about five minutes until the dough is smooth and pliable. Roll it out to a quarter-inch thickness on a floured surface, then cut shapes using cookie cutters — stars, trees, angels, and snowflakes all work beautifully. Use a straw to poke a hole near the top of each shape for hanging. Bake at two hundred degrees for two to three hours until completely hard, then let them cool overnight before decorating.
The decorating stage is where your personal style truly shines through. Paint the ornaments with acrylics in sophisticated color palettes — think matte white with gold accents, deep forest green with copper details, or classic red with cream. Add texture with stamps, lace impressions pressed into the raw dough, or delicate hand-painted patterns. A coat of clear matte sealant protects your work and gives it a professional finish. These ornaments make wonderful gifts, especially when you personalize them with names or dates using a fine paint pen. The entire process, from mixing to hanging, fills your home with a sense of accomplishment that perfectly captures the spirit of a handmade holiday.
Mason Jar Snow Globes
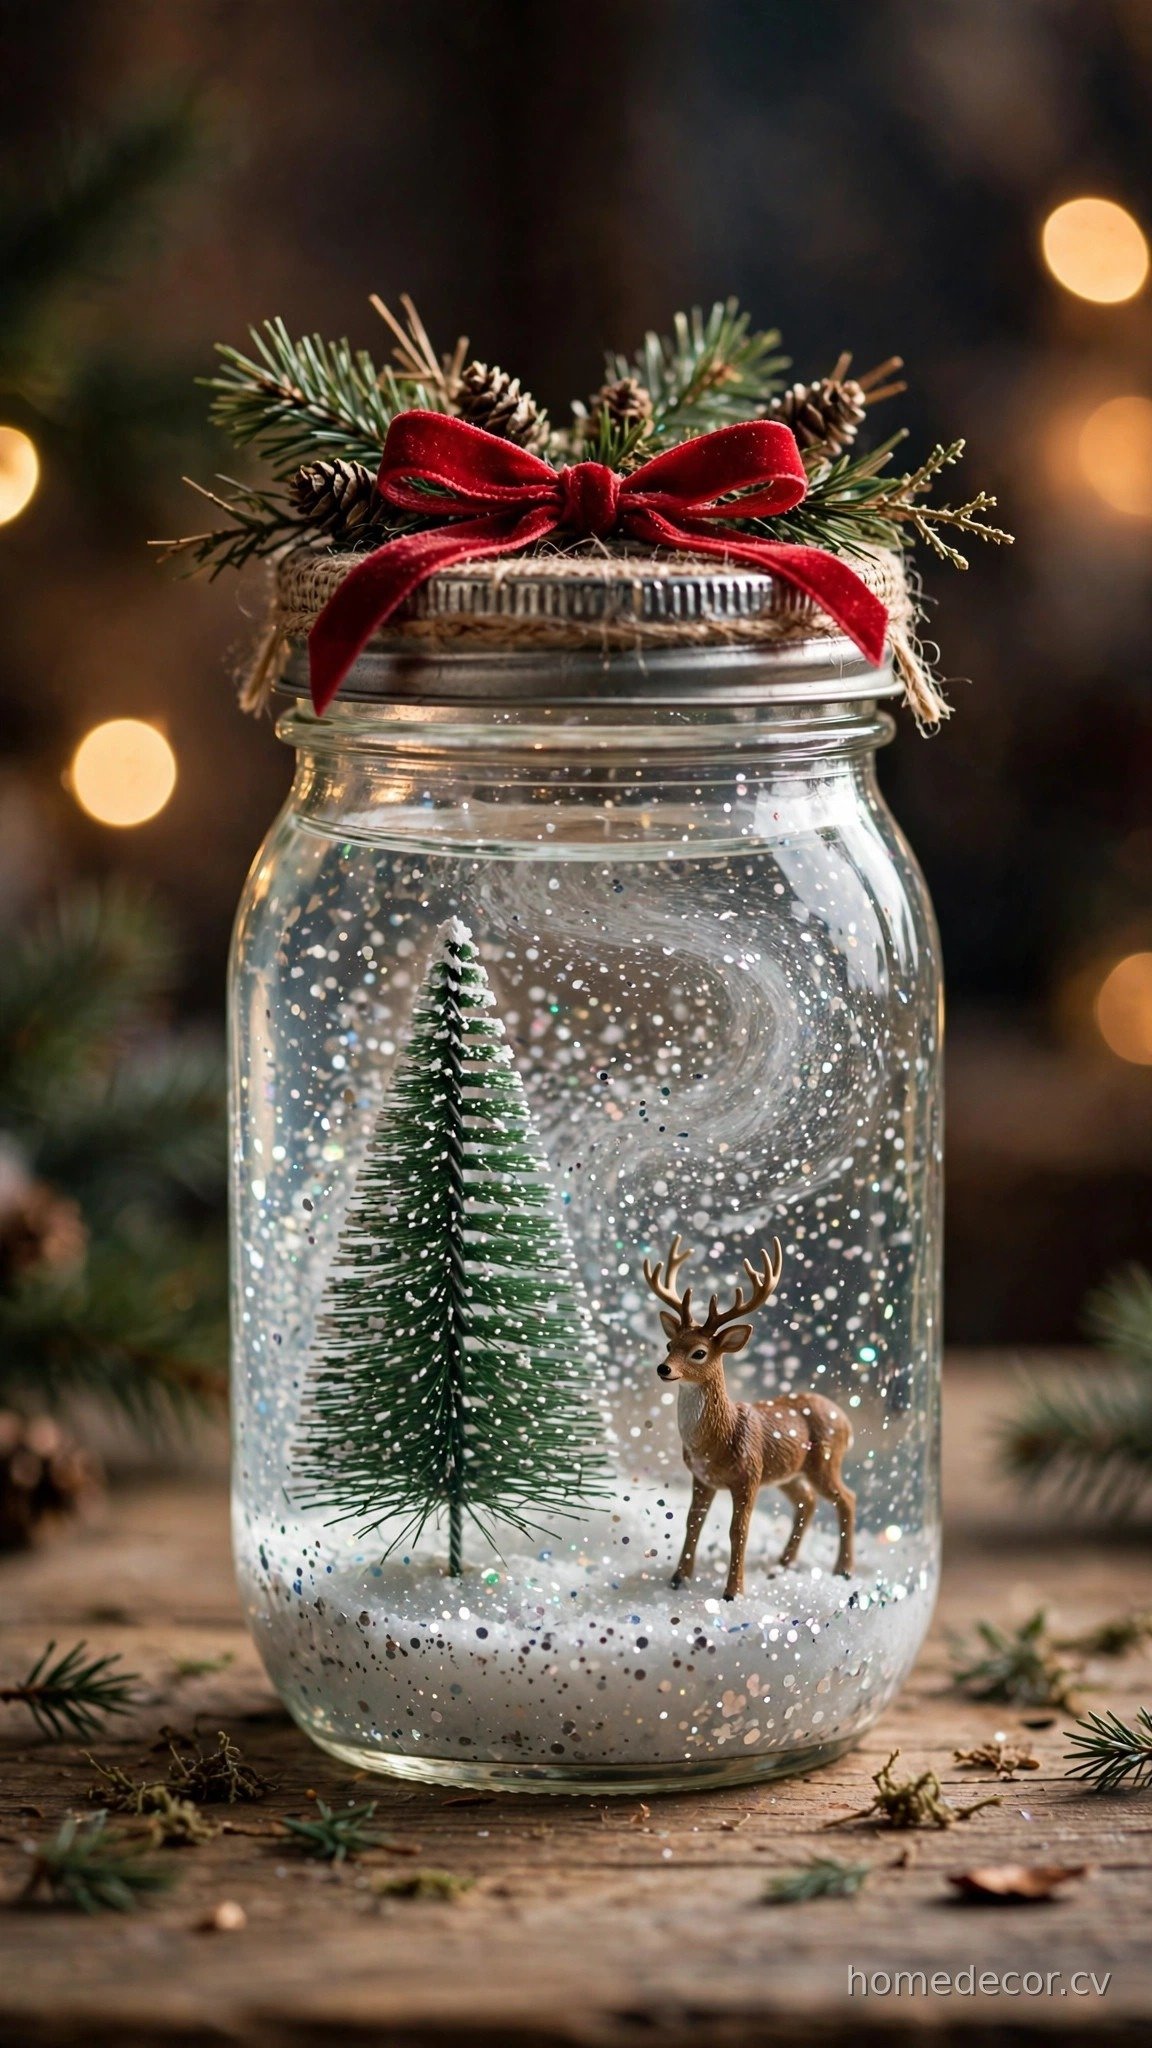
Mason jar snow globes are the perfect blend of nostalgia and creativity, producing keepsakes that look far more impressive than the effort required. Start with clean mason jars in any size — quart jars make dramatic statement pieces while smaller jelly jars are perfect for gifts. Choose a waterproof figurine for the center: miniature bottle-brush trees, tiny houses, deer, or even small photos laminated for protection. Use waterproof epoxy or hot glue to secure your scene to the inside of the jar lid, then let it cure completely. Fill the jar nearly to the top with distilled water, add a teaspoon of glycerin to slow the snowfall, then sprinkle in fine white glitter and tiny iridescent snowflake confetti.
Screw the lid on tightly — running a bead of waterproof sealant around the rim prevents any leaks — then flip the jar over and watch your winter scene come to life. The glycerin makes the glitter drift down slowly and realistically, creating a mesmerizing effect that never gets old. Decorate the outside of the lid with ribbon, twine, or a sprig of faux greenery for a finished look. These make extraordinary gifts because they feel deeply personal, especially when you customize the scene inside. Try making a series with different themes: a woodland scene, a tiny village, or a retro Santa tableau. For more holiday inspiration, check out our [DIY Christmas ornaments](https://homedecor.cv/diy-christmas-ornaments/) that pair beautifully with these handmade globes.
Embroidered Hoop Ornaments
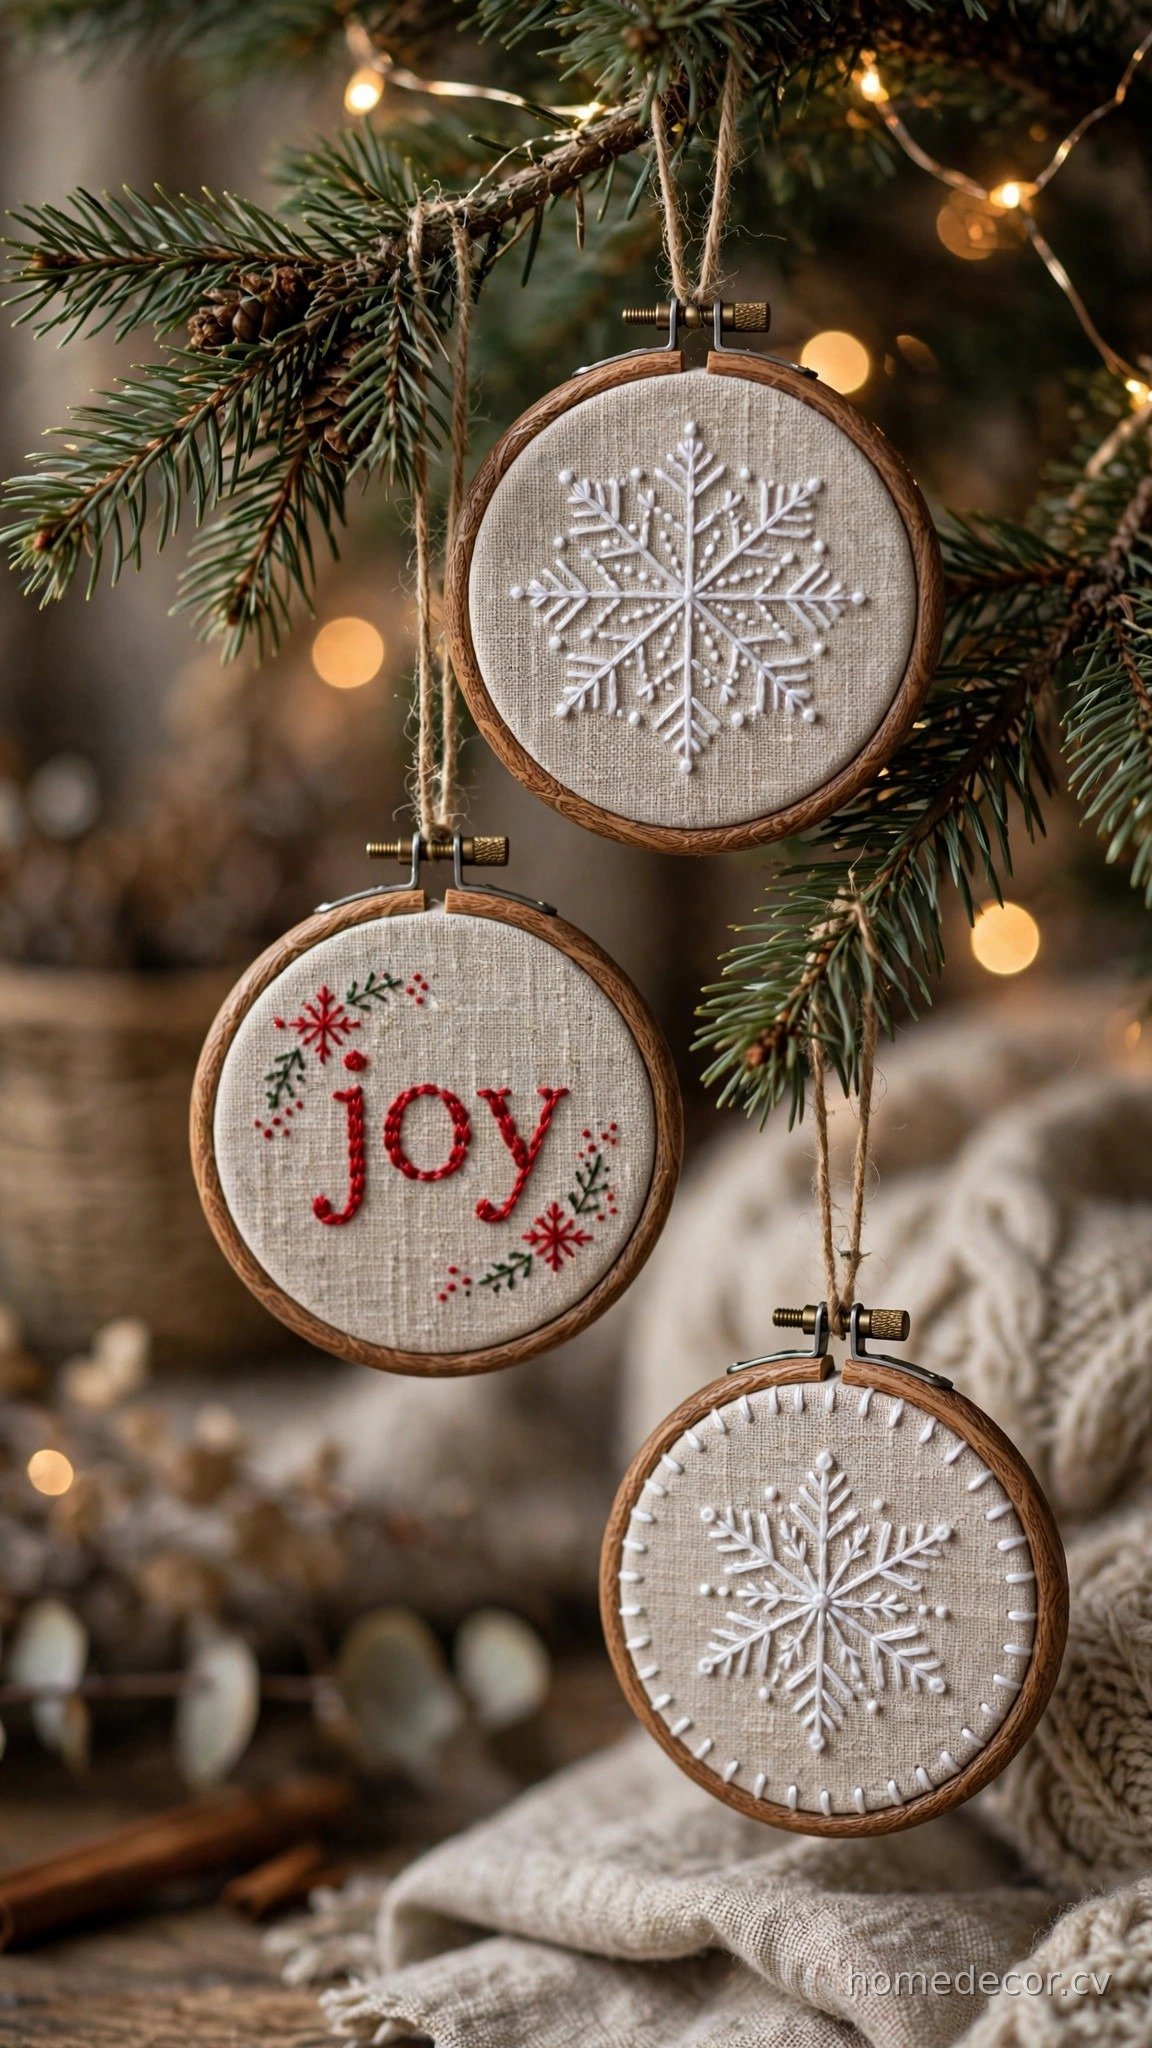
Embroidery hoop ornaments bring a cozy, textile warmth to your tree that glass baubles simply cannot match. Purchase small wooden embroidery hoops in three or four-inch sizes, along with plain linen or cotton fabric. Stretch the fabric taut in the hoop and tighten the screw, then trim the excess fabric from the back, leaving about half an inch to glue down neatly. Now comes the creative part: stitch simple holiday motifs using basic embroidery stitches. French knots make perfect snow dots, satin stitch fills in tree shapes beautifully, and simple backstitch outlines stars, words like “joy” or “peace,” and minimalist reindeer silhouettes. Even complete beginners can produce lovely results with just two or three stitch types.
The slow, rhythmic nature of hand stitching makes this one of the most relaxing crafts on the list — many people work on their hoops while watching holiday movies in the evening. Choose a cohesive color palette across all your ornaments, such as red and cream on natural linen, or go eclectic with a different design on each hoop. Finish the backs with a circle of felt glued over the raw edges, and add a ribbon loop for hanging. These ornaments have a heirloom quality that improves with age, and they pack flat for easy storage. They also make thoughtful gifts for friends who appreciate handmade details, since each one is genuinely one of a kind.
Wine Cork Christmas Tree
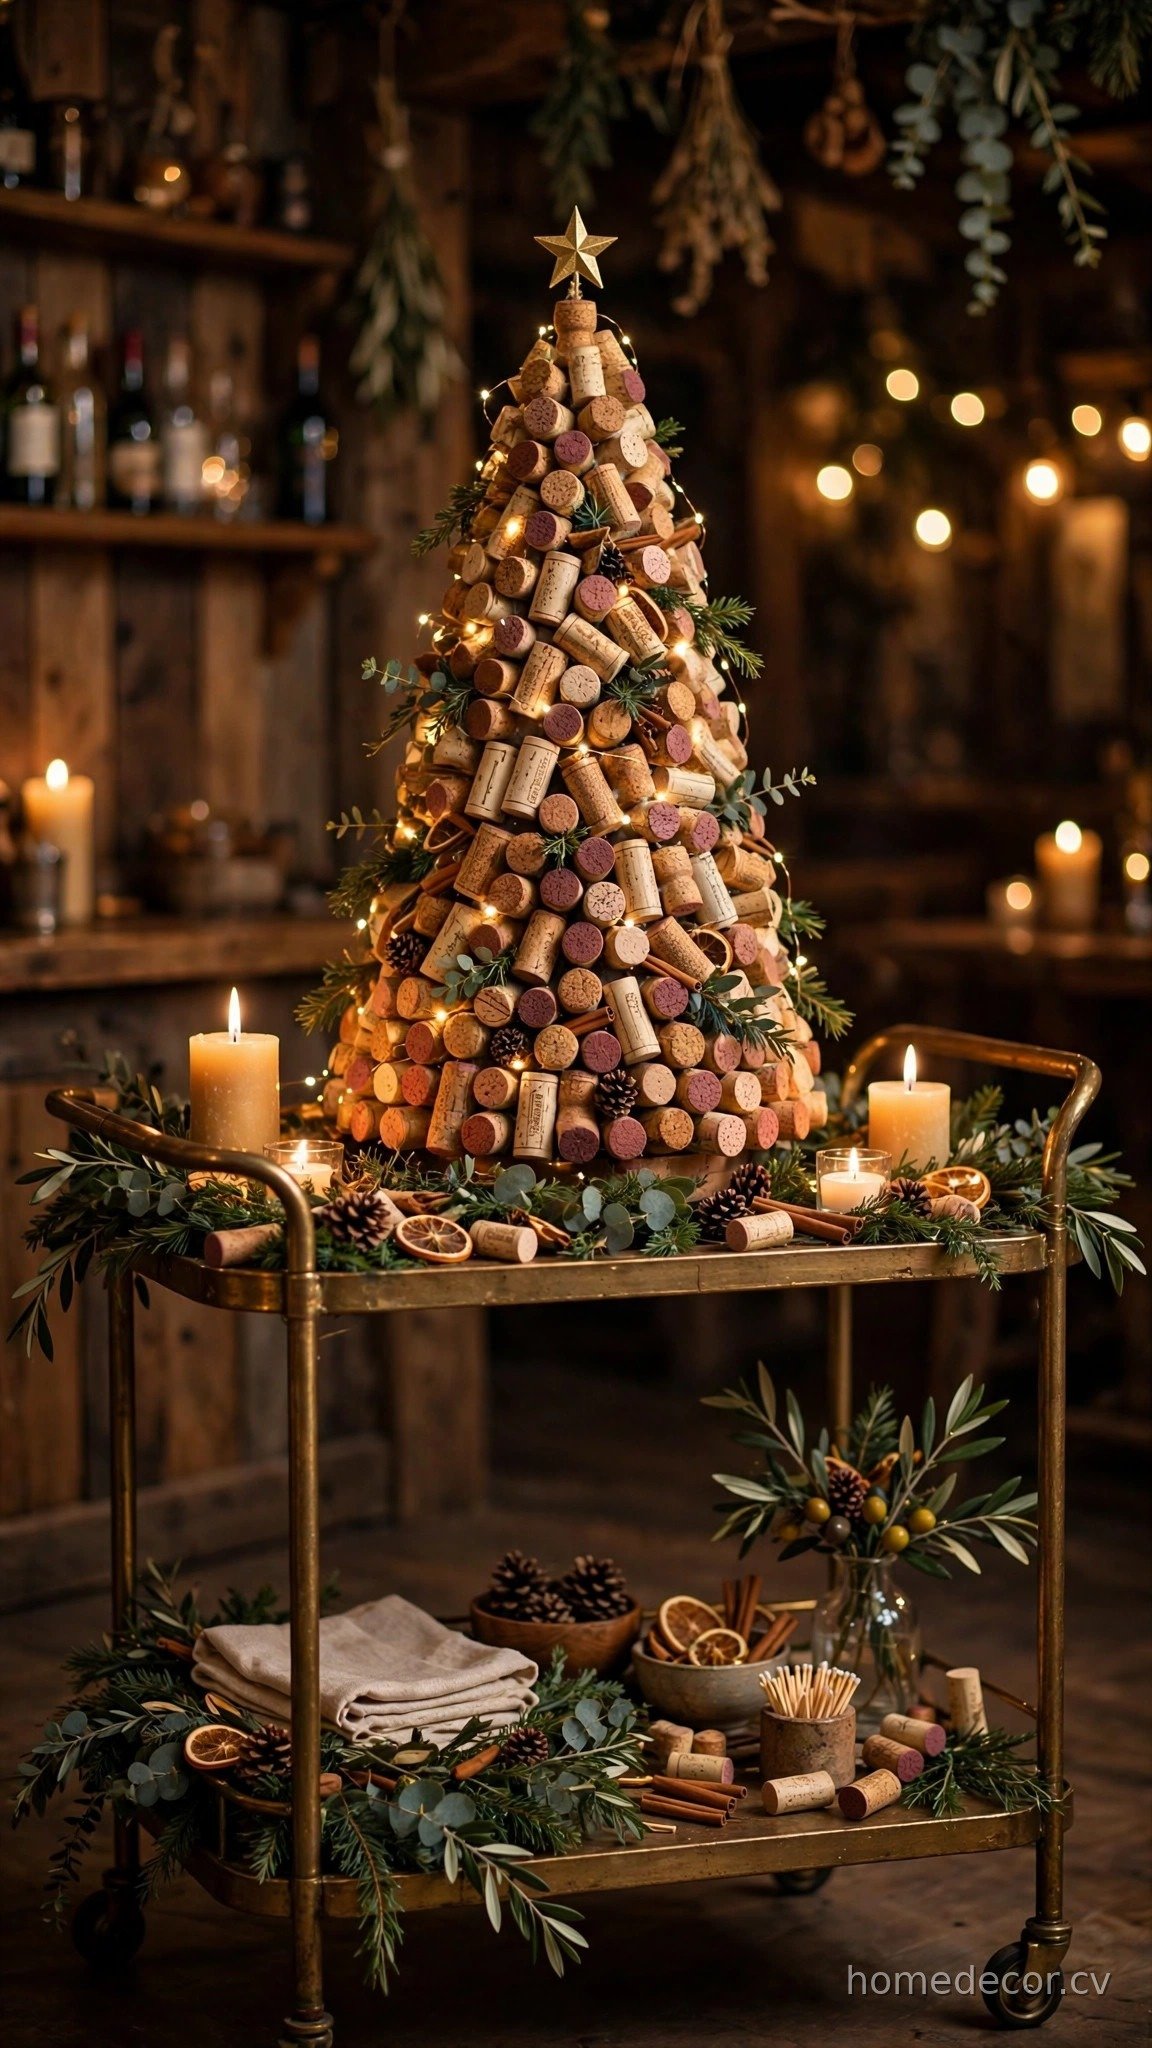
If you have been saving wine corks, the holidays are the perfect time to transform that collection into something spectacular. You will need roughly eighty to one hundred corks for a tabletop-sized tree, along with a foam cone from the craft store as your base. Starting at the bottom of the cone, hot glue corks horizontally around the base, working your way upward in staggered rows like shingles. The natural variation in cork color and texture creates a beautiful rustic pattern. Once the cone is fully covered, decorate your cork tree with tiny string lights woven between the corks, miniature ornaments, and a star or bow on top. A small wooden base or a festive tin makes a perfect stand.
This project is wonderfully satisfying because it gives new life to materials that would otherwise be discarded, and the finished tree has a warm, tavern-like charm that suits both rustic and modern interiors. The process of arranging the corks becomes almost puzzle-like as you fit different sizes together, which many crafters find deeply engaging. For a personal touch, write the names of wines or special occasions on some of the corks before gluing them on — it turns the tree into a memory piece. Display it on a bar cart, side table, or as a centerpiece surrounded by candles. Guests always ask about it, giving you the perfect excuse to share the story of its creation over a glass of wine.
Paper Quilled Snowflakes
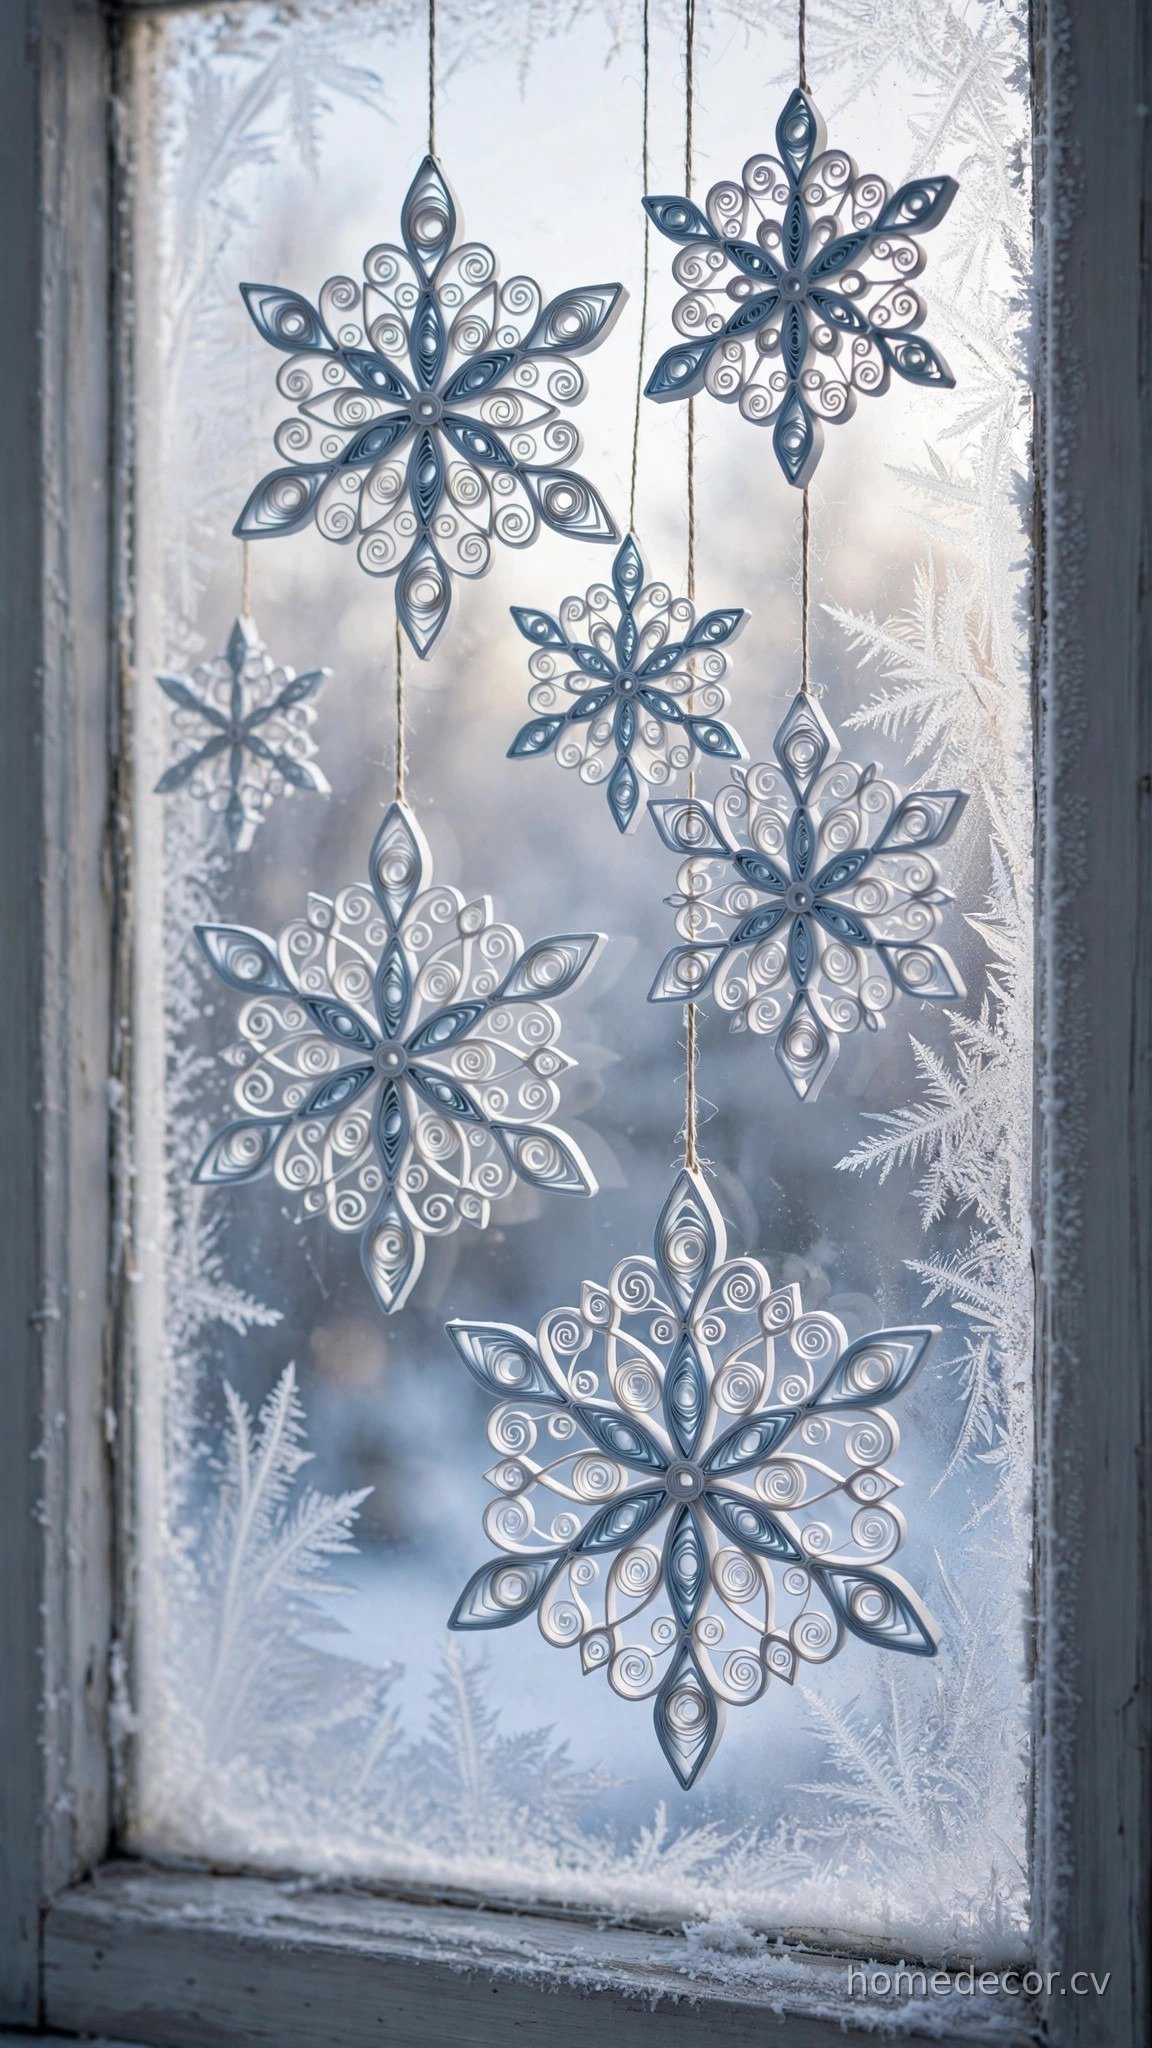
Paper quilling is an centuries-old art form that produces astonishingly intricate results from nothing more than strips of paper, and snowflakes are the perfect subject. Purchase pre-cut quilling strips in white, silver, and pale blue, along with a slotted quilling tool and clear-drying craft glue. The basic technique involves rolling a strip around the tool to form a tight coil, then releasing it to expand into a loose circle that you pinch into shapes — teardrops, marquises, and squares. Arrange six identical shapes radially around a central coil to form a snowflake, gluing each piece where it touches its neighbors. Add tiny tight coils as decorative centers and delicate scrolls at the tips for extra detail.
What surprises most beginners is how quickly the technique clicks — within thirty minutes you will be producing shapes confidently, and each snowflake takes only about twenty minutes once you find your rhythm. The finished snowflakes are incredibly delicate and catch the light beautifully, looking like frozen lace. Hang them in windows where backlight makes them glow, string several together as a garland, or attach them to gift packages as stunning toppers. Because no two handmade snowflakes are ever identical, just like real ones, each piece feels special. Seal finished snowflakes with a light coat of clear spray to protect them from humidity and keep them pristine for years.
Hand-Poured Scented Candles
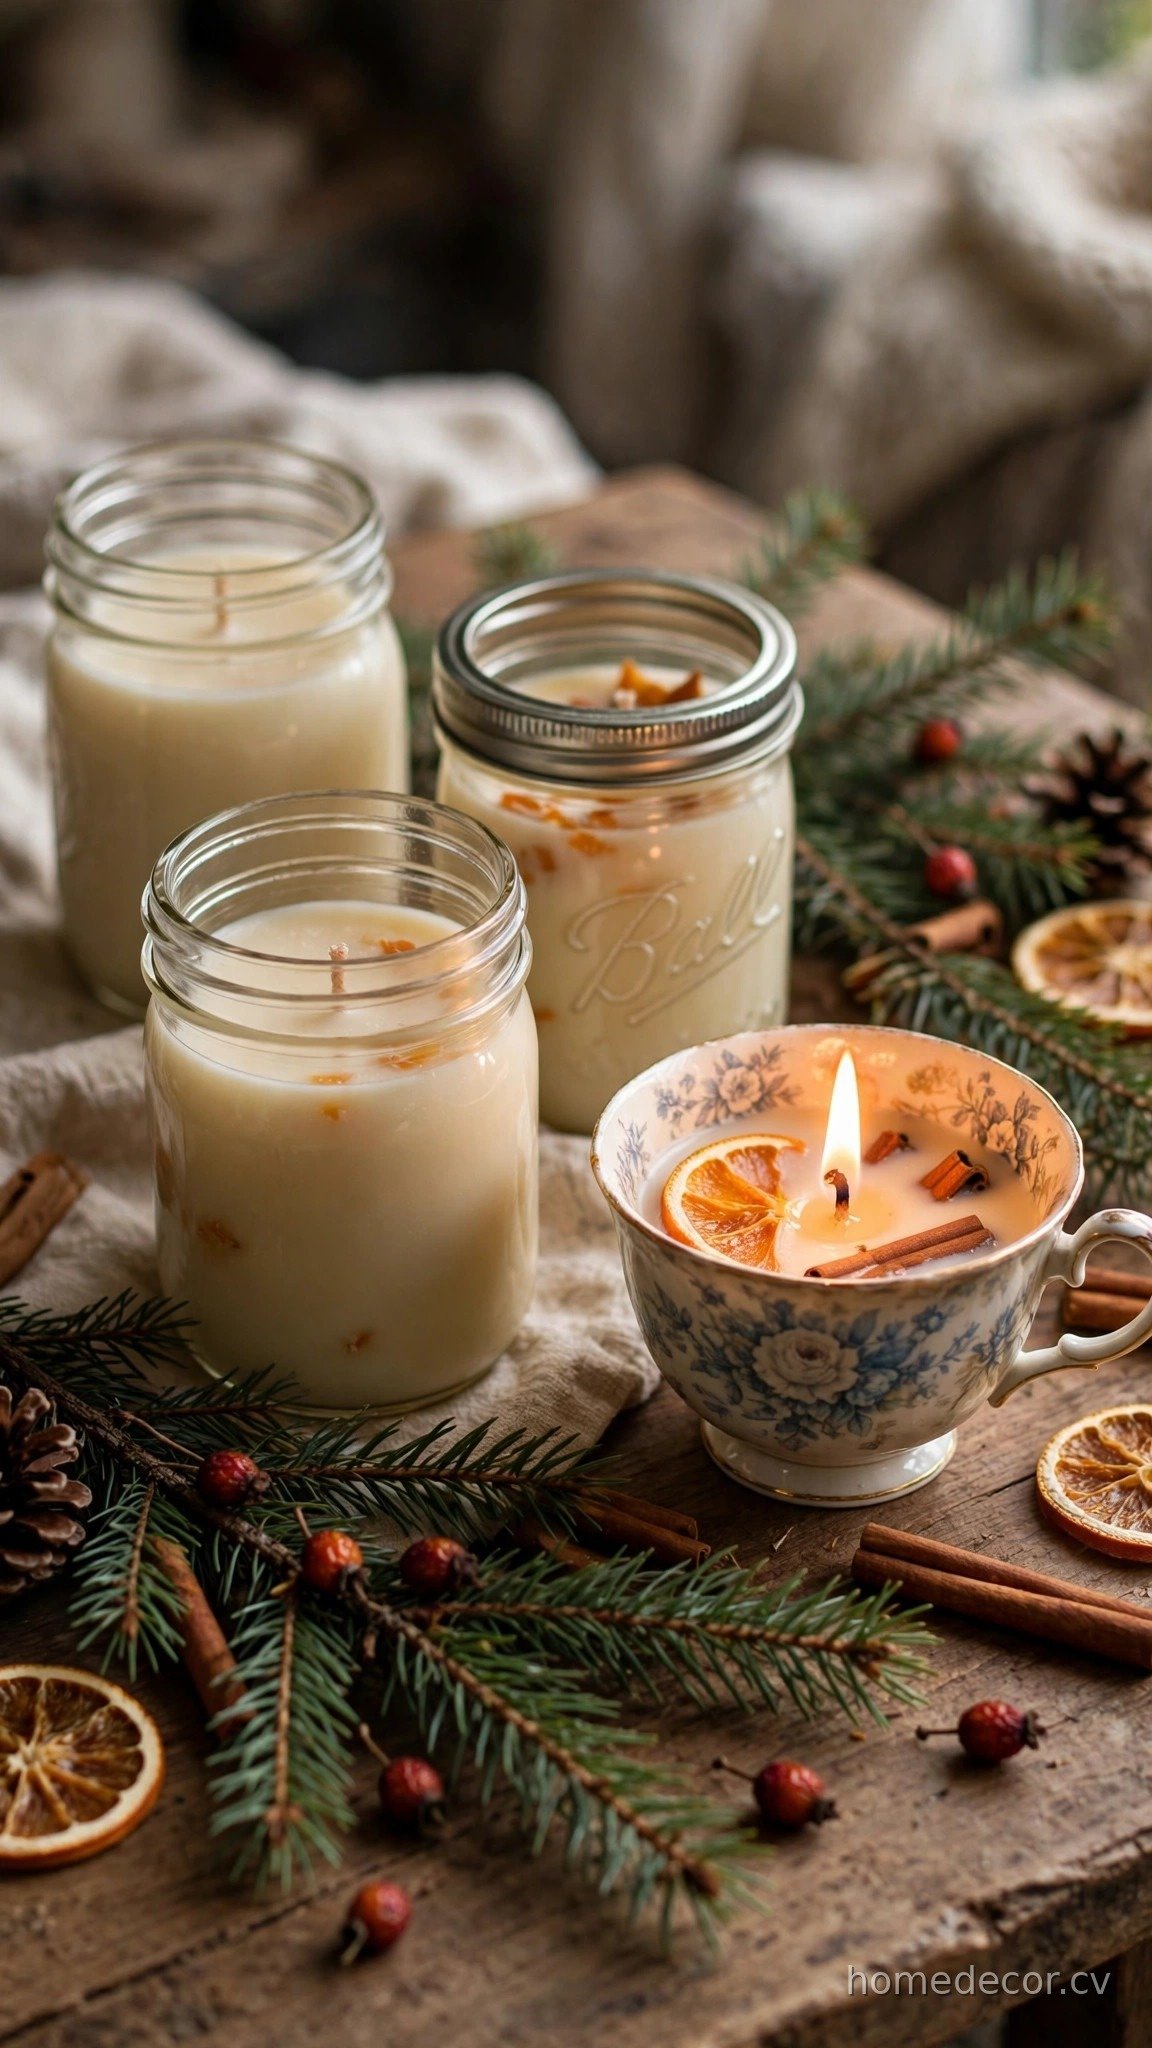
Making your own scented candles is part chemistry, part artistry, and entirely rewarding when you light that first homemade candle. Start with soy wax flakes, which are clean-burning and easy for beginners, along with cotton wicks, a pouring pitcher, and heat-safe containers like mason jars, vintage teacups, or ceramic vessels. Melt the wax in a double boiler to about one hundred seventy degrees, then remove from heat and stir in your chosen fragrance oils — classic holiday blends include balsam fir, cinnamon clove, cranberry spice, and vanilla amber. Secure the wick in the center of your container with a wick holder or clothespin, then pour the wax slowly, leaving half an inch at the top. Let the candles cure for at least twenty-four hours before burning.
The creative possibilities are endless once you master the basics: layer different colored waxes for an ombré effect, press dried flowers or orange slices against the inside of clear containers, or add a sprinkle of biodegradable glitter to the top for sparkle. Handmade candles make exceptional gifts because you can customize both the scent and the vessel to the recipient’s taste. The process fills your home with incredible fragrance even before the candles are lit. Always follow basic safety precautions — never leave melting wax unattended and keep wicks trimmed to a quarter inch. Once you experience the satisfaction of lighting a candle you poured yourself, you may never buy store-bought again. These pair wonderfully with our [small apartment Christmas decor](https://homedecor.cv/small-apartment-christmas-decor/) ideas for cozy spaces.
Felt Ball Garland

Felt ball garlands add soft color and playful texture to any holiday display, and making your own lets you customize the palette perfectly. You can either purchase pre-made wool felt balls in your chosen colors or make them yourself by wrapping wool roving around a core and felting it with hot soapy water — the DIY route is more time-consuming but deeply satisfying. For the garland itself, thread a large embroidery needle with sturdy twine or baker’s string, then simply push the needle through the center of each felt ball, spacing them evenly or clustering them in groups. Alternate colors in patterns that complement your decor: classic red and white, sophisticated blush and gold, or woodland greens and creams.
This is the ideal craft for multitasking — the simple, repetitive threading motion is perfect while chatting with friends, listening to podcasts, or watching movies. A six-foot garland takes about an hour to assemble once your felt balls are ready, making it a wonderfully efficient project. Drape your finished garland across the mantel, wind it through the Christmas tree, hang it in a doorway, or layer it with greenery for a lush look. The soft wool texture adds warmth that balances out shinier holiday decorations. Because felt is so durable, your garland will look just as good years from now, and you can easily add new colors each season to refresh the look.
Hand-Painted Wooden Signs

Hand-painted wooden signs let you add personalized, meaningful messages to your holiday decor with a charming rustic feel. Start with unfinished wood planks, rounds, or pallet boards from the craft store — or repurpose old fence boards for authentic weathered character. Lightly sand the surface, then apply a base coat in your chosen background color: classic white, deep charcoal, warm cream, or festive red all work beautifully. Once dry, sketch your design lightly in pencil — popular phrases include “Merry Christmas,” “Joy to the World,” “Let It Snow,” or your family name with the year. Paint over your sketch with acrylic craft paints using small brushes, building up letters with two thin coats for crisp coverage.
You do not need to be an artist to create signs that look professionally made — stencils, carbon transfer paper, and even printed templates traced onto the wood all produce clean results. Distress the edges lightly with sandpaper for a vintage farmhouse look, or keep the finish crisp and modern. Seal with a clear matte protective coat so your sign lasts for many seasons. These signs make incredibly personal gifts, especially when customized with family names, wedding dates, or inside jokes. Lean a large sign against the wall above your mantel, hang smaller ones on doors, or create a gallery wall of coordinating messages. The pride of seeing your own handwriting — or carefully stenciled lettering — displayed prominently is unmatched.
Macramé Christmas Stocking

Macramé brings beautiful bohemian texture to holiday decor, and a handmade stocking becomes an instant heirloom. You will need cotton macramé cord in three or four-millimeter thickness, a wooden dowel or branch for hanging, and sharp scissors. Start by cutting your cords to length — for a standard stocking you will need about twenty cords, each roughly four times your desired finished length. Attach them to the dowel using lark’s head knots, then work downward using square knots to create the leg of the stocking. The foot is formed by working additional rows at an angle, and online tutorials make this shaping much clearer than words alone can convey. Finish with a row of fringe at the top for a festive touch.
While macramé has a learning curve, the basic knots are simple to master and the repetitive knotting quickly becomes meditative. Your first stocking might take an entire weekend, but the result is a textural masterpiece that looks like it came from an artisan market. The natural cotton cord works with any decor style, and you can dip-dye the fringe in festive colors or add wooden beads for extra interest. Make a set of matching stockings for the whole family, varying the knot patterns slightly so each one is unique. Unlike store-bought stockings that wear out, a well-made macramé stocking actually improves with age as the cotton softens. Hang them from your mantel with pride, knowing no one else has anything quite like them.
Pressed Flower Ornaments

Pressed flower ornaments capture the beauty of summer gardens and preserve it for winter display in the most delicate, romantic way. If you planned ahead and pressed flowers during the growing season, you are ready to go — otherwise, purchase pressed flowers from craft suppliers, which offer an amazing variety. You will also need clear glass or plastic fillable ornaments that open into two halves. Arrange your pressed flowers, ferns, and leaves artfully on the inside of one half, securing tiny pieces with the smallest dab of clear-drying glue. Carefully close the ornament, add a beautiful ribbon for hanging, and consider a small tag with the flower varieties or the year.
The effect is breathtaking — sunlight streaming through the clear ornament illuminates the preserved botanicals like a tiny stained-glass window. Each ornament becomes a little time capsule of the garden, making them deeply meaningful gifts for gardening friends or anyone who appreciates nature. Experiment with different compositions: a single dramatic bloom, a wildflower meadow scene, or elegant ferns with baby’s breath. For added dimension, include a sprinkle of fine glitter that catches the light as the ornament moves. These ornaments are so lightweight that they can hang on even the most delicate tree branches. They also look stunning grouped together in a glass bowl as a centerpiece when not on the tree.
Decoupage Christmas Baubles

Decoupage transforms plain, inexpensive baubles into custom designer ornaments using nothing more than pretty paper and glue. Gather old or discount ornaments in any color — matte finishes work best as a base — along with decorative napkins, tissue paper, or printed images that catch your eye. Vintage Christmas illustrations, botanical prints, sheet music, and map pages all make stunning choices. Cut or tear your paper into manageable pieces, then brush a thin layer of decoupage medium onto a section of the ornament. Smooth the paper onto the wet surface, gently working out any bubbles or wrinkles with your fingers, then seal with another thin coat of medium. Continue until the entire surface is covered, overlapping pieces slightly for a collage effect.
The magic of decoupage is how it elevates humble materials into something that looks genuinely expensive and artistic. Tearing the paper rather than cutting it creates soft, feathered edges that blend seamlessly, giving a hand-painted appearance. Once dry, add details with metallic paint pens — gold outlines, tiny dots, or festive words take the design to the next level. A final coat of clear gloss sealant gives a beautiful shine and protects your work. This is a fantastic way to coordinate your tree with a specific theme or color scheme without buying all-new ornaments. Make a set of six to eight matching baubles and you will have a cohesive, high-end look for the cost of a bottle of glue and some pretty paper.
Knitted Coffee Cup Cozies

Knitted coffee cup cozies are the perfect portable craft — small, quick, and endlessly giftable during the holiday season. Even if you are a beginning knitter, a simple cozy requires only the knit stitch and takes less than two hours to complete. Cast on enough stitches to wrap snugly around a standard mug or takeaway cup, work in stockinette or garter stitch until the piece measures about four inches tall, then bind off and seam the edges. Use chunky yarn in festive colors for a fast, satisfying project, or try cable patterns and colorwork if you want more of a challenge. Add a small button closure or leave it as a simple sleeve that slips on and off.
These cozies make wonderful last-minute gifts and stocking stuffers because they are genuinely useful — anyone who carries a hot drink will appreciate one. Personalize them with the recipient’s favorite colors, add a tiny embroidered initial, or attach a small jingle bell for holiday cheer. Knitting a stack of cozies while watching Christmas movies is one of the coziest possible December activities. Pair each cozy with a bag of specialty coffee or hot chocolate mix and a handmade tag for a thoughtful, complete gift. The repetitive knitting motion is wonderfully calming during the hectic holiday season, giving you a peaceful creative outlet. For more cozy holiday ideas, explore our [fall table setting ideas](https://homedecor.cv/fall-table-setting-ideas/) for seasonal entertaining inspiration.
Rustic Twig Stars

Rustic twig stars celebrate the simple beauty of natural materials and look stunning in both farmhouse and modern holiday decor. Head outside to collect straight twigs about the thickness of a pencil — willow, birch, and dogwood all work beautifully. Cut them into equal lengths using pruning shears; six-inch pieces make charming ornaments while twelve-inch pieces create dramatic statement stars. Arrange five twigs into a star shape on a flat surface, overlapping the ends, then secure each joint with thin floral wire or hot glue. Wrap the joints with twine or jute for a finished, rustic look that also reinforces the structure. Add small embellishments like dried berries, tiny pinecones, or a sprig of evergreen at one point of the star.
The gathering and building process connects you with nature during a season when most decorating happens indoors, which feels wonderfully grounding. These stars have an organic, slightly imperfect charm that mass-produced decorations cannot replicate — each one reflects the particular character of the twigs you found. Hang small stars on the tree, cluster several large ones on a wall as art, or hang one above the mantel as a natural alternative to a traditional star topper. For evening magic, weave tiny fairy lights through the twigs before hanging. They also make lovely gifts when bundled in sets of three with a handwritten tag. The entire project costs nothing but time, yet the results look like artisan pieces.
Alcohol Ink Ornaments

Alcohol ink ornaments produce the most mesmerizing, professional-looking results of any craft on this list — swirling colors that resemble marble, agate, or ocean waves. Purchase clear glass or plastic ornaments and alcohol inks in coordinating colors, along with blending solution and a small straw or canned air. Remove the cap from the ornament and drop three to four drops of ink directly inside, choosing colors that blend beautifully: teal and gold, cranberry and copper, or sapphire and silver. Add a few drops of blending solution, then gently swirl and tilt the ornament to move the colors around. Use short bursts of air through the straw to push the ink into feathery, organic patterns. Work quickly, as the ink dries fast.
The unpredictability is the best part — you never know exactly what pattern will emerge, and every ornament is a genuine surprise when you hold it up to the light. The translucent inks glow brilliantly on the tree, catching and reflecting the Christmas lights in ways that opaque ornaments cannot. This craft is wonderfully social because everyone gathers around to watch each reveal, making it perfect for a holiday craft party. Wear gloves and protect your work surface, as the inks stain permanently. Once you are happy with the design, replace the cap and add an elegant ribbon. These ornaments look so stunning that recipients will assume you purchased them from a high-end gallery.
Hand-Rolled Beeswax Candles

Hand-rolled beeswax candles are perhaps the simplest craft here, yet they produce the most luxuriously scented results — pure beeswax has a natural honey fragrance that no artificial scent can match. Purchase sheets of beeswax in natural gold or festive colors, along with square-braided cotton wicks sized for the candle diameter you want. Cut the wick about an inch longer than your wax sheet is tall, then lay it along one edge of the sheet. Roll the wax tightly around the wick, using the warmth of your hands to help it adhere, pressing firmly as you go to eliminate air pockets. For tapered candles, cut the sheet diagonally before rolling; for pillars, roll the full sheet evenly. Trim the wick to a quarter inch.
The entire process takes about ten minutes per candle once you get the hang of it, making this the perfect craft for producing gifts in quantity. Beeswax burns longer and cleaner than paraffin, with a warm golden flame that creates the coziest possible atmosphere. Decorate finished candles by pressing dried flowers, herbs, or small stamps into the soft wax surface, or roll them in ground cinnamon for extra fragrance and texture. Pair two or three candles with a handwritten note about the benefits of beeswax for a thoughtful, eco-friendly gift. There is something deeply satisfying about the simplicity of this ancient craft — humans have been rolling beeswax candles for thousands of years, and participating in that tradition feels meaningful during the holidays.