The holidays are the perfect excuse to slow down, pull out the craft supplies, and let kids make something truly special. These Christmas crafts for kids to make are simple enough for little hands, fun enough to keep older kids interested, and pretty enough to actually display on the tree or gift to grandparents. From salt dough ornaments to handprint keepsakes, every project below uses affordable supplies you probably already have at home. So put on some holiday music, cover the table, and let the glitter fly — these are the crafts your kids will remember.
Salt Dough Handprint Ornaments

Salt dough ornaments are a classic for a reason: they are cheap, easy, and they turn into keepsakes parents treasure for years. Mix two cups of flour, one cup of salt, and about a cup of warm water until a soft dough forms, then roll it out on a floured surface. Press your child’s hand firmly into the dough, cut around the print with a butter knife, and poke a small hole at the top with a straw for hanging. An adult should handle the baking, popping the ornaments into a low oven until they are completely hard and dry.
I spend far too much time saving home ideas.
If you'd like the best ones, I'll send a short email once or twice a month.
Once the ornaments are cool, the real fun begins with decorating. Kids can paint the handprints in festive colors, add glitter, and write their name and the year on the back with a marker. A coat of clear varnish or Mod Podge seals the paint and keeps the ornament safe for years of tree duty. Thread a ribbon through the hole and hang it proudly on the tree, or wrap it in tissue paper as a gift for grandparents. Every year when it comes out of the box, everyone will smile at how small those hands once were. It also makes a wonderful first-day-of-December tradition, with each child adding a new ornament to the collection every single year.
Popsicle Stick Christmas Trees

Popsicle stick trees are wonderfully simple and look adorable lined up on a mantel or hanging from the tree. Start by painting several craft sticks green, then glue them together in a triangle shape, with each row slightly shorter than the one below it to form a tree. A brown stick at the bottom makes a perfect trunk, and a small star cut from yellow card or foam tops it off. Kids love arranging the sticks and deciding exactly how tall and wonky their tree should be. Let the painted sticks dry completely before gluing, and use child-safe craft glue so younger kids can join in without any worry.
Decorating is where each tree gets its own personality. Stick on tiny pom-poms, sequins, buttons, or beads as ornaments, and add a dab of white paint or cotton wool for snow. A loop of string glued to the back turns it into a hanging ornament, or you can glue a magnet on the back for the fridge. These trees are sturdy enough for younger children to play with, and they make lovely little gifts when kids make a whole forest of them in different sizes and colors. Set the finished trees on a windowsill where the light catches the sequins, or bundle a few together as a classroom gift for the teacher.
Paper Plate Santa Claus
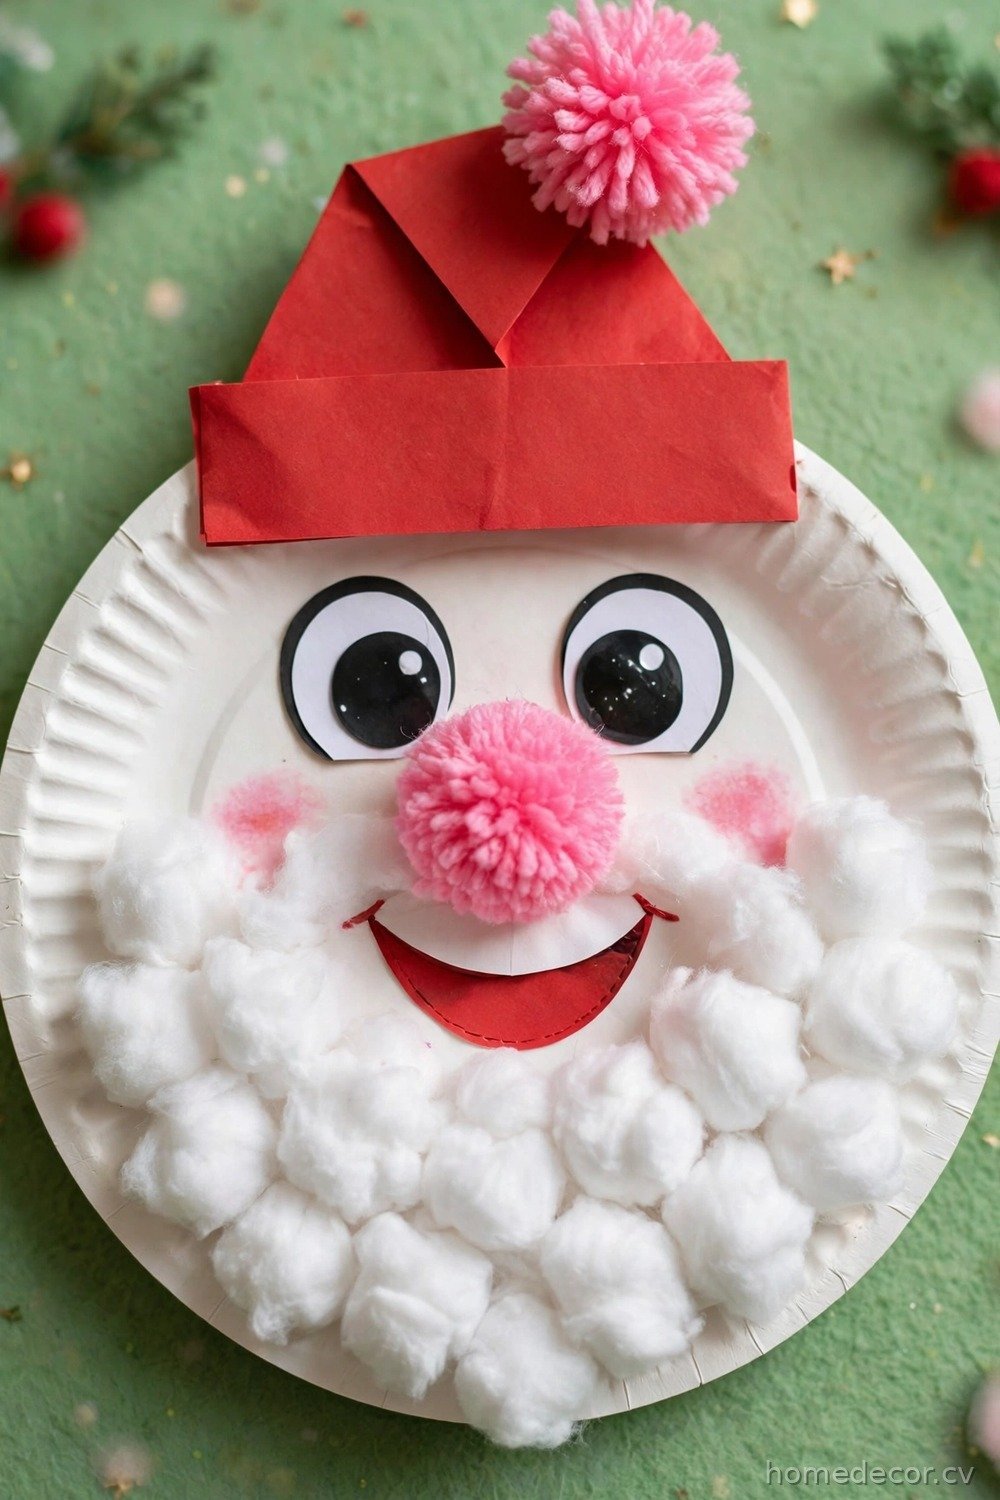
A paper plate makes the perfect round, jolly face for Santa, and this craft is ideal for preschoolers. Fold a paper plate in half or leave it whole, then paint or color the top section red for Santa’s hat. Add a white cotton ball trim along the hat, a fluffy cotton beard across the bottom half, and googly eyes plus a pink pom-pom nose in the middle. Kids can glue everything themselves, which makes this a great independent craft for a classroom or a rainy afternoon at home. A parent can pre-cut the hat and beard shapes for toddlers, while older children enjoy measuring and cutting everything by themselves.
The best part of this craft is how much room it leaves for creativity. Some kids will give Santa a huge beard that covers half the plate, while others will add rosy cheeks, eyebrows, or a big smile drawn with a marker. You can hang the finished Santa on the wall, prop it on a shelf, or tape a popsicle stick to the back to turn it into a puppet for a Christmas show. It is quick, cheerful, and uses supplies most homes already have in the craft drawer. For a classroom display, line up every child’s Santa on a bulletin board, and watch how proudly each one points out their own jolly creation.
Pinecone Christmas Trees

A walk outside to collect pinecones is half the fun of this craft, and the finished trees look surprisingly elegant. Start with clean, dry pinecones and stand them upright on a small cardboard base or a jar lid. Kids can dab green paint onto the tips of the scales with a sponge or an old toothbrush, then sprinkle on glitter while the paint is still wet. Once dry, add tiny beads, sequins, or mini pom-poms tucked between the scales as ornaments, and top it with a small star. An adult should check that the pinecones are fully dry and free of sap before the painting begins, so the finished trees look neat and last longer.
These little trees make beautiful table decorations, especially when you group several together in different heights. A light dusting of white paint or fake snow gives them a frosted, wintery look, and a sprinkle of cinnamon or a drop of pine-scented oil makes them smell festive too. Because pinecones are free and every one is a different shape, no two trees ever look alike. Just check the pinecones for bugs first and let them dry fully before painting. Glue a small loop of twine to the base if you want to hang them, and store them carefully in tissue paper so the ornaments survive until next Christmas.
Handprint Reindeer Cards

Handprint reindeer are the cutest cards a grandparent could ever receive, and they are almost impossible to mess up. Paint your child’s palm and fingers brown, press the hand onto folded cardstock, and let it dry — the fingers become the antlers and the palm becomes Rudolph’s face. Add googly eyes, a bright red pom-pom nose, and a big smile drawn with a marker. Kids love the tickly feeling of the paintbrush, and the print always comes out looking charmingly imperfect. Wash hands right after stamping so paint does not end up on clothes, and keep a damp cloth nearby for quick cleanups between prints.
Inside the card, help your child write a short holiday message or simply sign their name and the year. These cards are especially sweet because they capture a moment in time — a tiny hand that will not stay tiny for long. Make a batch for teachers, neighbors, and family members, using different paint colors for a whole herd of reindeer. Pair the card with a candy cane or a small treat, and you have a heartfelt, handmade gift that costs almost nothing but means everything. Slip the finished card into a colorful envelope, and add a sticker seal on the back for a polished, store-bought look with a handmade heart.
Paper Chain Garland
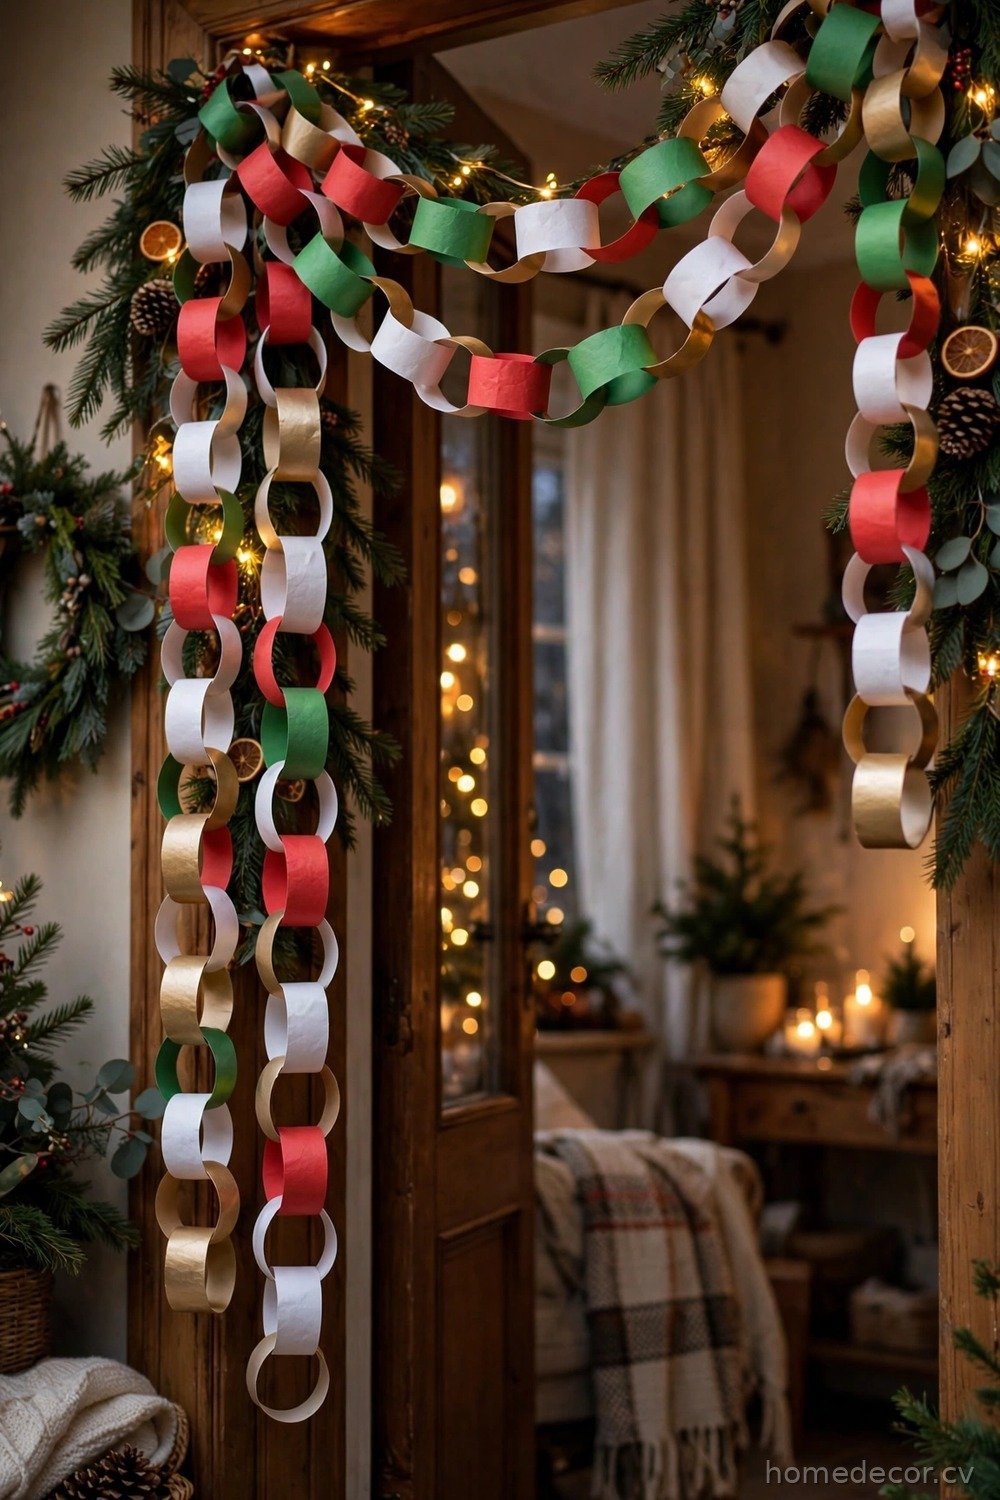
Paper chains are one of the oldest Christmas crafts around, and kids never seem to tire of making them. Cut colored construction paper into strips, loop the first strip into a circle, and staple or tape it closed. Thread the next strip through the circle, close it, and keep going until the chain is long enough to drape across a doorway or along the tree. Kids can work on a chain together, taking turns adding links, which makes it a lovely group activity for siblings or a classroom. A long chain can take a whole afternoon to finish, which makes it perfect for a cozy weekend project when everyone is stuck indoors.
To make the garland extra special, try alternating patterns of red, green, white, and gold, or let kids decorate each strip before linking it. They can draw snowflakes, write holiday words, or stick on glitter and stickers. You can even turn the chain into a countdown to Christmas by writing one number on each link and tearing one off every day. It is a simple, screen-free project that fills a whole afternoon and leaves the house looking wonderfully festive. Measure the space first so the chain fits nicely, and make extra links to replace any that get squashed during an enthusiastic decorating session.
Cotton Ball Snowmen
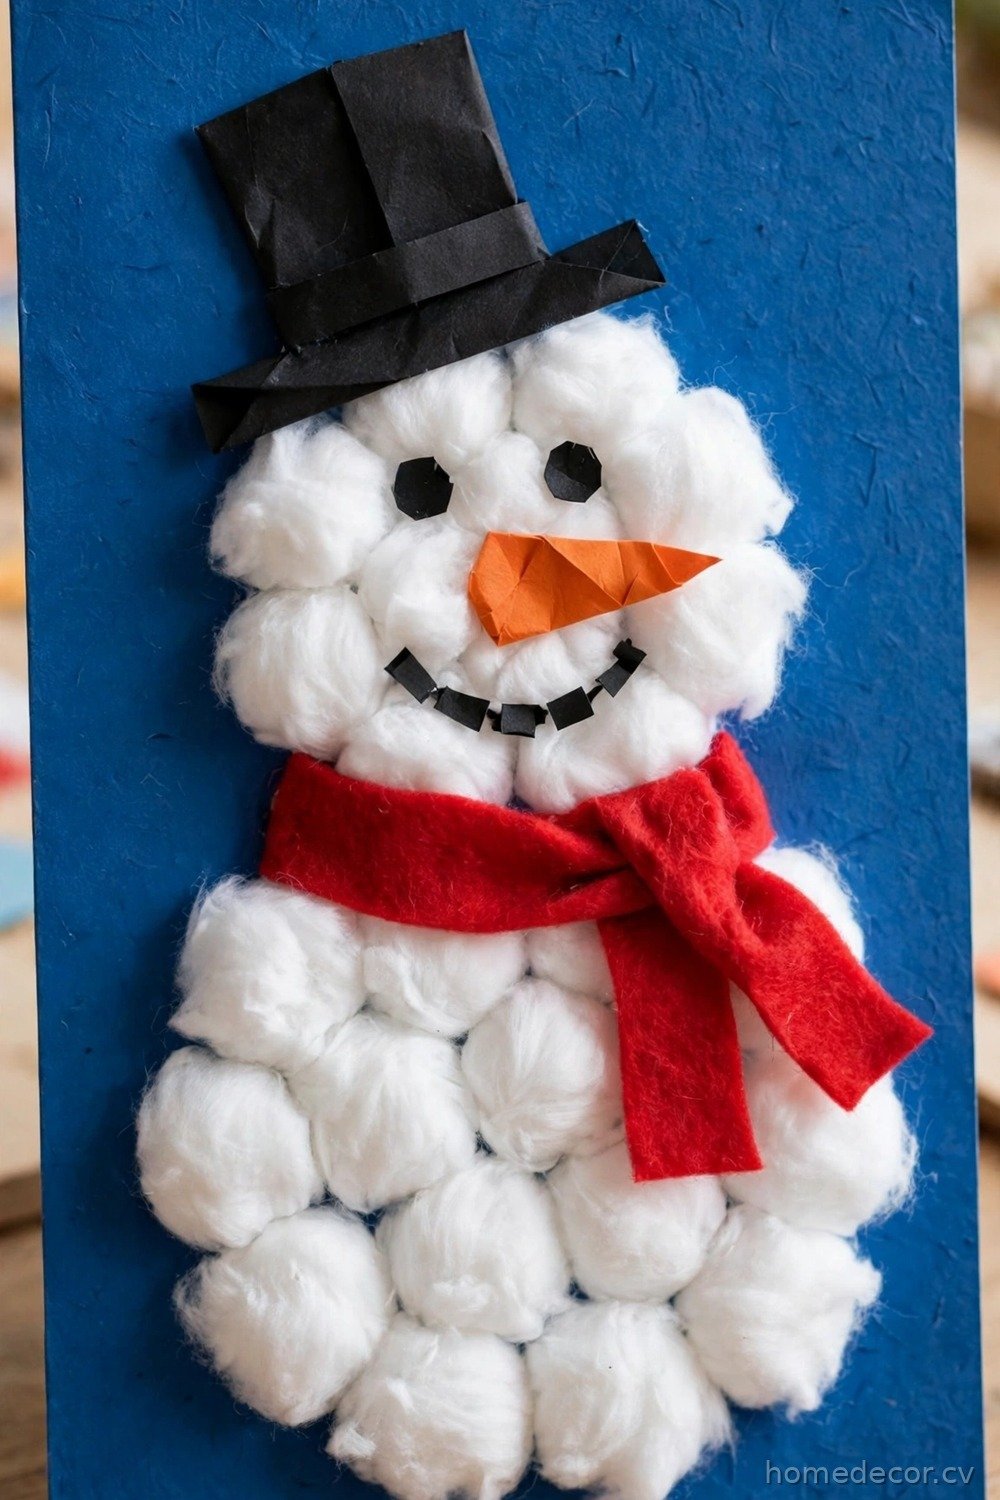
Fluffy cotton ball snowmen are irresistibly soft and perfect for toddlers and preschoolers. Draw a simple snowman outline on blue or black cardstock, then let kids glue cotton balls all over the body until it is completely covered and puffy. Add a construction paper hat, a carrot nose cut from orange paper, button eyes, and a scarf made from a strip of felt or ribbon. The texture of the cotton makes this craft extra satisfying for little hands. Draw the outline lightly in pencil first so kids can follow it easily, and pour the glue into a small dish with a brush for less mess.
These snowmen look wonderful displayed on a fridge, a bulletin board, or a bedroom door. For older kids, you can level up the craft by building a three-dimensional snowman: stuff a white sock with cotton balls, tie it off in two sections with string, and decorate it the same way. Either version makes a sweet winter decoration, and the materials cost next to nothing. Just keep an eye on younger children with the small buttons and pom-poms, and use child-safe glue for the whole project. A finished snowman also makes a sweet gift topper when glued to the front of a wrapped present, adding a handmade touch to any holiday gift.
Felt Stocking Ornaments
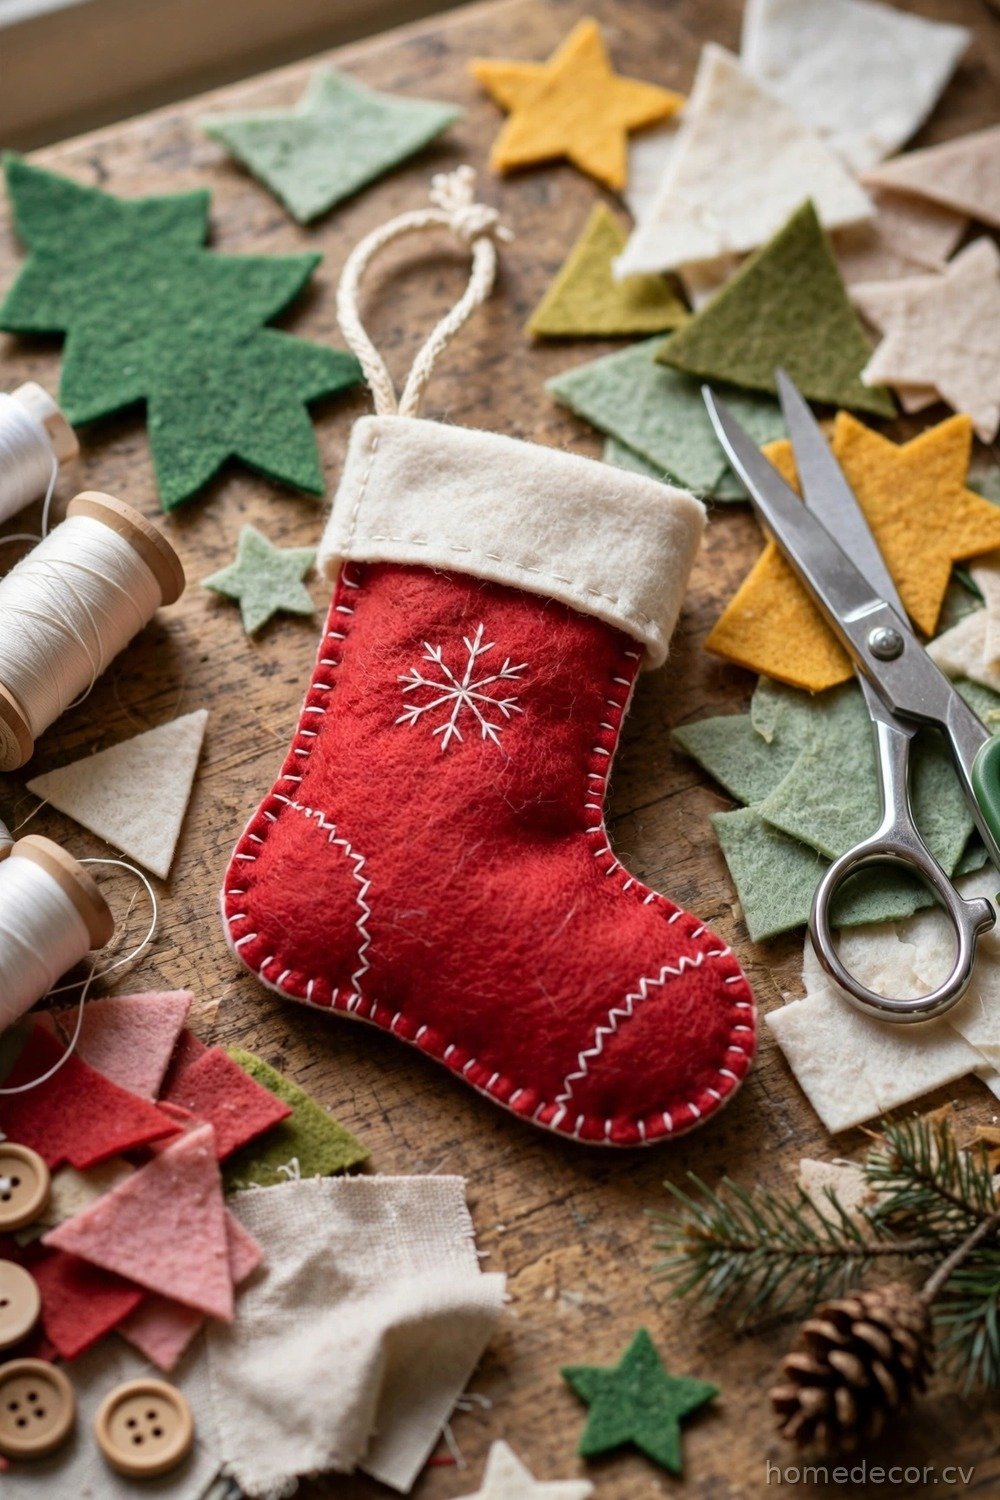
Felt is a forgiving, no-sew material that is perfect for little crafters, and mini stockings are a great first sewing-free project. Cut two matching stocking shapes from felt, then help your child glue or staple them together around the edges, leaving the top open. Decorate the front with felt shapes, buttons, sequins, or a snowflake cut from white felt. A loop of ribbon at the top means the stocking can hang on the tree right away. Draw the stocking shape on paper first and use it as a template, so every child can trace and cut their own stocking with confidence.
These tiny stockings are just the right size for a small treat or a rolled-up note, which makes them lovely as advent surprises or party favors. Kids can make one for every member of the family, personalizing each with an initial or a favorite color. Because felt does not fray, there is no need for neat edges — wonky cuts just add charm. If you want to practice simple stitching, older kids can sew the edges together with a plastic needle and yarn for a more finished look. Hang the finished stockings along a ribbon garland for a festive display, or tuck one into each stocking on Christmas morning as a surprise.
Beaded Candy Cane Ornaments
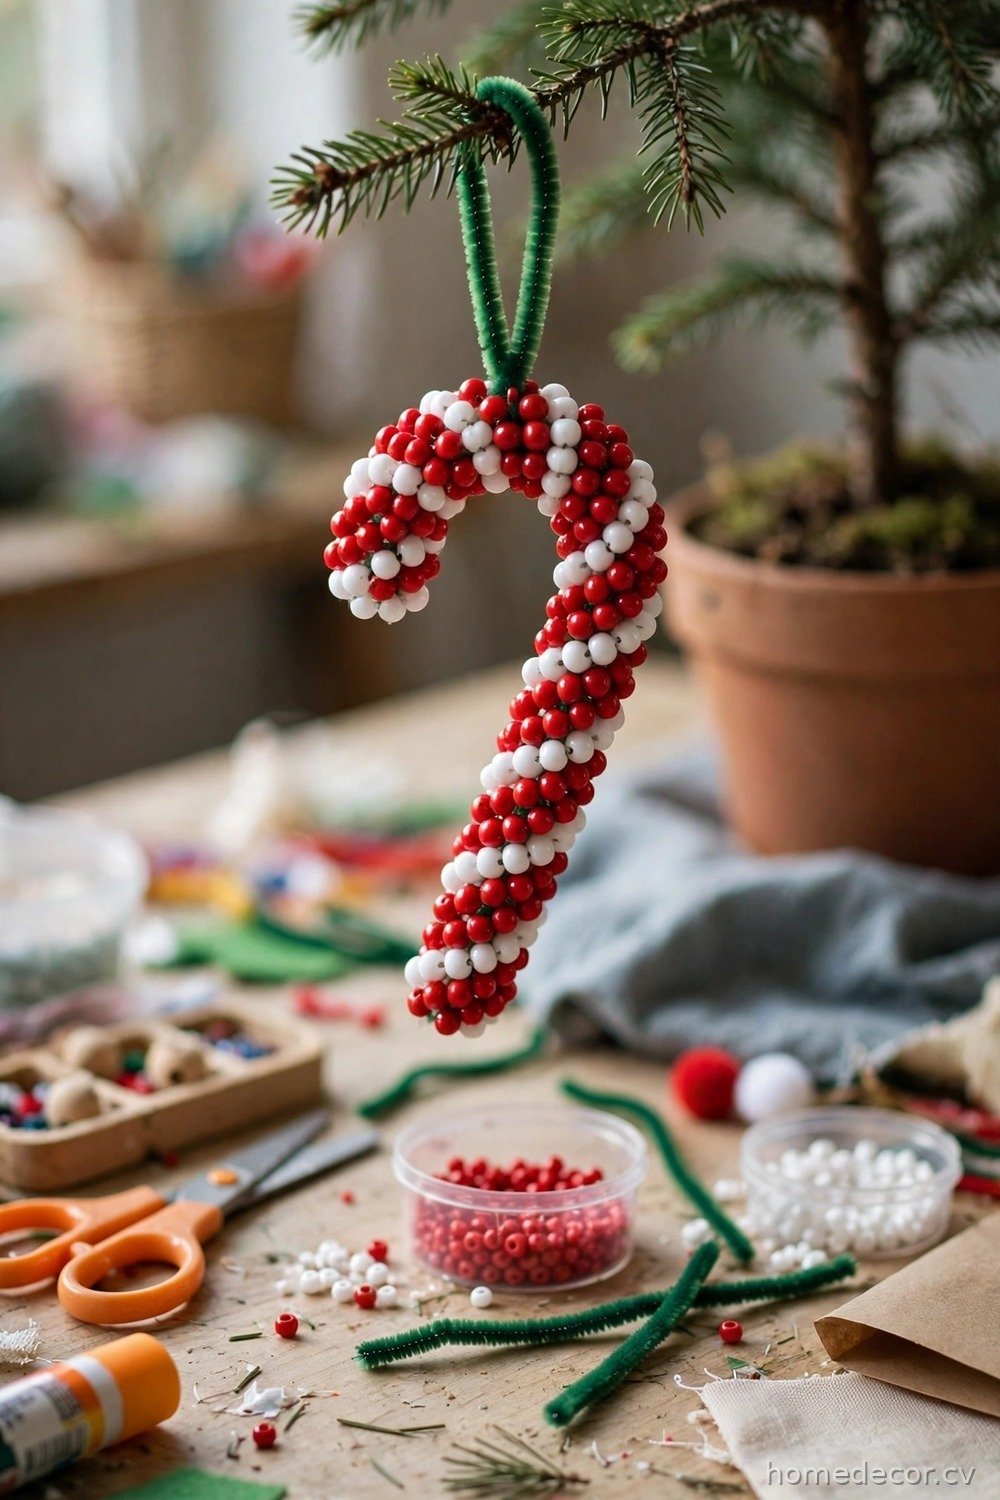
Beaded candy canes are a brilliant fine-motor craft that doubles as a beautiful tree decoration. Bend a white pipe cleaner into a cane shape, then let kids thread red and white beads onto it, alternating colors to mimic a real candy cane. When the pipe cleaner is full, bend the end over to lock the beads in place and add a ribbon loop for hanging. The result is shiny, sturdy, and surprisingly realistic-looking on the tree. Twist the top of the pipe cleaner into a small hook shape first, so the beads stay put and the cane keeps its classic curved look.
This craft is wonderful for building patience and pattern skills, since kids naturally fall into a red-white-red-white rhythm as they bead. You can vary it by using green and white beads, gold beads, or even letter beads to spell a name. A handful of these canes makes a charming gift set when tied together with a bow, and they are durable enough to survive years in the ornament box. Use larger beads for younger children, and always supervise small beads around toddlers to keep the crafting safe. Store the finished canes in a small box lined with tissue paper, and they will come out looking just as bright and shiny next holiday season.
Paper Snowflakes
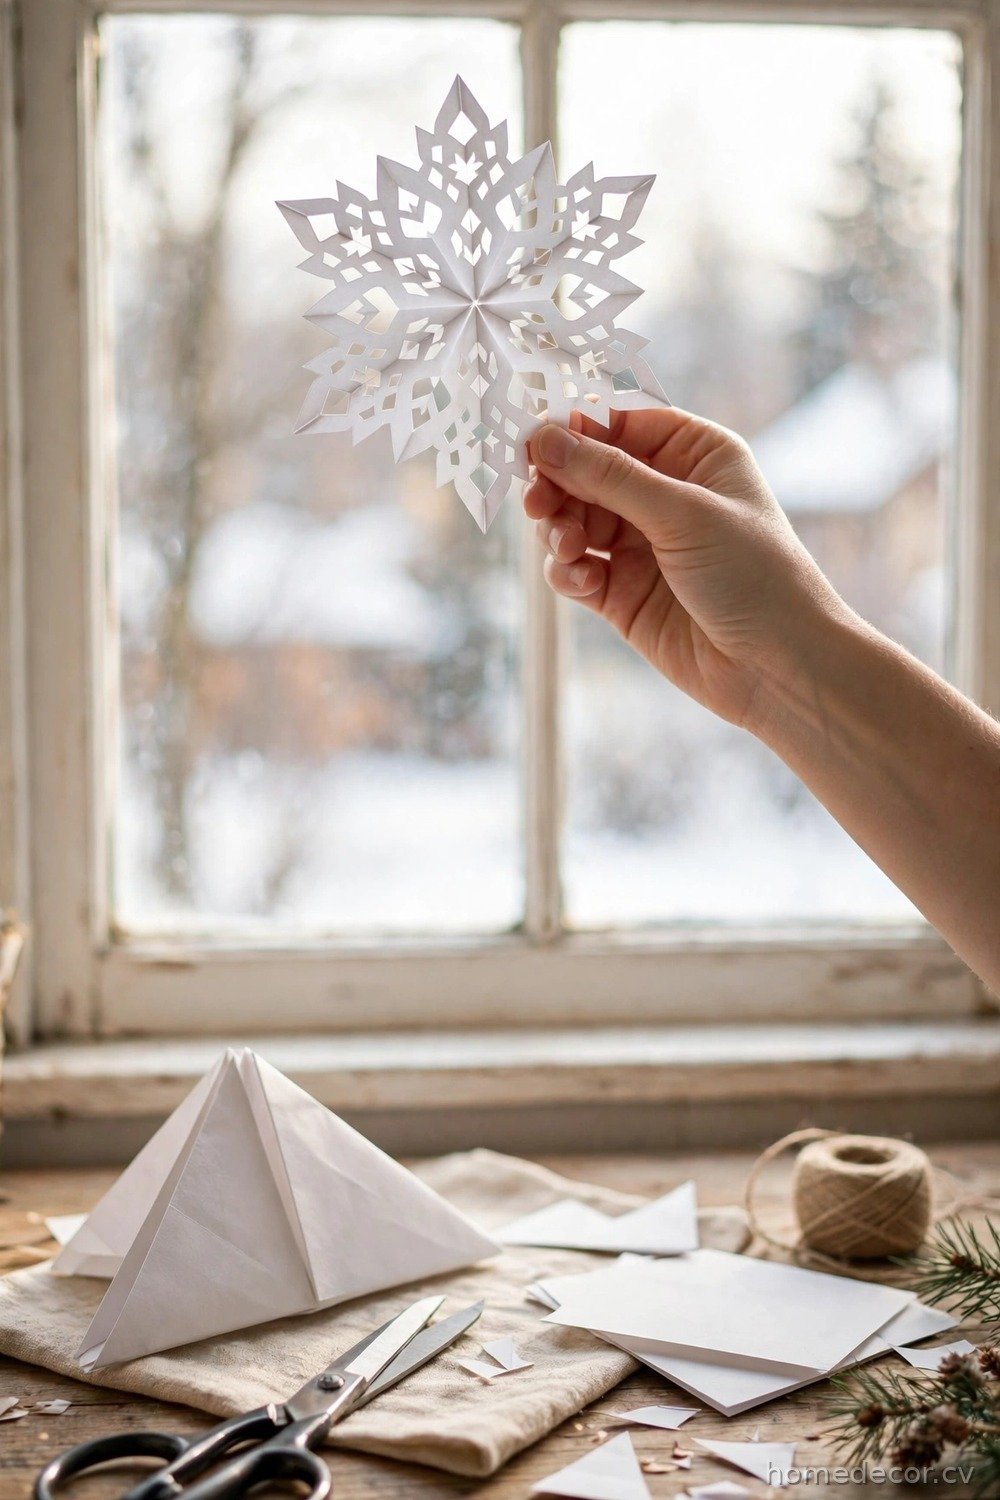
Cutting paper snowflakes is a magical craft — a plain folded square transforms into something delicate and unique with just a few snips. Fold a square of white paper into a triangle several times, then cut small triangles, curves, and notches along the edges with child-safe scissors. When you unfold it, every snowflake is a surprise, and kids love the dramatic reveal. No two snowflakes ever come out the same, which is a lovely little lesson in itself. Start with simple cuts for younger children, and let older kids experiment with tiny, detailed shapes once they feel confident with the scissors.
Hang the finished snowflakes in windows, string them together into a garland, or glue them onto dark blue paper for a winter display. Older kids can try more intricate patterns, layering a small snowflake on top of a big one, or adding glitter glue along the edges for sparkle. Coffee filters also work beautifully for this craft because they are thin and easy to cut, and they give a lovely translucent effect when taped to a window. Keep a recycling bin nearby for the scraps. Tape the snowflakes to windows at different heights to create a falling-snow effect, or scatter them across the holiday table as confetti.
Thumbprint Christmas Lights Cards

Thumbprint lights are a simple, joyful way to turn a plain card into a string of glowing holiday bulbs. Draw a wavy black line across the front of a folded card to represent the wire, then let kids dip their thumbs in different colors of paint and press them along the line as bulbs. Once dry, add a tiny line on top of each print to connect it to the wire, and the card suddenly looks like a real string of Christmas lights. Use washable paints so cleanup is easy, and test the thumbprint size on scrap paper before pressing onto the final card.
Kids love choosing which colors go where, and the finished cards look impressively professional for such an easy technique. You can also use fingerprints on gift tags, wrapping paper, or a table runner made from brown parcel paper for a festive holiday table. Add a message inside like “You light up our Christmas” for an extra sweet touch. This craft works for all ages, from toddlers making their first prints to older kids creating careful, rainbow-colored patterns. Older kids can add tiny details like a star at the top of the string, or write the recipient’s name in glitter glue for a personal touch.
Mason Jar Snow Globes

A homemade snow globe in a mason jar is a little bit of winter magic that kids can shake again and again. Glue a small plastic figurine, a tiny tree, or a pinecone to the inside of the jar lid with strong glue — an adult should handle this step. Fill the jar with water, add a spoonful of glycerin and plenty of glitter, then screw the lid on tightly and seal the edge with glue or tape. Flip it over, give it a shake, and watch the snow fall. Let the glued figurine dry overnight before adding water, so nothing floats loose, and test the seal over a sink before handing it to a child.
Kids love choosing what goes inside their globe: a tiny reindeer, a snowman eraser, or a miniature house all work beautifully. Use waterproof figurines and glitter, and avoid anything that might dissolve in water. These globes make wonderful gifts for teachers and grandparents, especially when kids decorate the outside of the lid with ribbon or a hand-written label. Just remind kids that the globe is for shaking and admiring, not for opening, so the snowy magic stays inside. Wrap the finished globe in tissue paper and a small gift box, and it becomes a treasured keepsake that grandparents will display every single year.
Egg Carton Wreath

An egg carton wreath turns recycling into a beautiful front-door decoration. Cut the cups apart from a cardboard egg carton, trim the edges into rounded petals, and paint them green. Once dry, glue the cups in a circle on a cardboard ring, overlapping them so the wreath looks full and leafy. Add red pom-poms as berries, a bow at the bottom, and a loop of ribbon for hanging, and you have a wreath that cost almost nothing. Let kids choose their own paint shades, from deep forest green to bright lime, so each wreath reflects the child who made it.
This craft is a great lesson in reusing materials, and kids enjoy the whole process from cutting to painting to arranging. You can make the wreath in any size — a small one for a bedroom door or a big one from several cartons for the front door. For a frosted look, dab white paint on the petal tips, or add tiny bells for a jingle when the door opens. It is sturdy, lightweight, and a lovely alternative to a store-bought wreath that kids can proudly say they made themselves. Add a small wooden sign or a painted initial in the center for a personalized touch, and hang the wreath with a sturdy ribbon so it stays put.
Sock Snowmen

Old single socks make the cutest snowmen, and this no-sew craft is perfect for a cozy winter afternoon. Fill a white sock with uncooked rice until it is plump, tie it off with a rubber band, then tie another band about a third of the way down to create a head and body. Fold the top of the sock down as a hat, or add a separate colored sock as a hat, then glue on button eyes, a felt nose, and a strip of fabric as a scarf. Kids love squishing the rice-filled snowman into shape. Use a funnel or a rolled paper cone to pour the rice neatly, and let kids pat the sock into a round shape before tying the bands.
These sock snowmen are soft, squeezable, and make adorable shelf decorations or gifts. You can make a whole family of them in different sizes by using baby socks for small ones and adult socks for big ones. Add a drop of peppermint or vanilla scent to the rice for a sweet-smelling snowman, and draw a smile with a permanent marker. Because there is no sewing involved, even young children can complete most of the steps with a little help tying the bands. Place the finished snowmen on a shelf near the tree, or give one to each guest at a holiday party as a charming little favor.
Gingerbread Playdough Ornaments
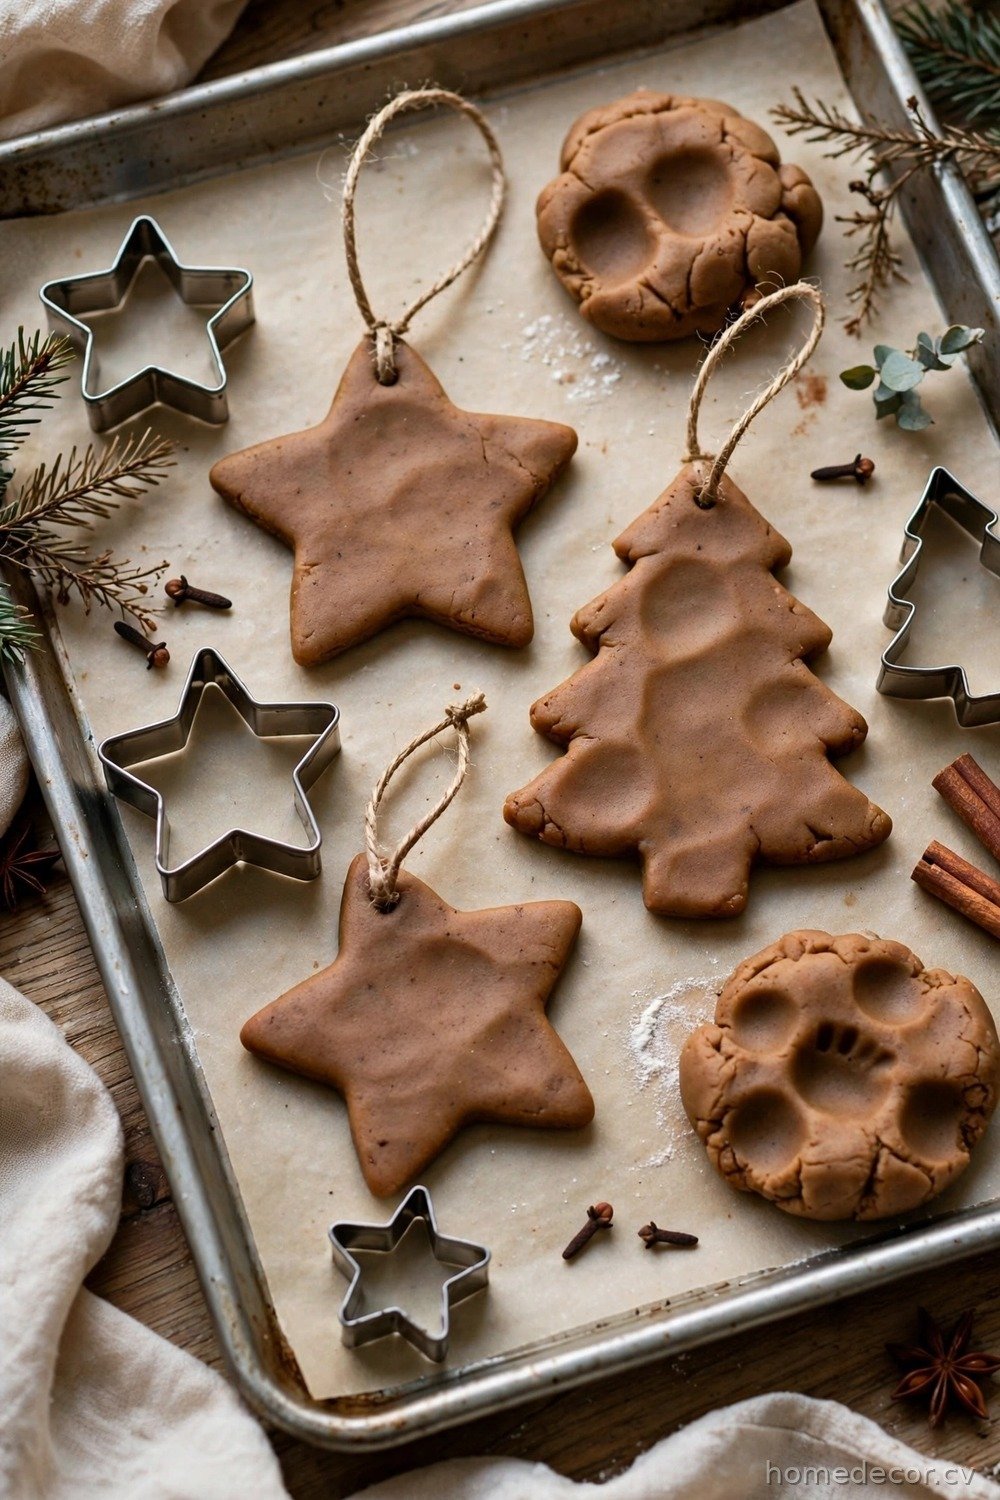
Gingerbread-scented playdough ornaments smell like Christmas and are delightful to make, even though you never eat them. Mix flour, salt, cinnamon, ginger, and a little vegetable oil with warm water to form a soft, fragrant dough. Kids can roll it out and cut gingerbread people, stars, and trees with cookie cutters, then poke a hole at the top with a straw. An adult bakes them in a low oven until hard, and the house will smell wonderful while they bake. Knead the dough on a floured surface until it feels smooth and soft, and add a little more water if it starts to crack around the edges.
Once cool, decorate the ornaments with puffy paint, buttons, and ribbon — white paint makes perfect icing squiggles on a gingerbread person. These ornaments look charming on the tree and keep their spicy scent for weeks, especially if stored in a sealed bag between holidays. Remind kids that these are decorations, not cookies, so nobody takes a bite. They also make sweet gifts: tie a few together with twine and a cinnamon stick for a present that smells as good as it looks. Let the painted ornaments dry completely before hanging them, and keep them away from damp rooms so the scent and color stay fresh all season.