

There is something special about Christmas decorations you made with your own hands — they carry memories that no store-bought ornament ever can. The best part is that most Christmas crafts use supplies you already have at home, like paper, pinecones, jars, and ribbon, so they cost almost nothing. Whether you are crafting alone with a cup of cocoa, with your kids on a snowy afternoon, or with friends at a holiday party, these fifteen ideas are simple, fun, and guaranteed to make your home feel more festive.
Make Salt Dough Ornaments

Salt dough ornaments are a classic Christmas craft that has been loved for generations, and for good reason — they cost pennies and last for years. Mix two cups of flour, one cup of salt, and one cup of water into a smooth dough, roll it out on a floured surface, and cut shapes with cookie cutters like stars, trees, and hearts. Poke a small hole near the top of each shape with a straw so you can hang them later, then bake them in a low oven until they are completely hard and dry. The smell of warm dough in the kitchen already feels like Christmas, and the whole process is simple enough for even very young children to enjoy safely.
I spend far too much time saving home ideas.
If you'd like the best ones, I'll send a short email once or twice a month.
Once your ornaments are cool, the real fun begins with painting and decorating them. Use acrylic paints in red, green, gold, and white, and add glitter, buttons, or tiny beads while the paint is still wet. You can stamp names or dates into the dough before baking to turn them into keepsakes, or paint them to look like gingerbread cookies. Seal finished ornaments with a coat of clear varnish or Mod Podge so the paint stays bright and the dough stays protected from moisture. Hang them on the tree, tie them to gifts as handmade tags, or give them to grandparents — a salt dough ornament made by little hands is a gift nobody ever throws away.
Create a Paper Snowflake Garland
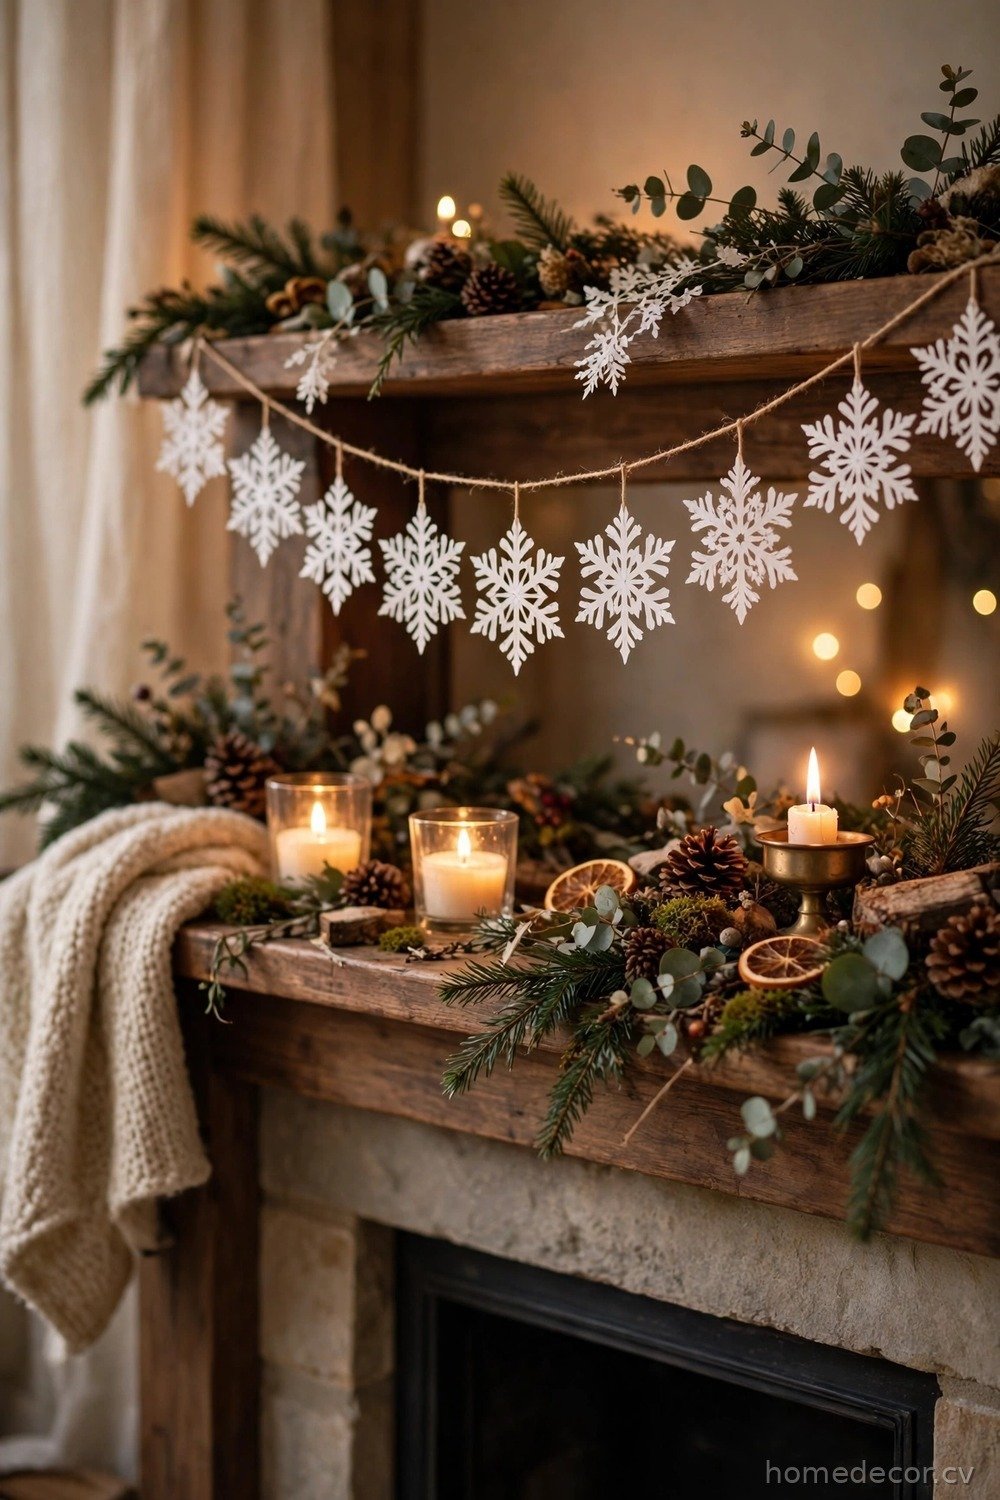
Paper snowflakes are one of the first crafts most of us ever learned, and turning them into a garland makes them feel fresh and grown-up again. Start with white or light blue paper — old book pages, plain printer paper, or even coffee filters all work beautifully. Fold each sheet into a triangle and cut small triangles, curves, and notches along the edges, then unfold it to reveal a unique snowflake every single time. No two snowflakes come out alike, which is exactly the charm — children love the surprise of opening each one, and adults will be amazed at how pretty simple paper can look.
To make the garland, string your snowflakes together with thread, thin ribbon, or fishing line, spacing them a few inches apart so they flutter gently. You can hang the garland across a mantel, in a window, along a staircase, or even across the top of a doorway. For extra sparkle, lightly brush the snowflakes with glue and sprinkle glitter over them before stringing, or use metallic paper for a few of the flakes. A paper snowflake garland costs almost nothing, takes less than an hour, and brings a snowy, magical feeling indoors even if you live somewhere warm. Store it flat between sheets of tissue paper and it will last for many Christmases.
Turn Pinecones Into Mini Trees

Pinecones make the most adorable miniature Christmas trees, and they are completely free if you collect them on a walk. Look for pinecones that are open and sturdy, with a flat bottom so they stand up on their own — if one wobbles, trim the bottom scales slightly or glue it onto a small wooden disc or a bottle cap. Paint the tips of the scales green for a classic tree look, or leave them natural and dust them with white paint for a snowy, frosted effect. A tiny star cut from gold cardboard and glued to the top finishes the tree perfectly, and a dab of glue with a pinch of glitter makes it sparkle.
These little trees look wonderful grouped together on a mantel, a windowsill, or as place settings on the Christmas dinner table. You can also glue a loop of ribbon to the top and hang them on the big tree as ornaments, or set one beside each guest’s plate as a tiny favor to take home. Kids love painting pinecones because there is no wrong way to do it — every tree looks charming no matter how the paint lands. Add tiny beads as ornaments, a sprinkle of fake snow, or a small wooden star, and you have a whole forest of handmade trees. Best of all, this craft gets everyone outside collecting supplies, which is half the fun.
Build Mason Jar Snow Globes

Mason jar snow globes are pure Christmas magic in a jar, and they are much easier to make than they look. Start with a clean mason jar with a tight-fitting lid, and glue a small waterproof figurine — a tiny tree, a deer, a snowman, or a little house — to the inside of the lid using strong waterproof glue. Let the glue dry completely overnight, because this step matters most; a figurine that comes loose will ruin the globe. Fill the jar almost to the top with water, add a drop of glycerin so the snow falls slowly, and sprinkle in a generous spoonful of fake snow or fine glitter.
Screw the lid on tightly, flip the jar over, and watch your tiny winter scene come alive as the snow drifts down around it. You can decorate the outside of the lid with ribbon, twine, or a small pine sprig, and paint the metal band gold or red for a festive finish. These snow globes make wonderful gifts, especially for teachers, neighbors, and grandparents, because they look far more expensive than they are. Make one for every member of the family and line them up on a windowsill, where the daylight catches the glitter beautifully. Children are mesmerized by snow globes, so expect this craft to become an annual tradition in your home.
Craft Cinnamon Stick Ornaments

Cinnamon stick ornaments smell like Christmas itself, and they are one of the simplest crafts you can make. Bundle three or four cinnamon sticks together with twine or thin ribbon, and you instantly have a rustic little ornament that looks beautiful on the tree and scents the whole room. You can arrange the sticks into a star shape, glue them into a tiny log cabin, or tie them in a bundle with a small pine sprig and a dried orange slice for a natural, fragrant decoration. A dab of hot glue holds everything firmly, and the warm brown color of cinnamon looks gorgeous against green tree branches.
These ornaments are wonderful gifts because they are useful as well as pretty — the scent lasts for weeks, and recipients can hang them in a car, a closet, or a bathroom long after the tree comes down. Let children help by choosing ribbons and arranging the sticks, while an adult handles the hot glue gun. You can also add a small handwritten tag with the year on it, turning a simple bundle of sticks into a dated keepsake. Cinnamon sticks are cheap in bulk at grocery stores, so you can make a dozen ornaments for the price of one store-bought decoration. Hang them near the top of the tree where warm air rises, and your whole living room will smell like a holiday bakery.
Dry Orange Slices for Garland

Dried orange slices are the prettiest natural Christmas decoration, glowing like little stained-glass windows when light shines through them. Slice oranges about a quarter inch thick, blot them dry with a towel, and bake them on low heat for two to three hours, flipping them halfway through, until they are dry and slightly translucent. Your kitchen will smell amazing while they bake, which is a bonus all by itself. Once they are cool, you have gorgeous amber slices that can be strung into garland, hung as ornaments, tucked into wreaths, or used to decorate wrapped gifts.
To make a garland, thread twine or ribbon through a small hole poked near the top of each slice, alternating oranges with cinnamon sticks, pine sprigs, or wooden beads for a beautiful natural rhythm. Hang the garland on the tree, across a mantel, or in a window where sunlight can shine through the slices. This craft is wonderfully sustainable, since it uses simple fruit and compostable string, and the slices last for years if you store them dry. Dried orange garland suits almost any decorating style, from rustic farmhouse to elegant and minimal, because the warm amber color complements both greenery and gold. It is proof that the most beautiful Christmas decorations often come from the simplest ingredients.
Build Popsicle Stick Snowflakes

Popsicle stick snowflakes are a perfect craft for kids, but they look surprisingly stylish when they are finished well. Glue six popsicle sticks together in a starburst pattern — three sticks crossed at the center — and let the glue dry completely before decorating. Paint the snowflakes white, silver, or light blue, and while the paint is still slightly tacky, sprinkle glitter over them for a frosty sparkle. Add small buttons, beads, sequins, or tiny pom-poms at the ends of the sticks and in the center, and glue a loop of ribbon to the back for hanging.
These snowflakes look fantastic hanging in windows, on the tree, or strung together as a garland across a wall. For a more elegant look, paint them all one color, like matte white or metallic gold, and skip the glitter — a set of matching snowflakes in one color looks like a boutique decoration. Kids can make a whole blizzard of them in one afternoon, and they are sturdy enough to survive being packed away and reused year after year. You can also write each child’s name and the year on the back of their snowflake, turning a simple craft into a keepsake you will treasure. Cheap, cheerful, and endlessly customizable, popsicle stick snowflakes are a holiday craft box essential.
Sew Simple Felt Stockings

Felt stockings are a wonderful no-sew or easy-sew project, even if you have never picked up a needle before. Cut two identical stocking shapes from a sheet of felt in red, green, or cream, and join them with fabric glue, a simple running stitch, or a blanket stitch around the edges, leaving the top open. Add a loop of ribbon at the corner for hanging, and then decorate the front however you like — felt shapes like trees, stars, and snowmen, buttons, sequins, or a name cut from contrasting felt. Felt is forgiving and does not fray, so even wobbly stitches look charming and handmade.
Making stockings together is a lovely family tradition, especially if each person designs their own. Children can choose their colors and decorations, and the stockings become part of your Christmas story year after year. If you do not want to sew at all, fabric glue works perfectly and holds up well for stockings that hold light treats. You can also make mini felt stockings as ornaments or gift card holders, which are just as cute and even quicker to finish. A handmade stocking, slightly imperfect and full of personality, feels so much more special than a store-bought one, and it costs only a few dollars in felt and trims.
Wrap Stars With Twine
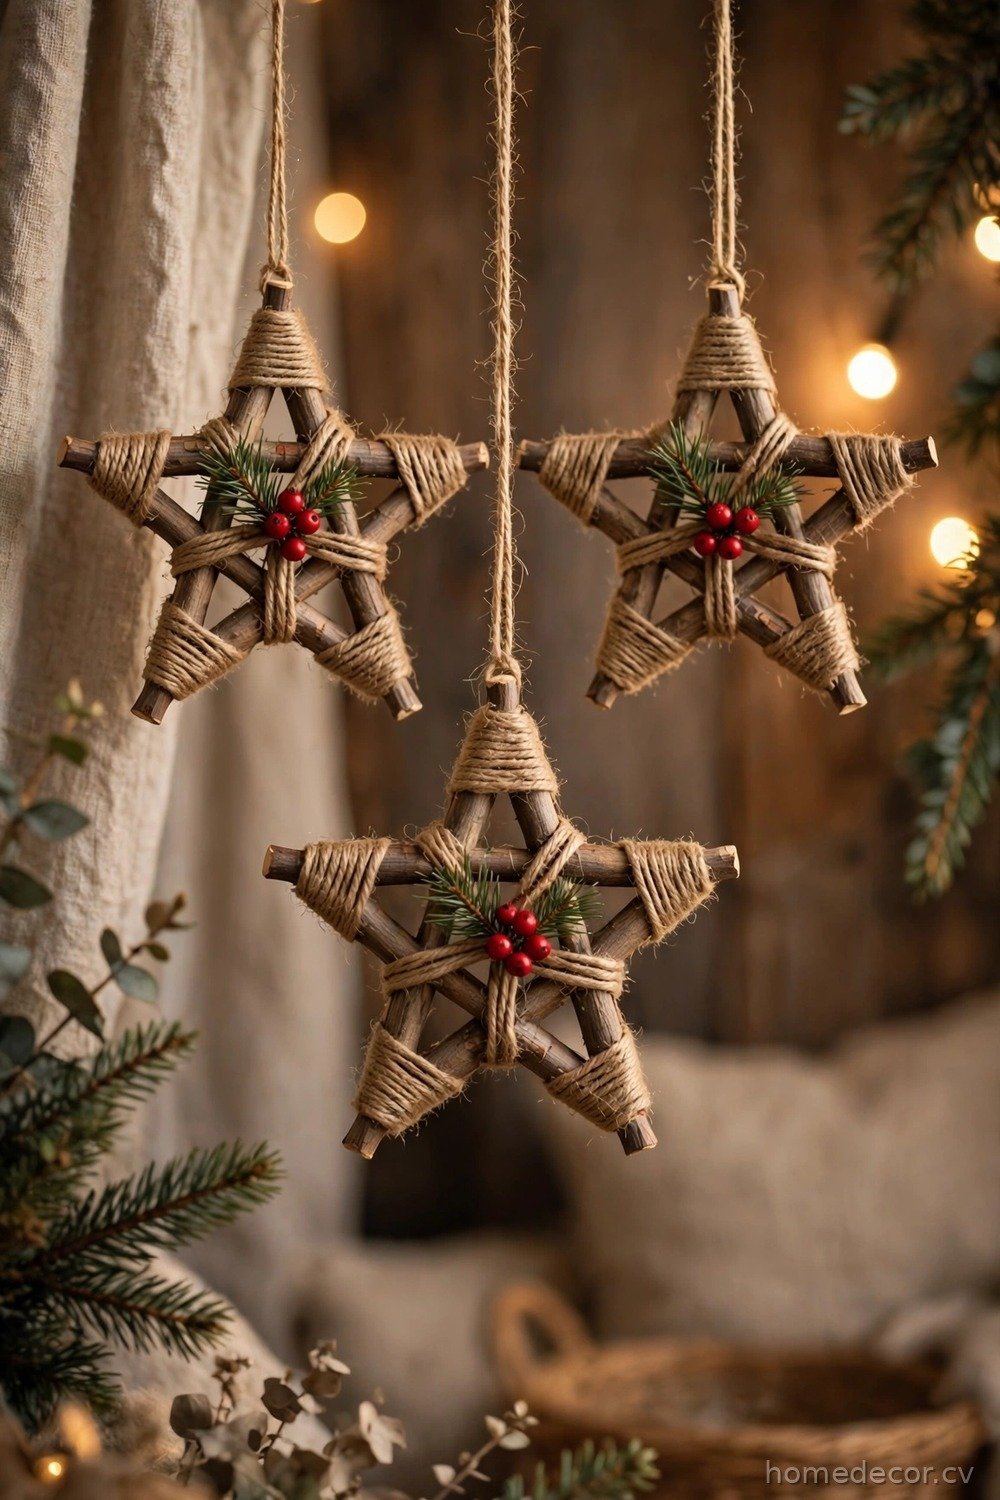
Twine-wrapped stars have a beautiful rustic charm, and they are easier to make than they look. Cut a star shape from thick cardboard, then wrap it tightly with jute twine, securing the start and end with a dab of hot glue. Keep the twine snug and even, working your way around the points and into the corners patiently — the wrapping itself is relaxing, almost like a quiet meditation, and the finished star looks wonderfully textured. Add a small red berry, a tiny pine sprig, or a miniature bell at the center, and glue a loop of twine to the back for hanging.
These stars look stunning on the tree, hung in windows, or tied to wrapped gifts as a natural, eco-friendly decoration. Make them in different sizes for a beautiful layered effect, and mix plain twine stars with a few painted gold or white ones for variety. Because they are flat and light, they store easily in a box between sheets of tissue paper, and they are sturdy enough to last for many seasons. Twine stars also make lovely gifts, especially paired with a handwritten tag, because they feel personal and handcrafted in a way that mass-produced ornaments never do. This is a craft that proves simple materials, used with care, create the most beautiful results.
Make Handprint Ornaments

Handprint ornaments capture a moment in time that you can never get back, which is why parents treasure them above all other decorations. Press a child’s hand into salt dough, air-dry clay, or even a paper plate painted white, and you have a perfect little handprint to decorate and hang. For salt dough, follow the basic recipe, press the hand firmly into the rolled dough, cut around the print, and bake until hard. For a simpler version, paint a child’s palm with acrylic paint and press it onto a round wooden disc or a clear plastic bauble, then add details to turn the print into a reindeer, a Santa, or a Christmas tree.
Date every handprint ornament on the back, because in a few years you will be amazed at how small those hands once were. These ornaments make the most meaningful gifts for grandparents, who will hang them on their trees with pride every single year. Children love seeing their own handprint on the family tree, and the tradition of making a new one each Christmas becomes a beautiful way to watch them grow. Keep the finished ornaments in a special box, wrapped in tissue, so they stay safe from year to year. Of all the crafts on this list, handprint ornaments are the ones your family will still be talking about decades from now.
Create Wine Cork Reindeer
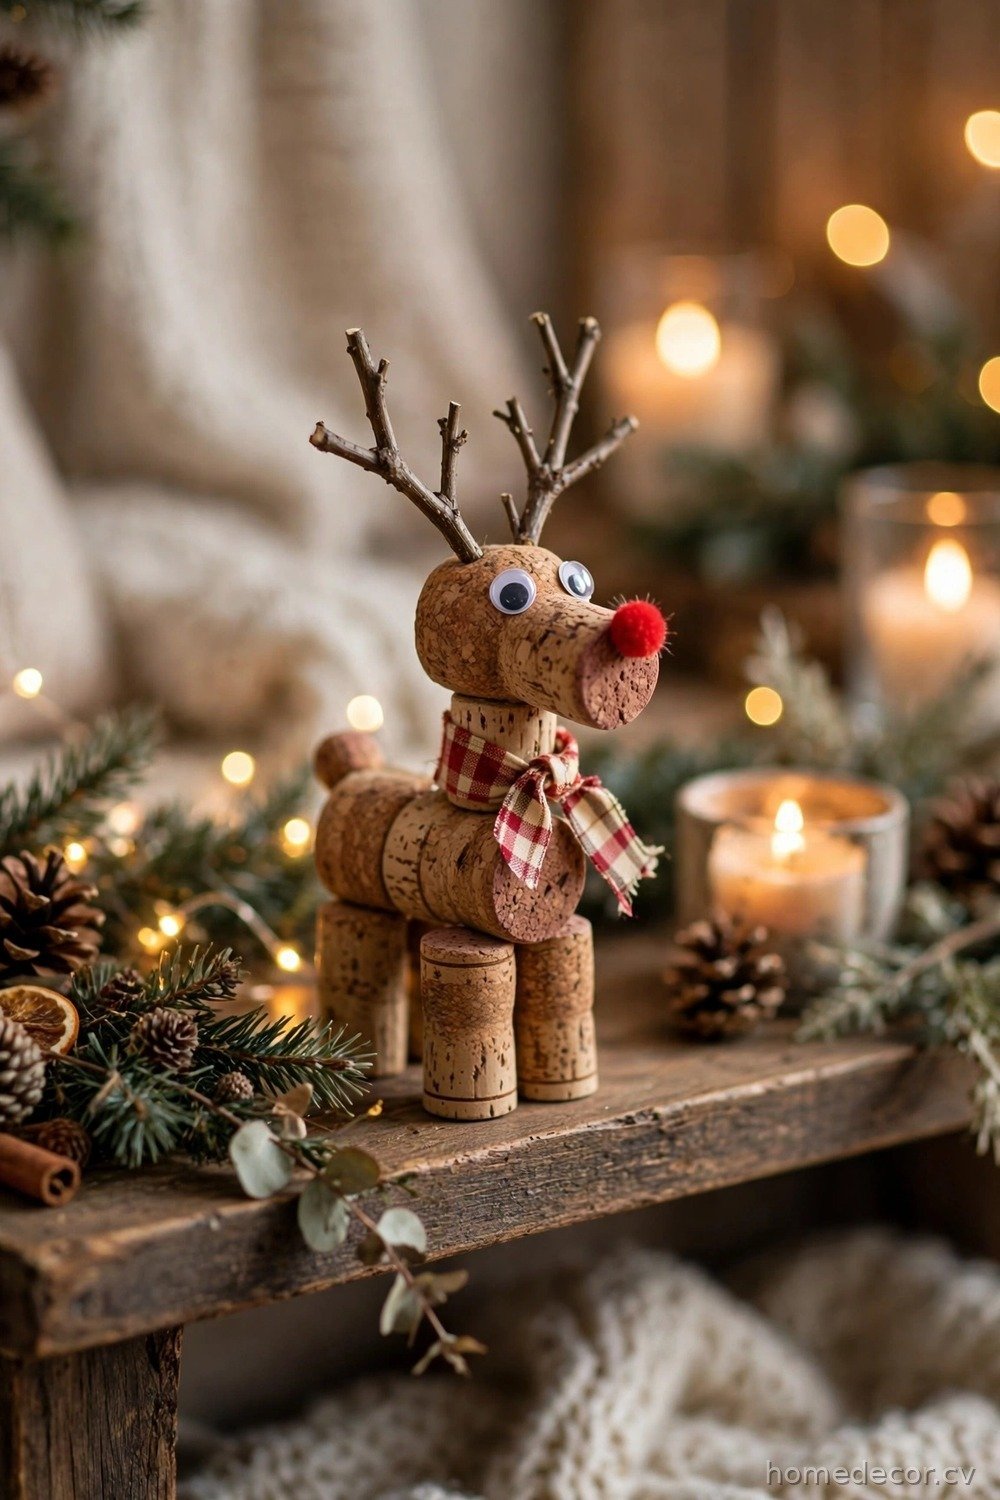
Wine cork reindeer are a funny, charming craft that turns something you might throw away into a decoration full of personality. Glue two corks together at a right angle — one horizontal for the body, one vertical for the head — and add tiny twig antlers pushed into the top cork, googly eyes, and a small red pom-pom for Rudolph’s nose. A scrap of ribbon tied around the neck as a scarf completes the look, and a loop of twine glued to the back lets you hang your reindeer on the tree. Each one takes only a few minutes, but they have so much character that guests always smile when they spot them.
These little reindeer are wonderful for using up corks you have been saving, and they make a great craft for a wine-and-craft night with friends. Make a whole herd in different sizes, with different colored scarves, and arrange them on a mantel as a tiny reindeer family. Kids love giving each reindeer a name and a personality, and the googly eyes guarantee giggles. You can also glue a magnet to the back and stick them on the fridge, or stand them on the dinner table as place card holders with a tiny name tag. Funny, frugal, and full of charm, wine cork reindeer are proof that the best Christmas crafts do not take themselves too seriously.
Craft Paper Bag Luminaries
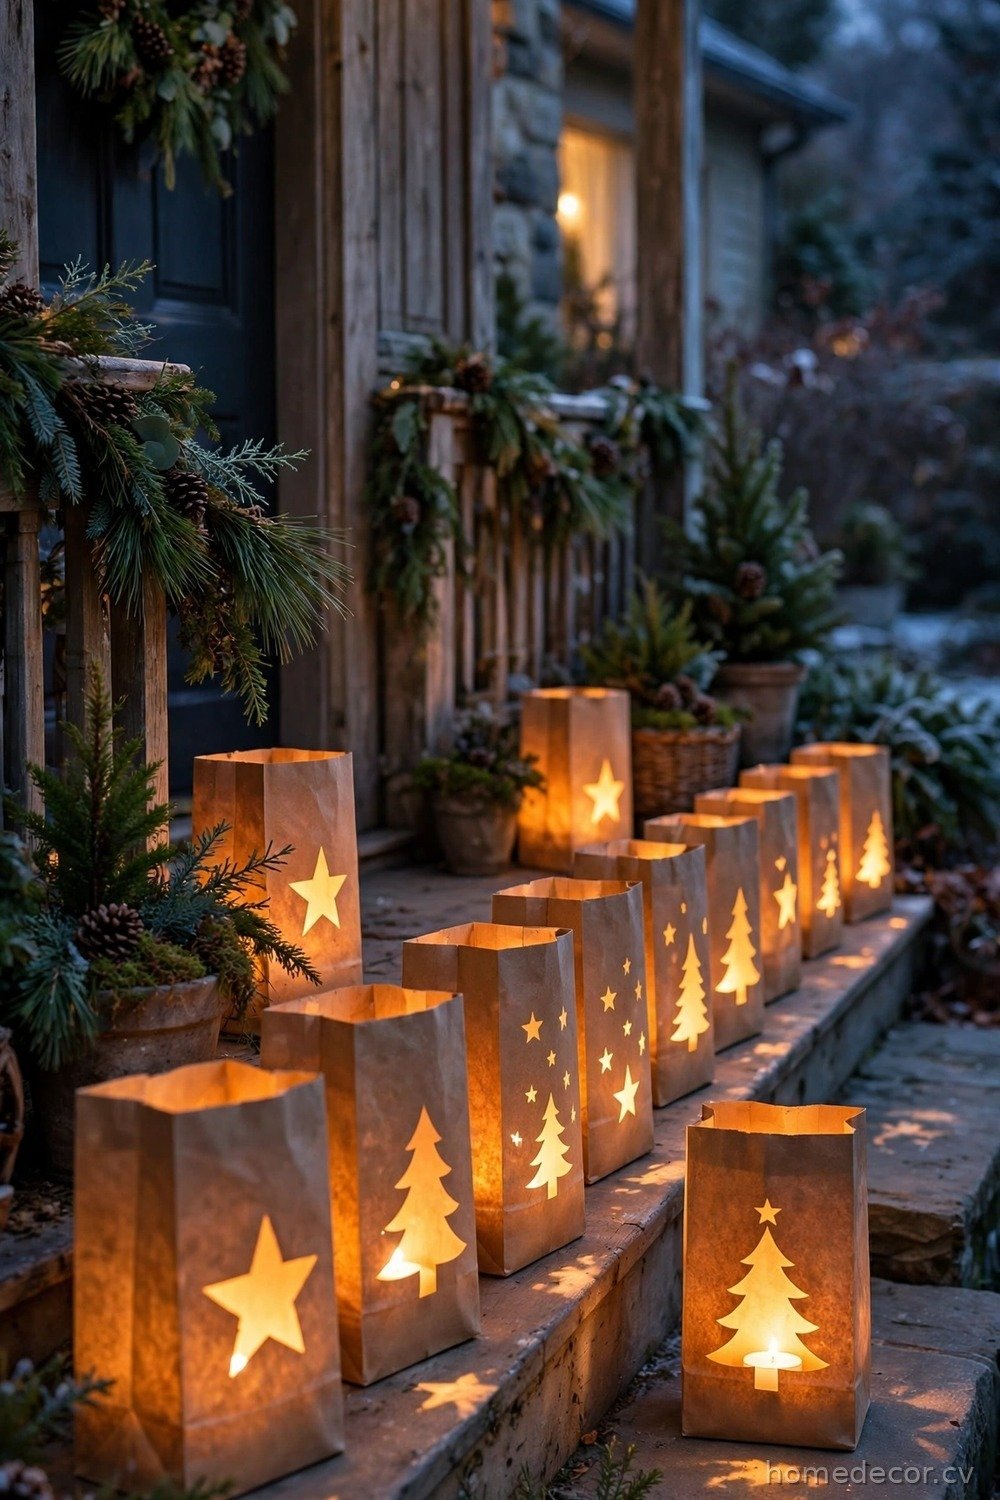
Paper bag luminaries create the most magical glow on a porch, a windowsill, or a dinner table, and they cost almost nothing. Take a plain brown paper lunch bag, fold the top edge down about an inch, and cut simple shapes — stars, trees, or snowflakes — into the sides of the bag with scissors or a craft punch. Place a battery-operated tea light inside, never a real flame, and watch the light shine through the cut-out shapes in a beautiful pattern. The warm glow through brown paper feels old-fashioned and cozy, like candlelight from a storybook cottage.
These luminaries are perfect for lining a walkway on Christmas Eve, decorating a holiday table, or lighting up a dark corner of the porch. Make a whole set and vary the cut-out shapes for a beautiful display, or let children design their own bags for a personal touch. You can also decorate the outside of the bags with stamps, drawings, or a sprinkle of glitter before adding the light. Because they use battery lights, paper bag luminaries are completely safe around children and pets, and they can glow all evening without worry. When the season ends, flatten the bags and store them for next year, or recycle them and make fresh ones — at this price, you can afford to start over every Christmas.
Wrap Yarn Around Cone Trees
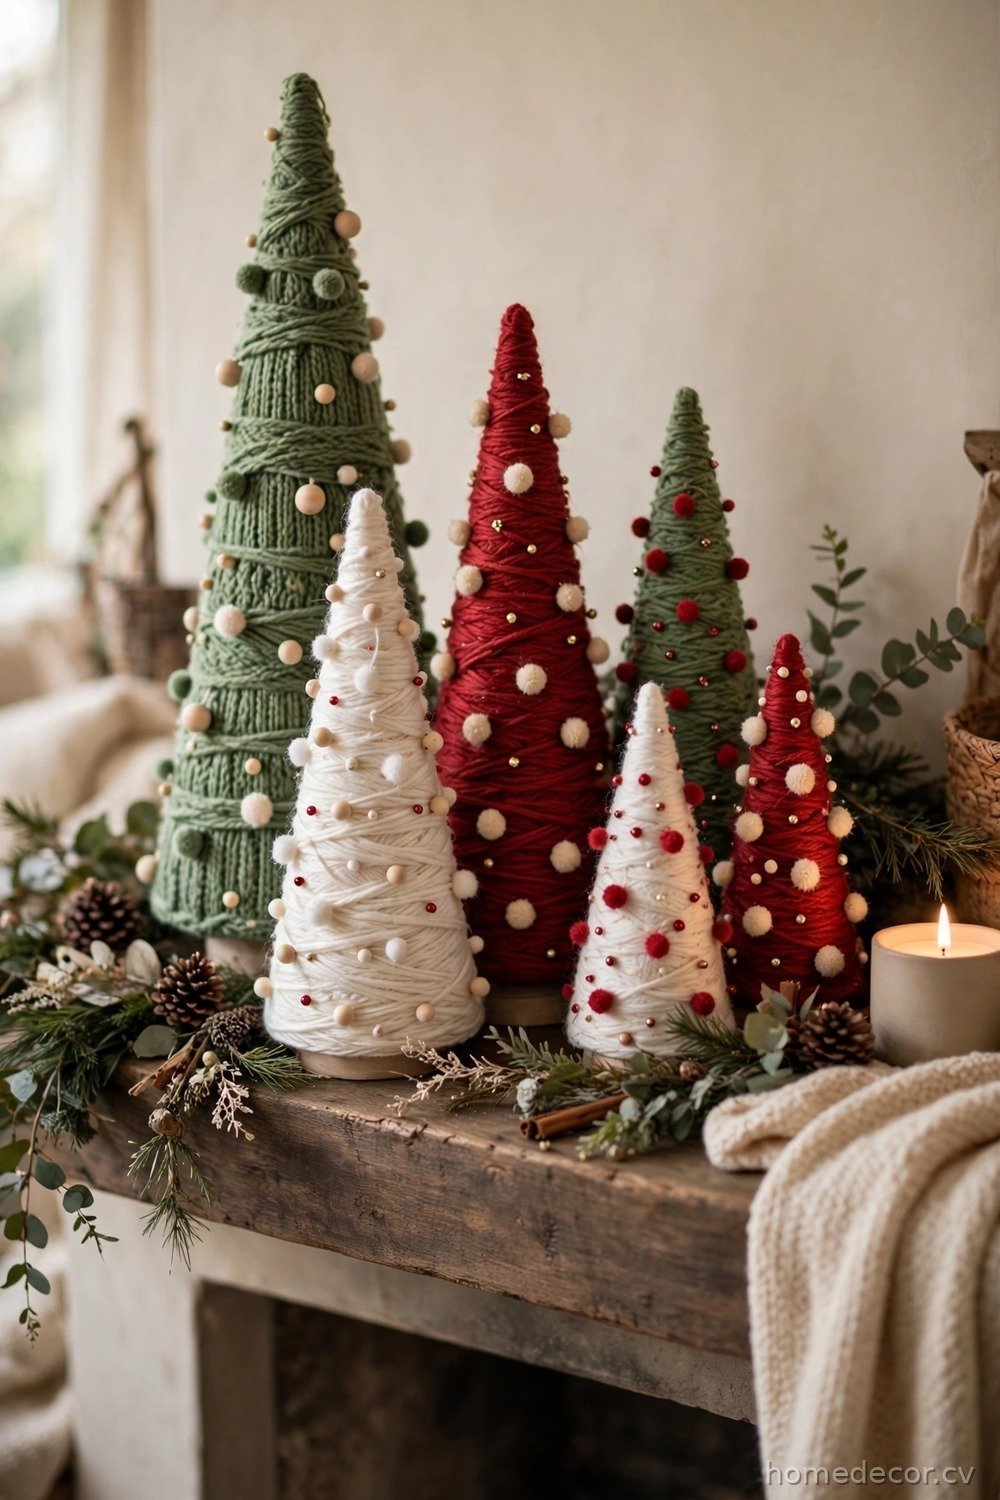
Yarn-wrapped cone trees are soft, colorful, and wonderfully simple to make from supplies you probably already have. Start with a cone shape made from cardboard or a foam cone from the craft store, and wrap yarn around it from the bottom to the top, securing each end with a dab of glue. Choose classic green yarn for a traditional tree, or try white, red, pink, or even sparkly yarn for a modern look. Keep the yarn snug and close together so no cardboard shows through, and add small beads, buttons, or tiny pom-poms as ornaments once the wrapping is done, finishing with a star or a pom-pom on top.
These trees look beautiful grouped in different heights on a mantel, a shelf, or a table, and they are soft enough to be completely safe around small children. You can make a whole forest in an afternoon while watching a Christmas movie, and each tree costs only a few cents in yarn. Yarn trees also make lovely gifts, especially in the recipient’s favorite color, and they are easy to personalize with a tiny initial or a special ornament. If you have leftover yarn from knitting projects, this craft is the perfect way to use up small balls that are too tiny for anything else. Cozy, colorful, and endlessly adaptable, yarn trees are a craft you will return to every year.
Design a Button Wreath

A button wreath turns a jar of old buttons into a decoration that looks surprisingly elegant and full of history. Cut a wreath shape from sturdy cardboard, or use a foam wreath form from the craft store, and glue buttons all over it, overlapping them so no cardboard shows through. Mix sizes, shades, and textures — red, green, white, gold, and cream buttons together create a beautiful festive mosaic. A hot glue gun makes this project fast, and the satisfying click of each button finding its place is oddly relaxing. Finish with a big bow at the top and a loop of ribbon for hanging.
Button wreaths are wonderful because every button tells a story — buttons from old coats, baby clothes, and sewing boxes all find new life in one beautiful circle. If you do not have a button collection, thrift stores sell bags of mixed buttons very cheaply, and one bag is usually enough for a full wreath. Hang your button wreath on the front door, above the mantel, or in a hallway where guests will admire it up close. Children love sorting buttons by color for this project, and the finished wreath is sturdy enough to last for decades. It is recycling, memory-keeping, and Christmas decorating all wrapped into one gorgeous, glittering circle.
Build Sock Snowmen
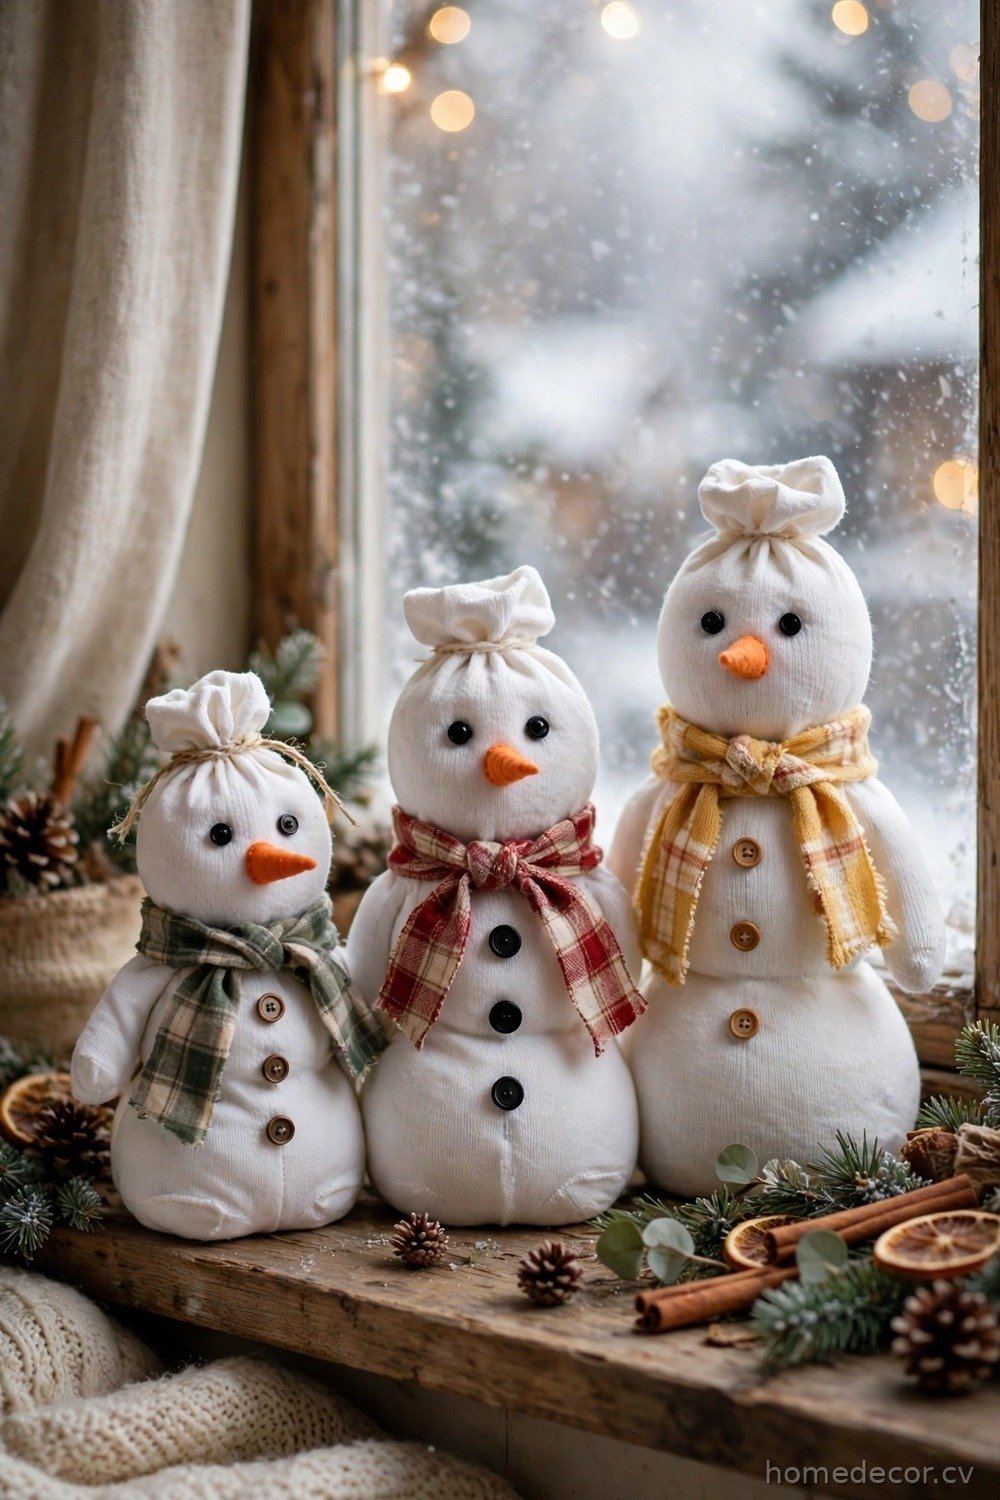
Sock snowmen are the cutest Christmas craft of all, and they are made from a single lonely sock that lost its partner. Fill the toe of a white sock with rice or dried beans until it is plump, tie it off with a rubber band, then fill a smaller section above it and tie again to create the head. The sock naturally forms a round snowman body, and you can fold the top of the sock down as a little hat or add a separate small sock as a cap. Glue on button eyes, a tiny orange felt triangle for the nose, and a few small buttons down the front, then wrap a scrap of ribbon or fabric around the neck as a scarf.
These snowmen are irresistibly huggable, which makes them perfect for children’s rooms, and they are completely safe since there is nothing breakable inside. Make a whole snowman family in different sizes using different socks, and arrange them on a windowsill or a shelf where everyone can admire them. Sock snowmen also make sweet gifts, especially for kids, because each one is unique and handmade with love. You can personalize them with different scarf colors, hats, and button styles, and children love choosing the personality of their own snowman. When Christmas is over, sock snowmen pack away easily in a box, ready to bring smiles again next winter. There is no better way to give an old sock a second life.