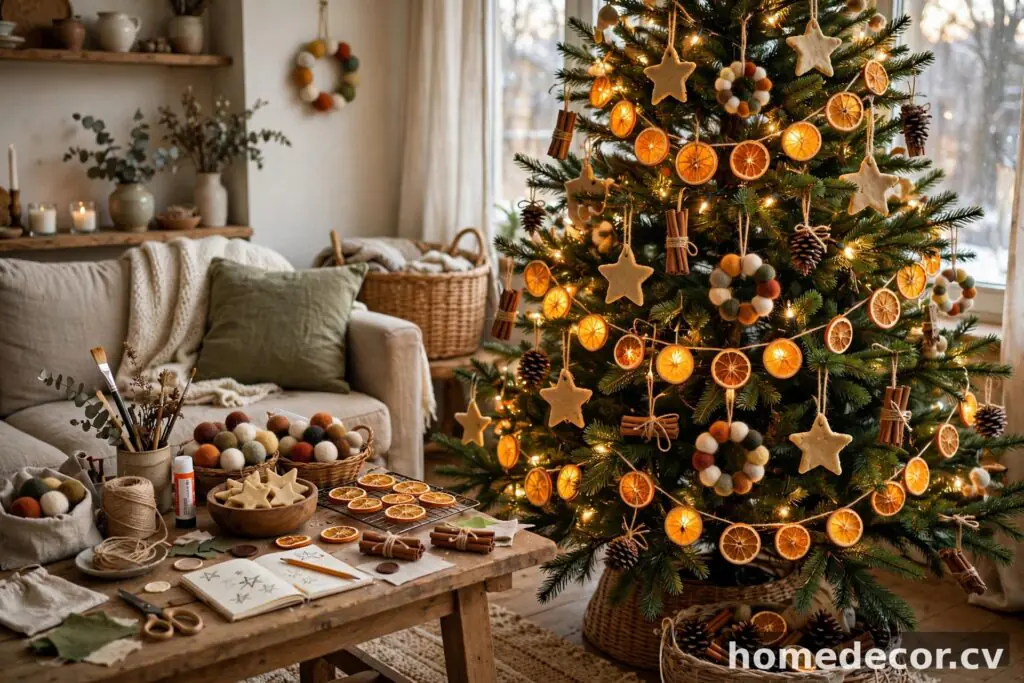
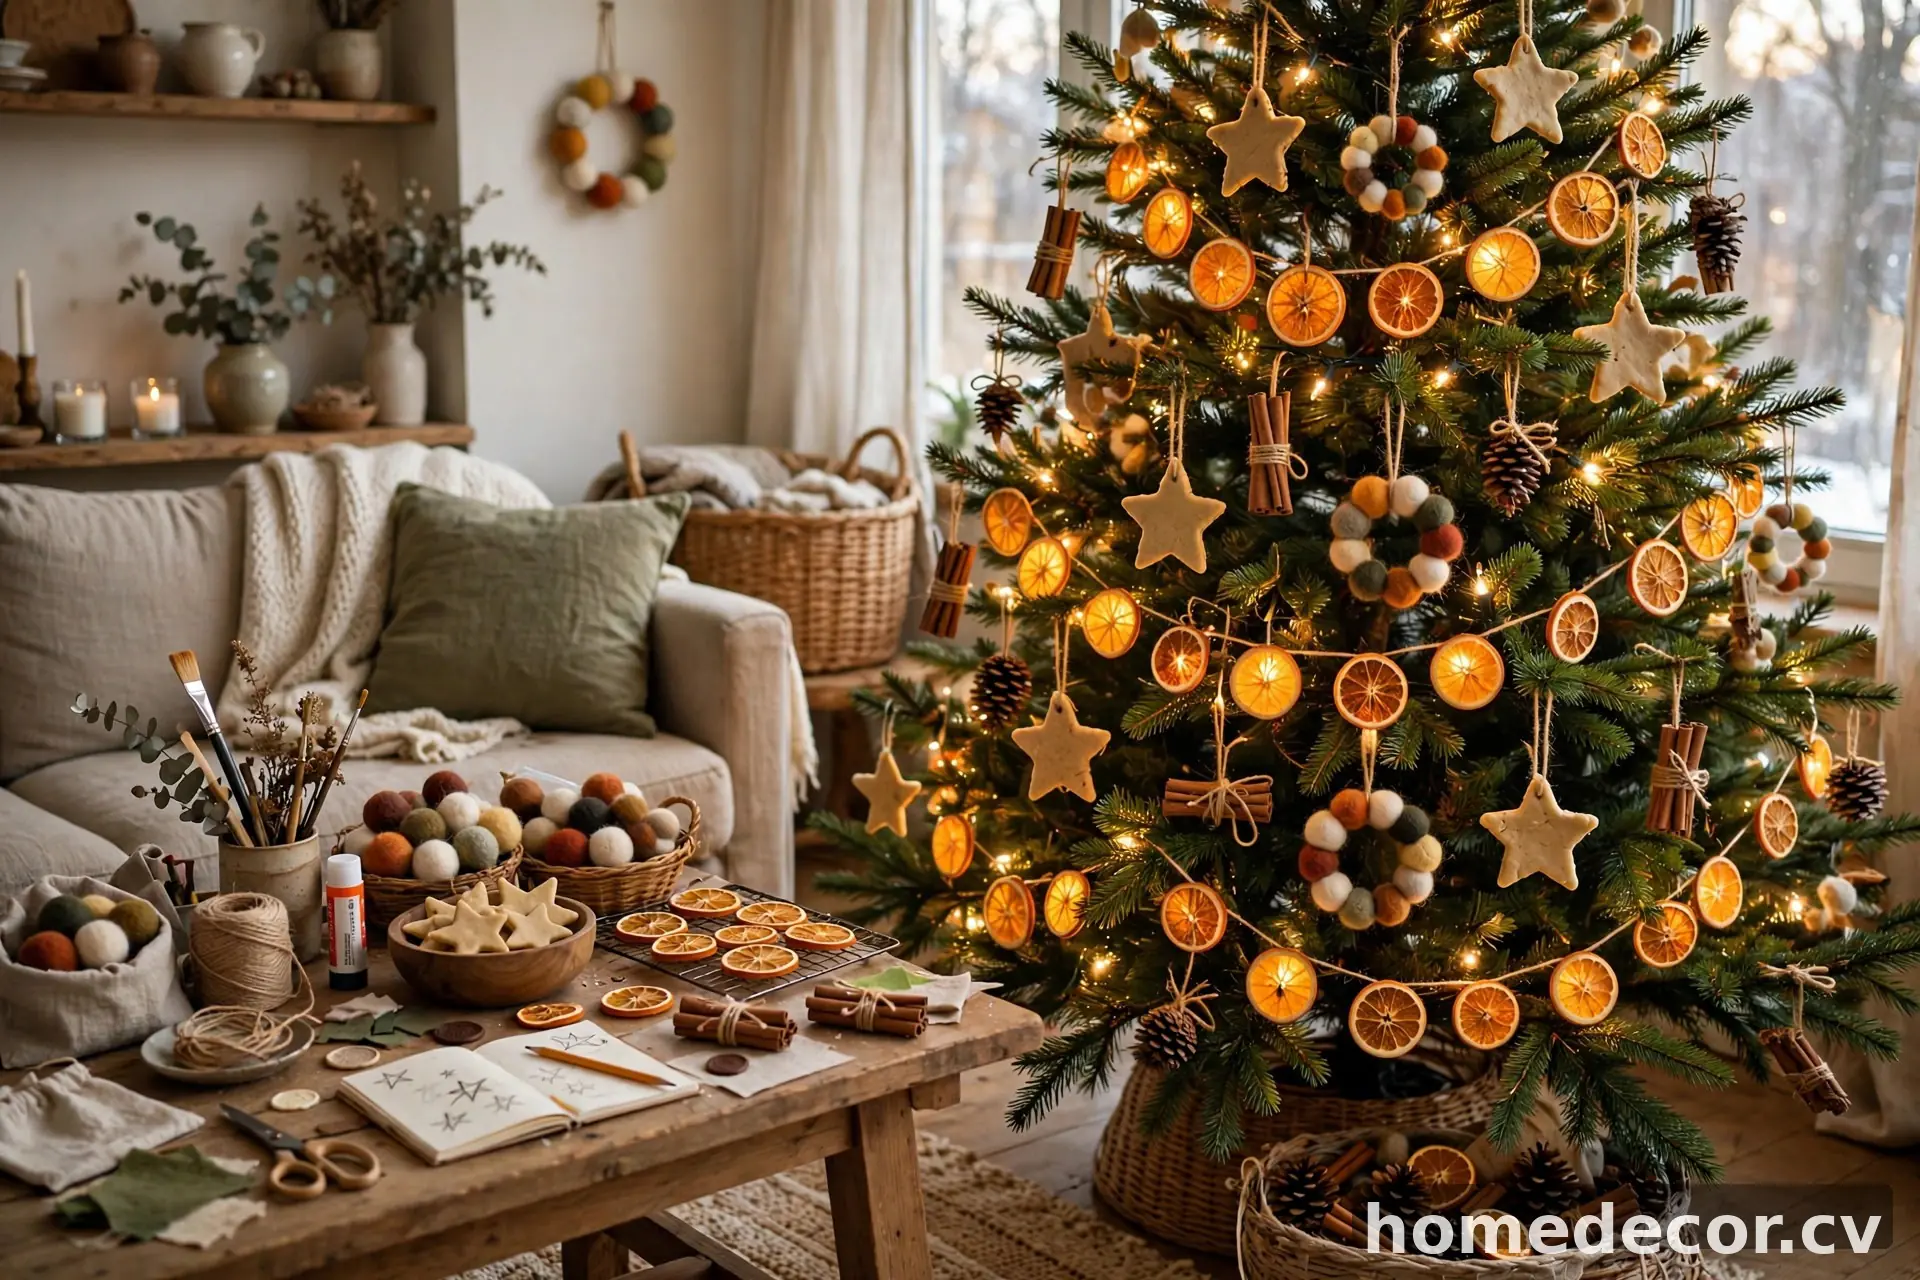
There’s a special kind of magic in a tree trimmed with ornaments you made yourself — and no one will believe they cost almost nothing. These 15 diy christmas ornaments look like boutique finds but use humble materials you probably already have: paper, felt, pinecones, salt dough, and dried citrus. Each idea includes simple steps and drying times, so grab a mug of cocoa and let’s make something beautiful.
Glowing Dried Citrus Slice Ornaments
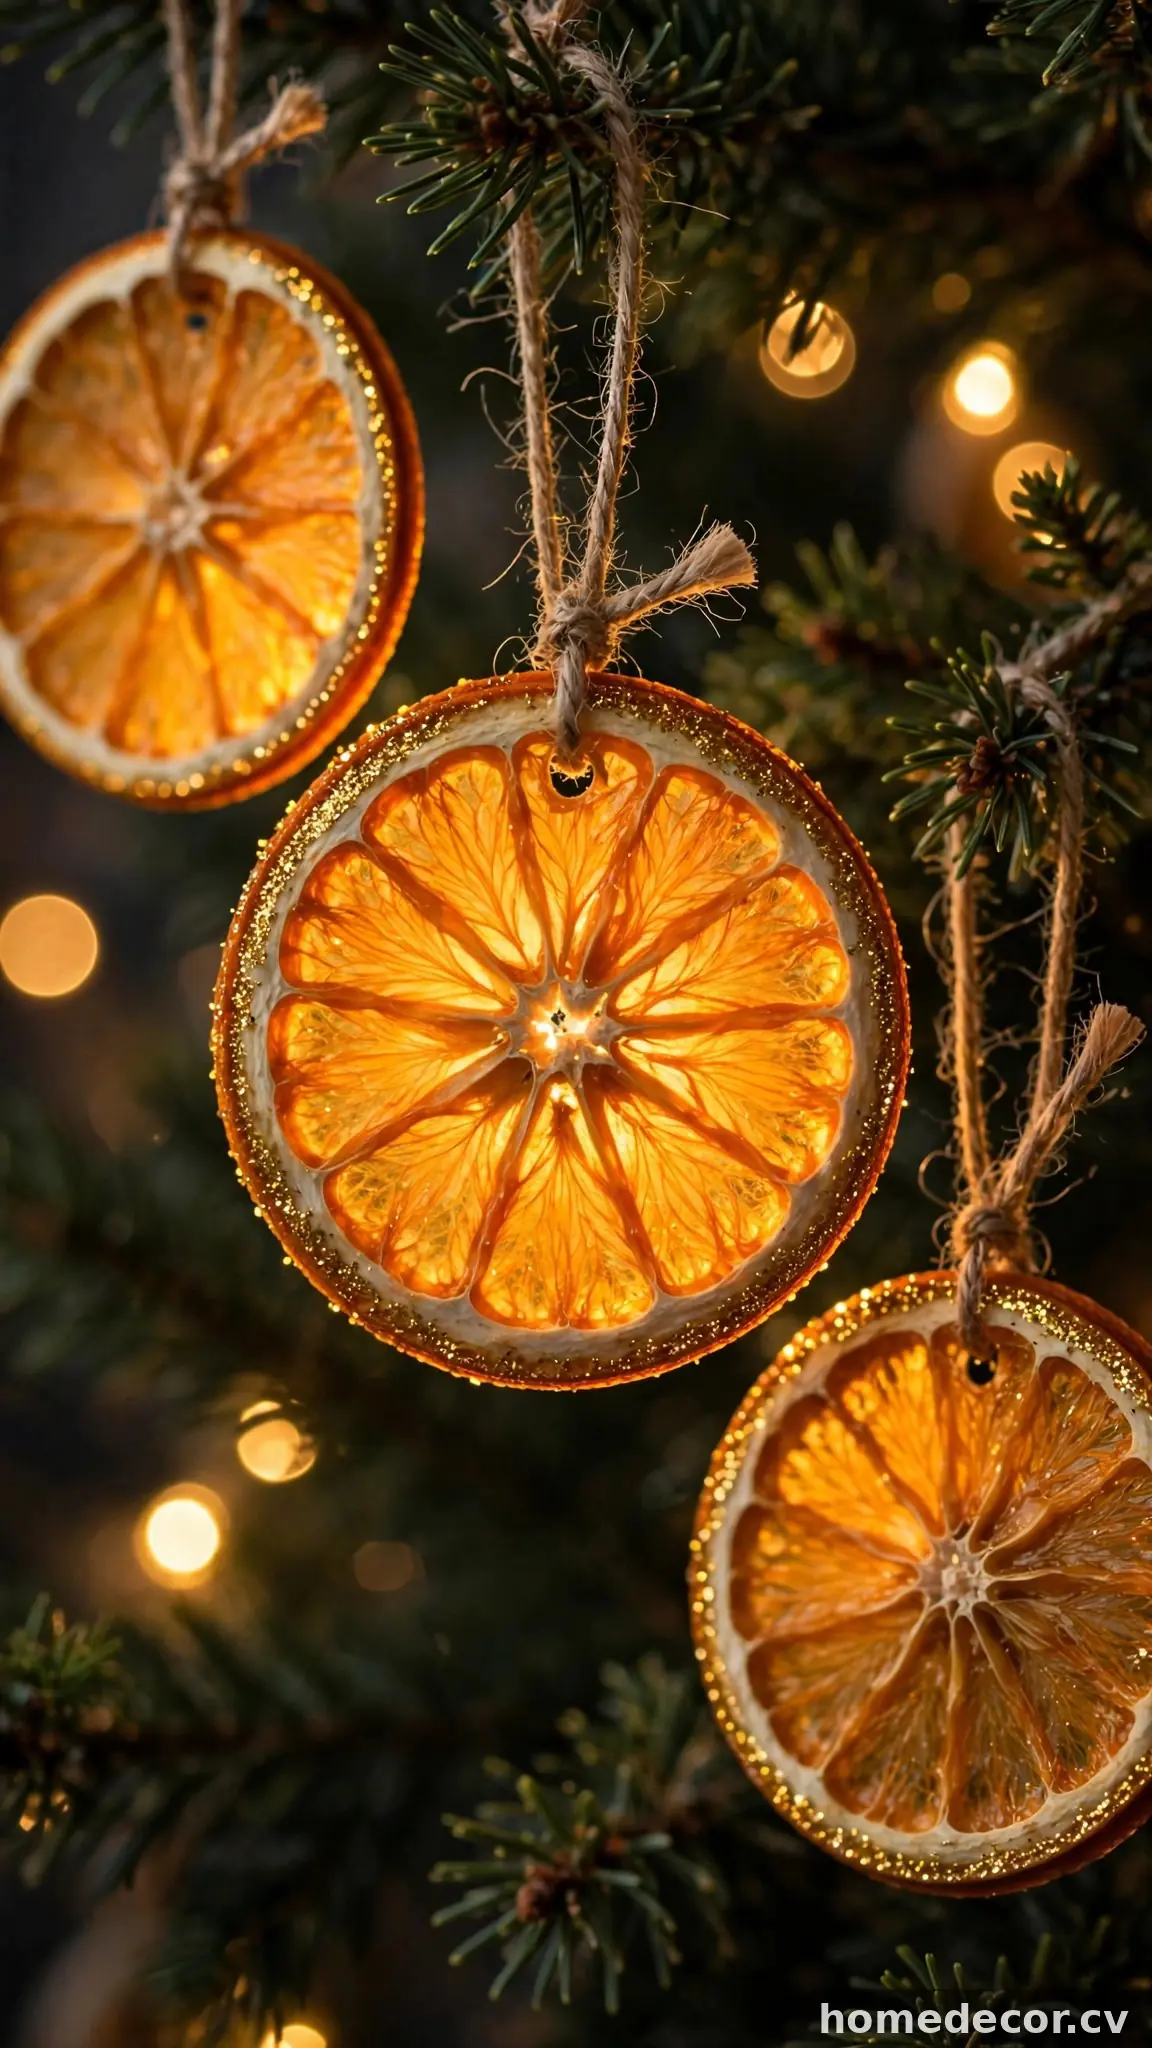
There’s something magical about the glow of a dried orange slice catching tree lights — it looks like stained glass, yet it costs almost nothing to make. Slice oranges (or lemons and grapefruits for variety) into quarter-inch rounds, pat them dry with paper towels, and lay them on a parchment-lined baking sheet. Bake at 200°F for about three hours, flipping once halfway through, until they’re firm and slightly translucent. Let them cool completely overnight so no moisture remains. Once dry, thread natural twine or thin ribbon through the top of each slice and knot it into a hanging loop. For a polished finish, brush the edges with a little clear craft glue and dust with fine gold glitter, or tie a tiny sprig of rosemary at the knot for fragrance and color contrast.
I spend far too much time saving home ideas.
If you'd like the best ones, I'll send a short email once or twice a month.
These translucent beauties hang beautifully on the tree, but they’re equally charming strung together into a garland or used as gift toppers tied over simple kraft wrapping. Because each slice is flat, they also work tucked into a wreath or laid across a mantel garland for a cohesive look. Store them in a single layer between sheets of parchment in an airtight container, and they’ll last for several holiday seasons. If a slice softens in humid weather, a few minutes back in a warm oven firms it right up. Pair them with cinnamon sticks and pine sprigs on the tree for a rustic Scandinavian vibe that looks straight out of a boutique catalog.
Salt Dough Star Keepsakes
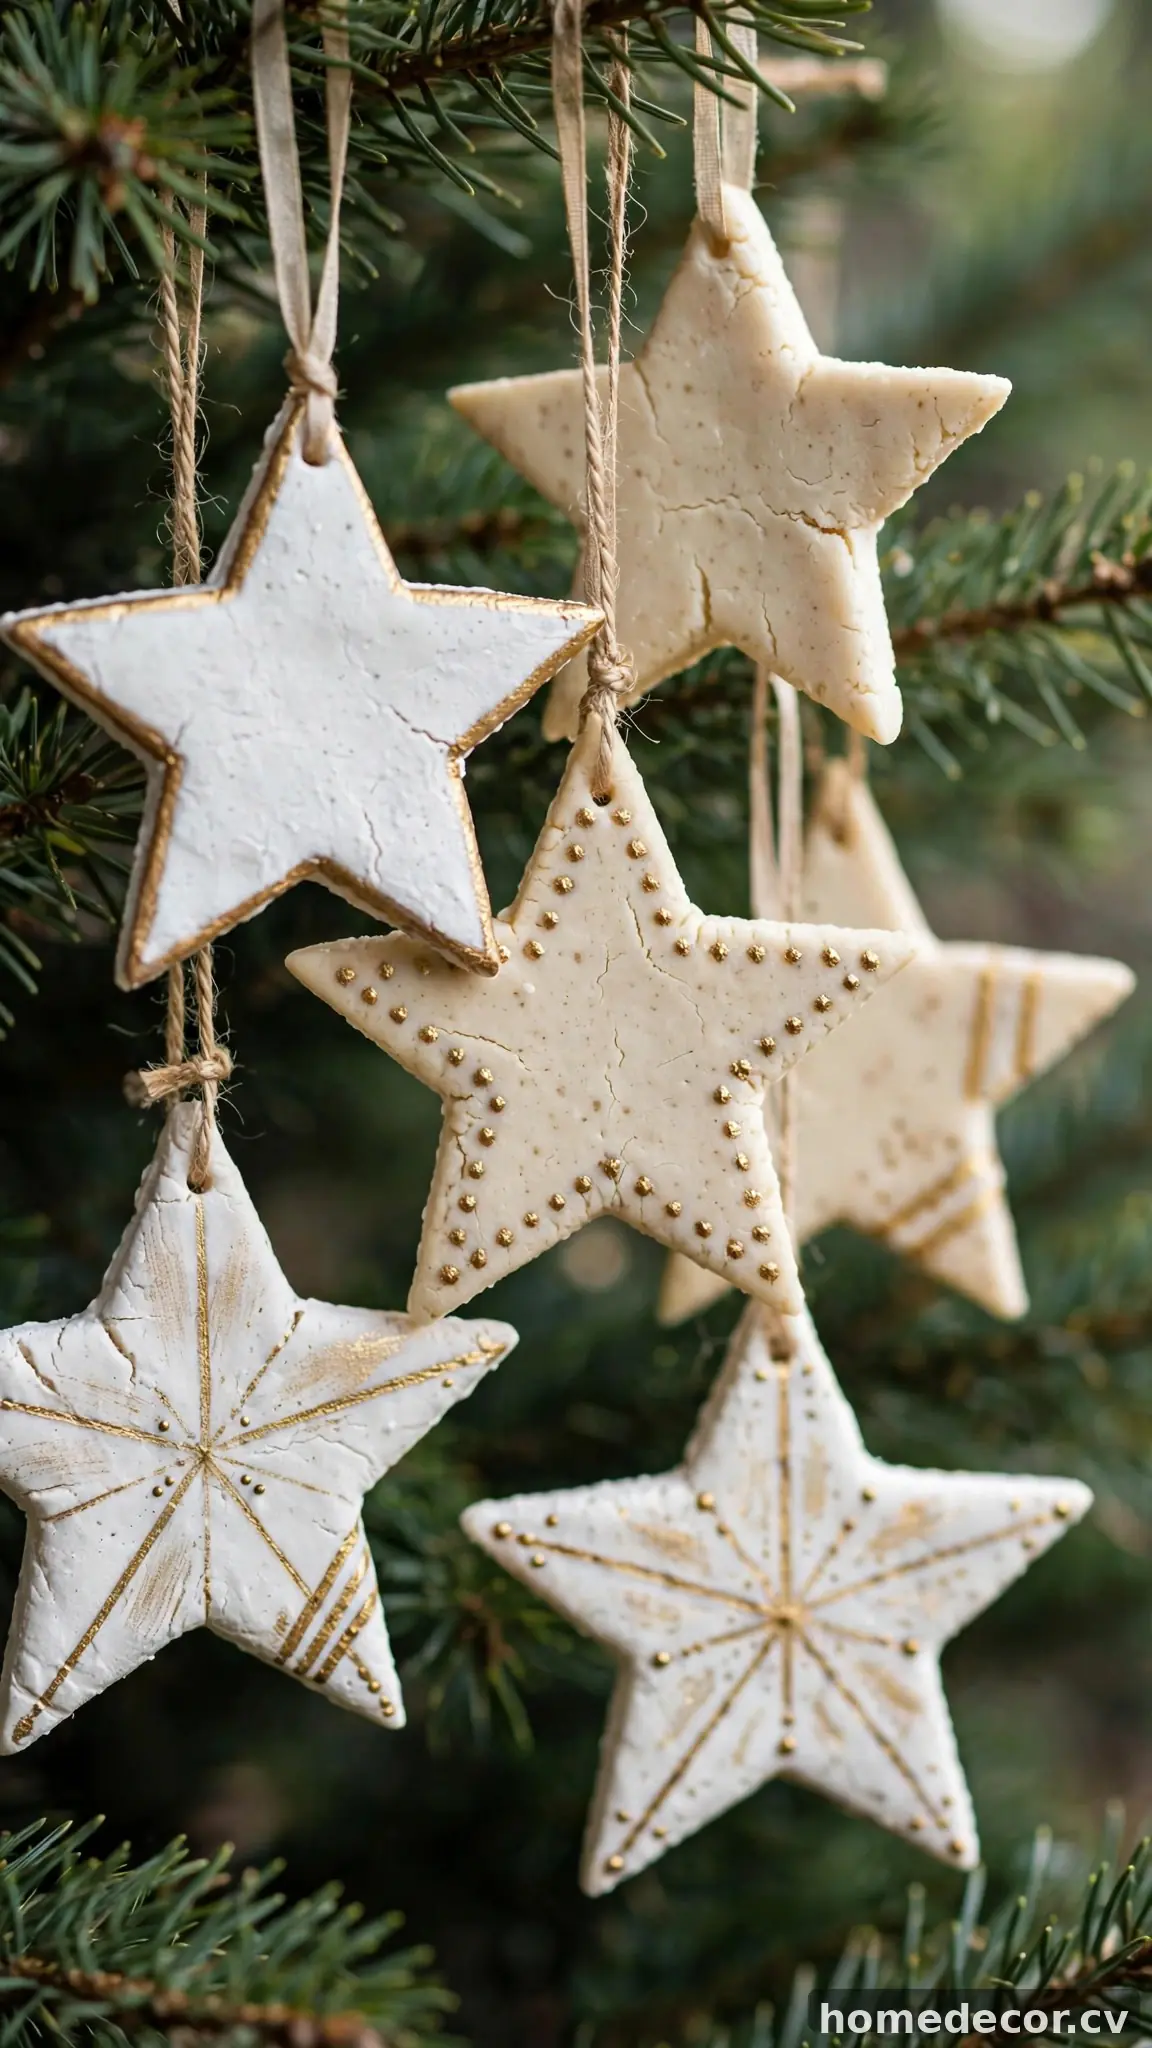
Salt dough is the ultimate budget craft material — flour, salt, and water transform into heirloom-style ornaments for pennies. Mix one cup of flour with half a cup of salt and half a cup of water, kneading until smooth. Roll the dough to a quarter-inch thickness on a floured surface and cut stars (or trees, angels, and mittens) with cookie cutters. Poke a small hole near the top of each shape with a straw for the hanging string, then bake at 200°F for two to three hours, flipping halfway, until completely hard. Let them cool for several hours before decorating with acrylic paint, gold leaf pen details, or a dusting of glitter sealed with clear matte spray.
These ornaments are perfect keepsakes — press a child’s thumbprint into the dough before baking and add their name and the year for a treasured family tradition. Hang them on the tree with thin ribbon, or string several together as a rustic garland across a window. They also make lovely gift tags tied to presents with baker’s twine. Because salt dough is sturdy once fully cured, these stars will last for years if stored in a dry box between layers of tissue paper. Their matte, chalky texture looks surprisingly high-end, especially in a palette of white, cream, and antique gold against deep green branches.
Felt Ball Mini Wreath Ornaments
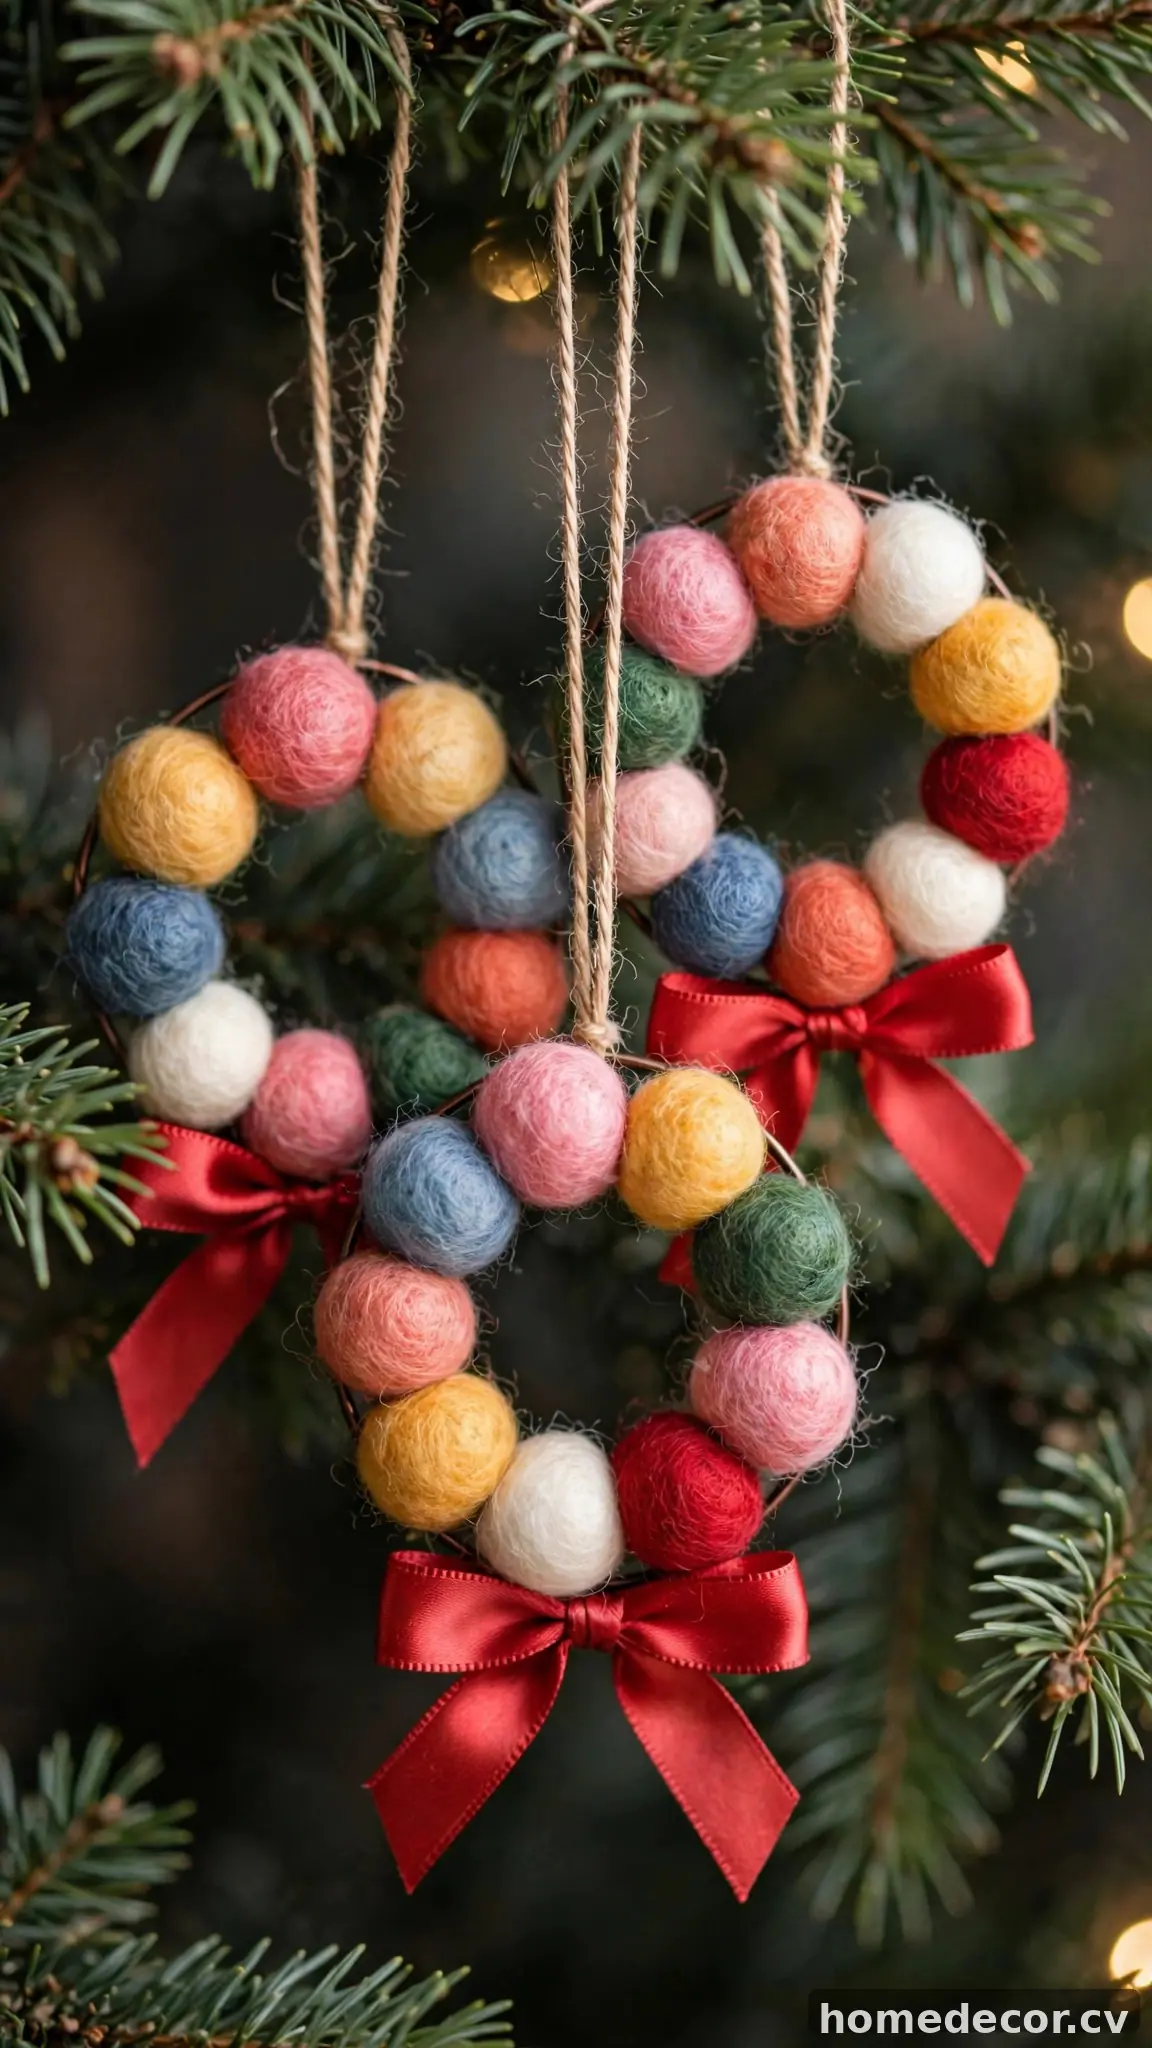
Tiny felt-ball wreaths look like something from a designer holiday collection, but all you need is a bag of wool felt balls and floral wire. Form a circle of 20-gauge floral wire about two inches across and twist the ends to close it. Thread felt balls onto the wire in a color pattern you love — classic red and white, blush and cream, or a rainbow of jewel tones — packing them snugly until the wreath is full. Tie a small bow from satin or velvet ribbon at the top of the ring, and add a loop of gold thread for hanging. A dot of hot glue between balls keeps everything snug, and a tiny sprig of faux greenery tucked behind the bow adds a professional finishing touch.
These miniature wreaths bring soft color and texture to the tree, and they’re light enough for even delicate branches. Make them in matching sets of three or five for a coordinated look, or craft a whole rainbow of them with the kids — threading the balls is a wonderful fine-motor activity. They also work as chair-back decorations tied with long ribbon, or as napkin rings at your holiday table for a pulled-together place setting. Felt balls cost just a few dollars per bag online or at craft stores, and one bag makes a whole cluster of wreaths, making these among the cheapest ornaments on this list.
Twine-Wrapped Pinecone Ornaments
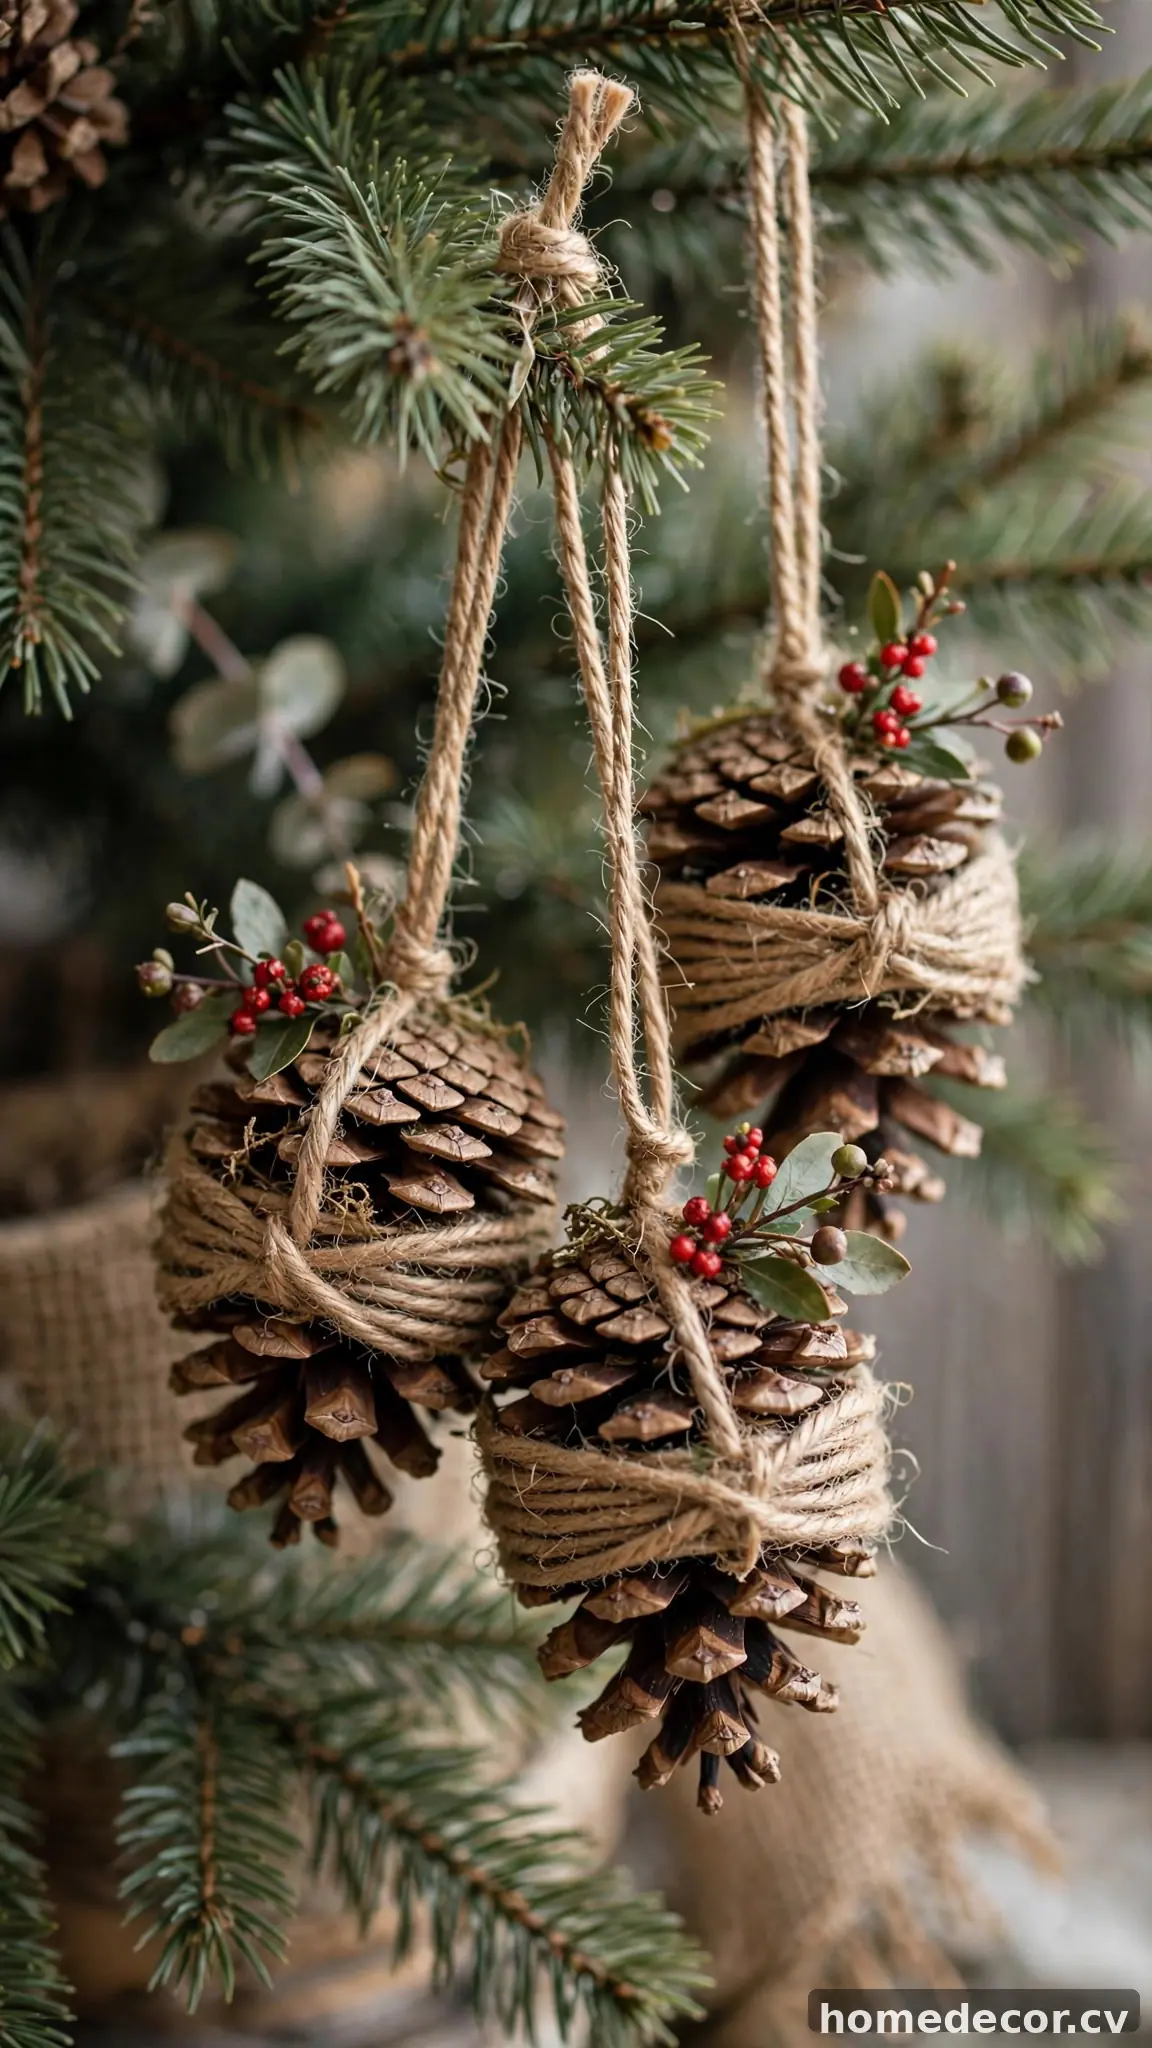
Foraged pinecones become rustic-chic ornaments with nothing more than jute twine and a hot glue gun. Start by baking gathered pinecones at 200°F for about an hour to kill any bugs and open the scales, then let them cool completely. Starting at the top, wrap twine tightly around the pinecone, adding a dab of hot glue every few turns to keep it secure, working down to the tip. Trim the twine and glue the end under the last wrap. Tie a loop of twine at the top for hanging, then tuck in a small sprig of faux berries or a cinnamon stick tied with ribbon for contrast. A light dusting of faux snow spray or brushed-on white acrylic paint on the scale tips gives them a frosted, boutique finish.
Hang these on the lower branches of your tree where their texture can be appreciated up close, or cluster them in a bowl as a centerpiece when you want the tree to look different. They also make wonderful garland filler strung on wire between dried orange slices, or tied to the outside of gift wrap as a natural topper. Because the materials are nearly free — just pinecones from the yard and twine from the dollar store — you can make dozens for the price of a single store-bought ornament. Their earthy look pairs beautifully with both farmhouse and modern rustic holiday schemes.
Paper Quill Snowflakes
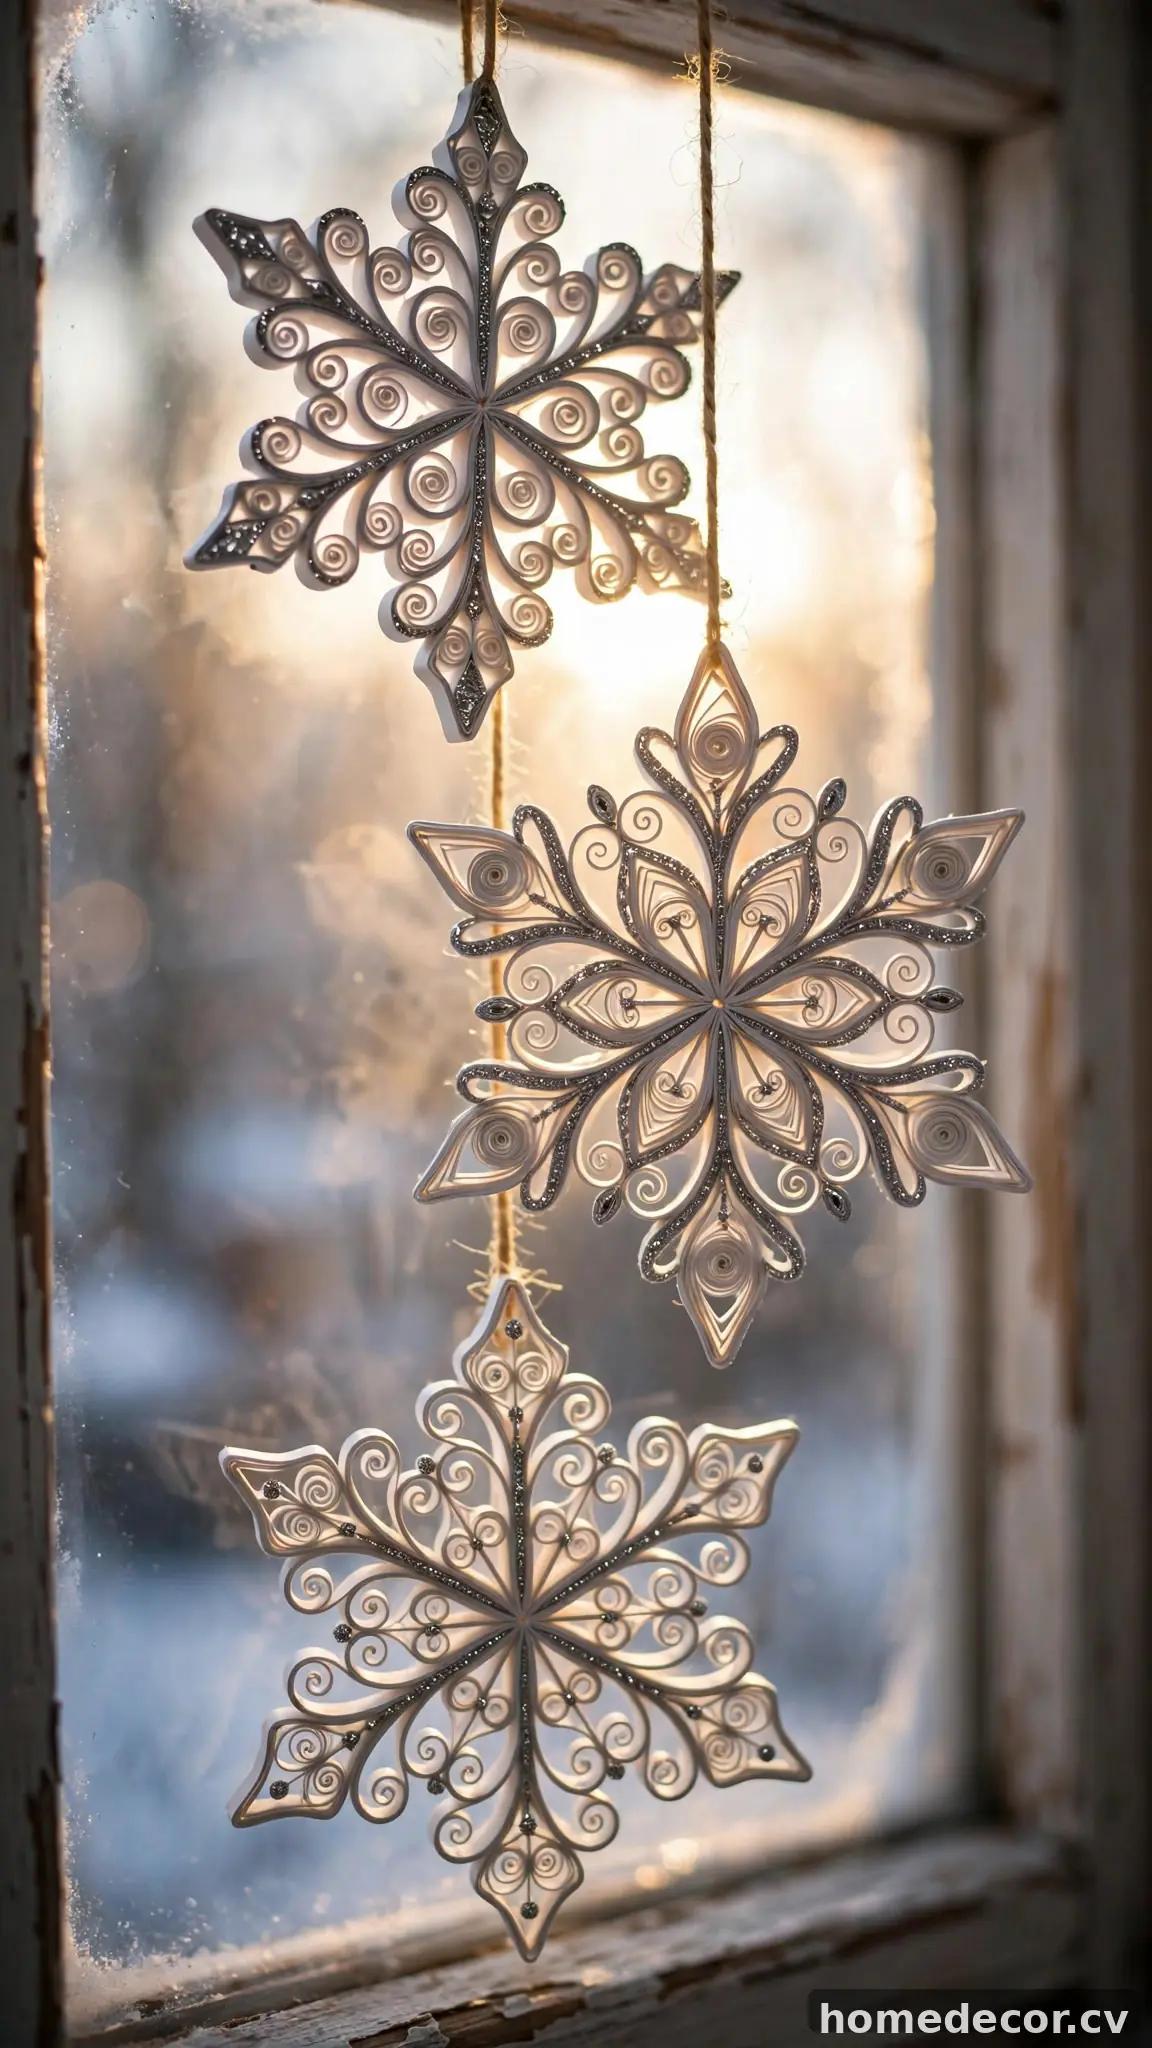
Quilled paper snowflakes look incredibly intricate, yet they’re made from simple strips of paper rolled and shaped by hand. Cut or buy quarter-inch quilling strips in white, icy blue, or silver. Roll tight coils for the center, then form teardrops, marquise shapes, and S-scrolls by pinching the coils into shapes with your fingers. Arrange six teardrops around a center coil to form the classic snowflake arms, adding smaller coils between the arms for detail, and glue each piece where it touches its neighbors using a toothpick to apply tiny dots of craft glue. Let the finished snowflake dry flat for about an hour, then seal it with a light coat of clear spray to prevent warping.
These delicate snowflakes are stunning hung in a window where backlight makes their paper scrollwork glow like real frost. They’re also lovely dangling from the ceiling over a holiday table at varying heights on fishing line. Because paper quilling is so affordable — one pack of strips makes dozens of snowflakes — this is the perfect craft for a cozy afternoon with friends. Vary the sizes from two to six inches for visual interest, and mix white with metallic gold or silver strips for a snowflake collection that looks like it came from an artisan paper studio rather than your kitchen table.
Cinnamon Stick Bundle Ornaments
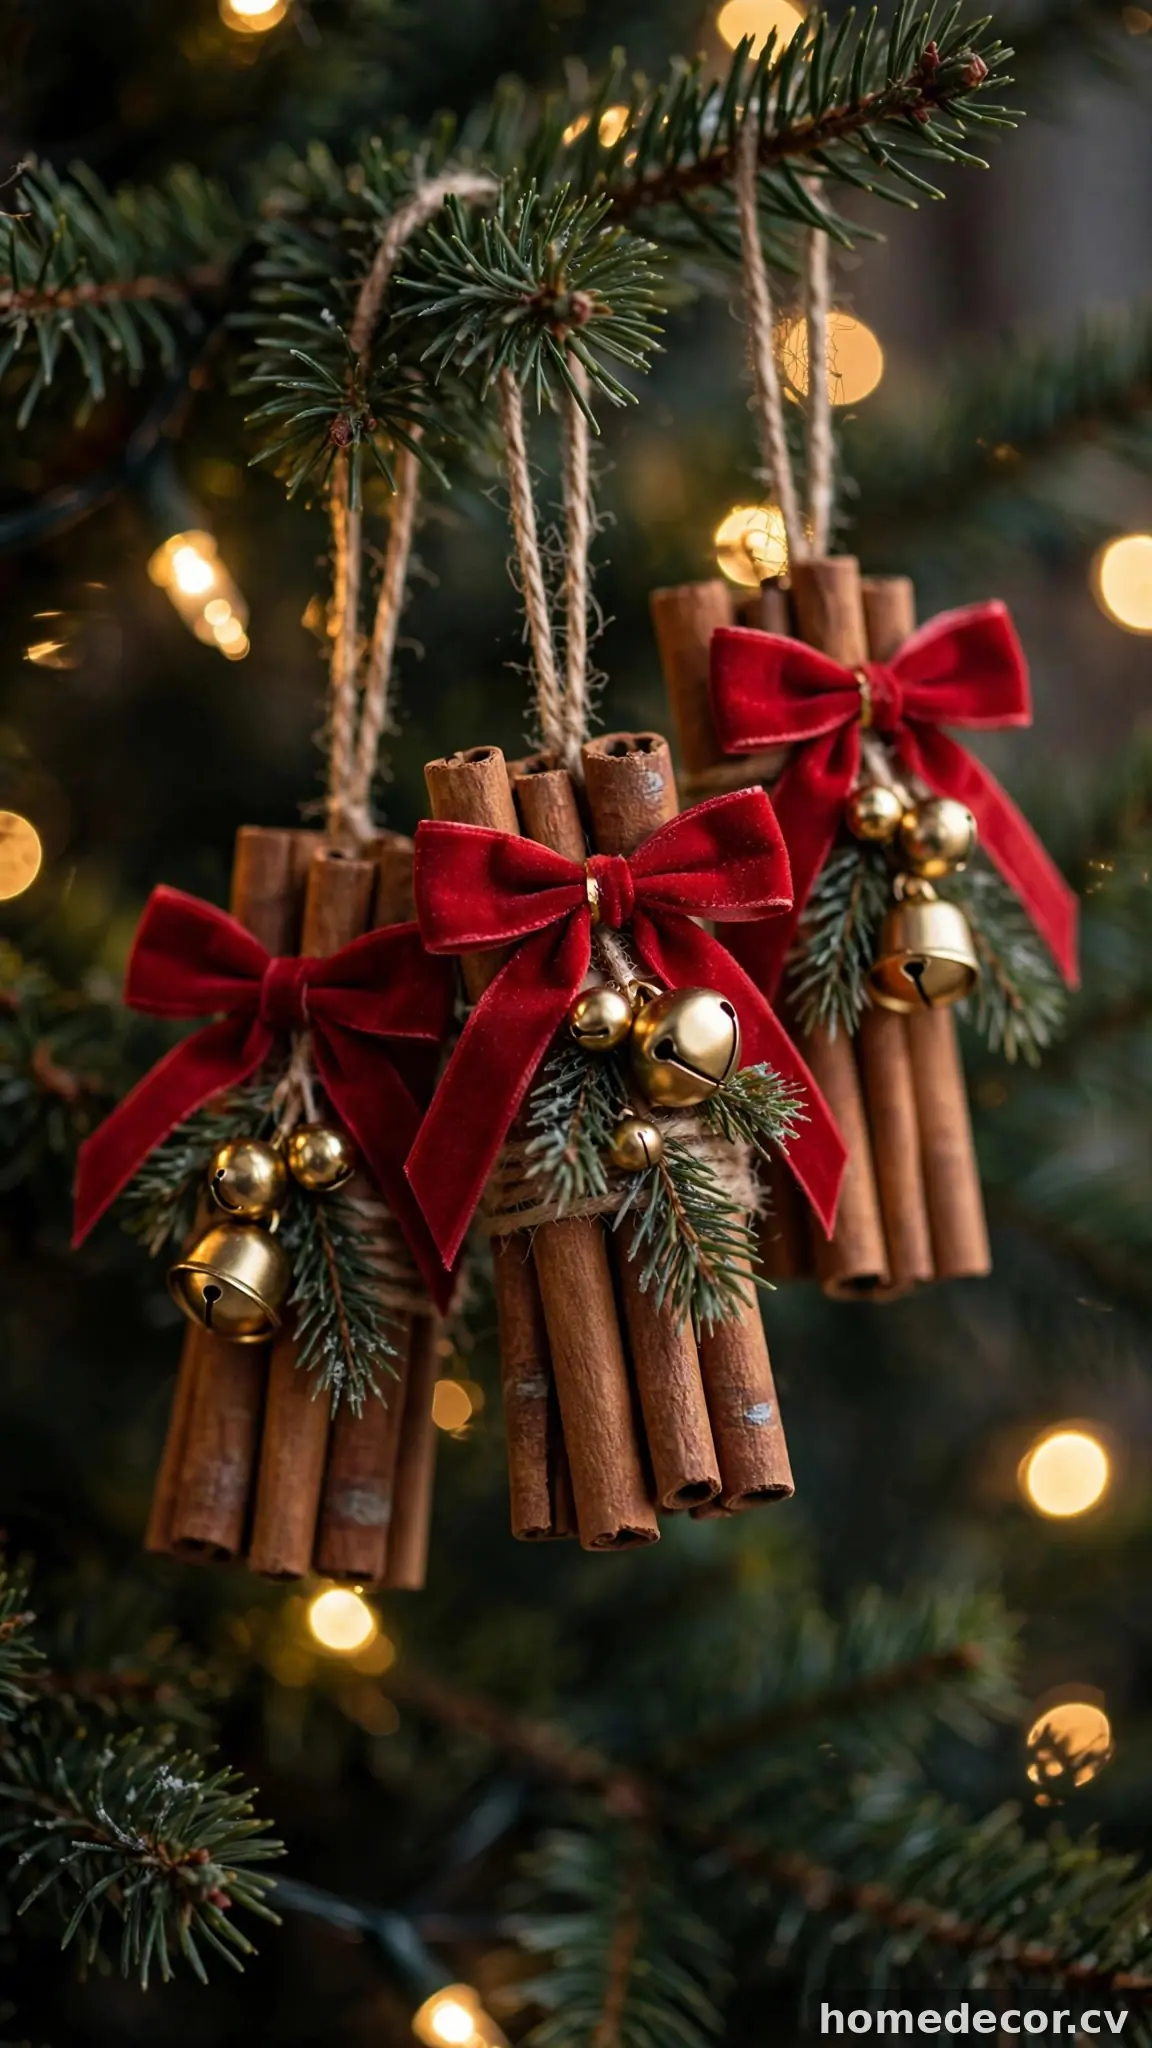
Cinnamon stick bundles smell like Christmas and look like high-end rustic decor, and they take about five minutes each to assemble. Gather three to five cinnamon sticks of roughly equal length and bundle them with a band of red, green, or burlap ribbon tied in a neat bow. For a tree ornament, tie a loop of twine at the back of the bundle for hanging; for a garland accent, wire the bundles to a length of twine spaced a few inches apart. Tuck in a sprig of faux pine, a dried orange slice, or a small pinecone with hot glue for a fuller, professional arrangement. A tiny gold bell tied into the bow adds a festive jingle and a jewel-like accent.
Hang these bundles on the tree near the lights so the warmth deepens their scent — your whole room will smell faintly of spice. They’re also perfect tied onto stockings, used as napkin bundles at the holiday table, or tucked into a wreath for extra fragrance and texture. If you’re planning a full seasonal look, these bundles coordinate beautifully with classic [christmas mantel ideas](https://homedecor.cv/18-christmas-mantel-ideas-for-a-stunning-focal-point/) where scent and texture matter as much as color. Cinnamon sticks are inexpensive in bulk at grocery or warehouse stores, and the fragrance lasts the whole season, making these the ornaments that engage every sense. Make a big batch in one sitting and you’ll have fragrant decor ready for the tree, the table, and thoughtful hostess gifts all season long.
Scrap Ribbon Tassel Ornaments
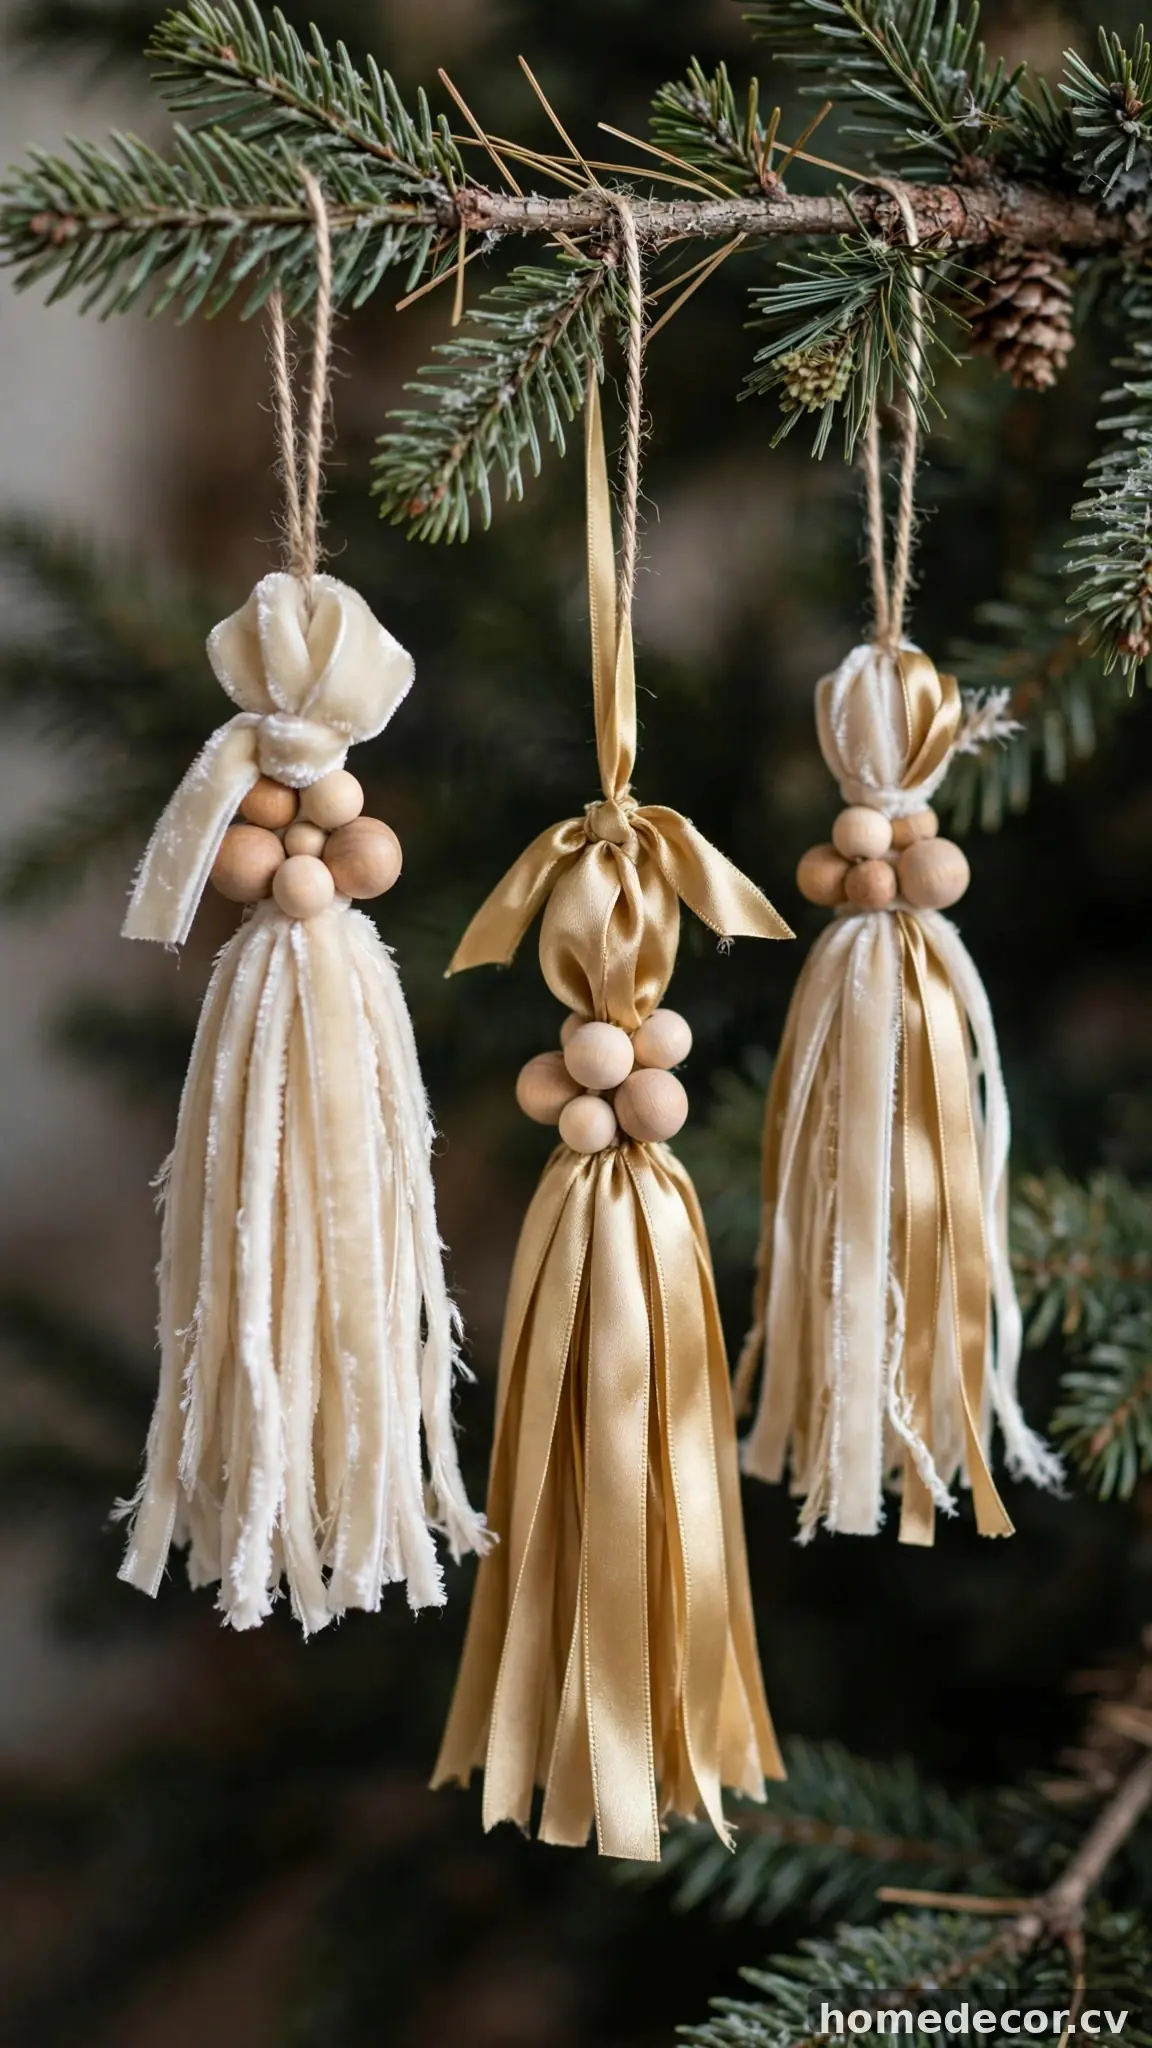
Ribbon tassels turn leftover fabric scraps into elegant ornaments that rival anything in a holiday catalog. Cut strips of ribbon, fabric, or even frayed burlap into six-inch lengths — mixing textures like velvet, satin, and lace gives the richest look. Fold the strips over a short piece of twine, then bind the folded top tightly with more ribbon or embroidery floss to form the tassel head, leaving a loop for hanging. Trim the bottom ends evenly, then fray or angle-cut them for a finished look. Add a small wooden bead or gold jingle bell above the binding for a polished detail. Hot glue a tiny pine sprig or dried flower to the head for extra charm.
These tassels hang gracefully from tree branches, swaying gently and catching light on their varied textures. Make them in a single color family — all cream and gold, or cranberry and forest green — for a sophisticated designer look, or go bohemian with a rainbow of scraps. They also work beautifully as gift toppers, doorknob decorations, or tied to the back of dining chairs. Because they use up scraps and remnants you already own, the cost is essentially zero. A tree trimmed entirely in handmade tassels looks lush, full, and expensive, proving that texture can do the work of a dozen store-bought ornaments.
Thrifted Sweater Baubles
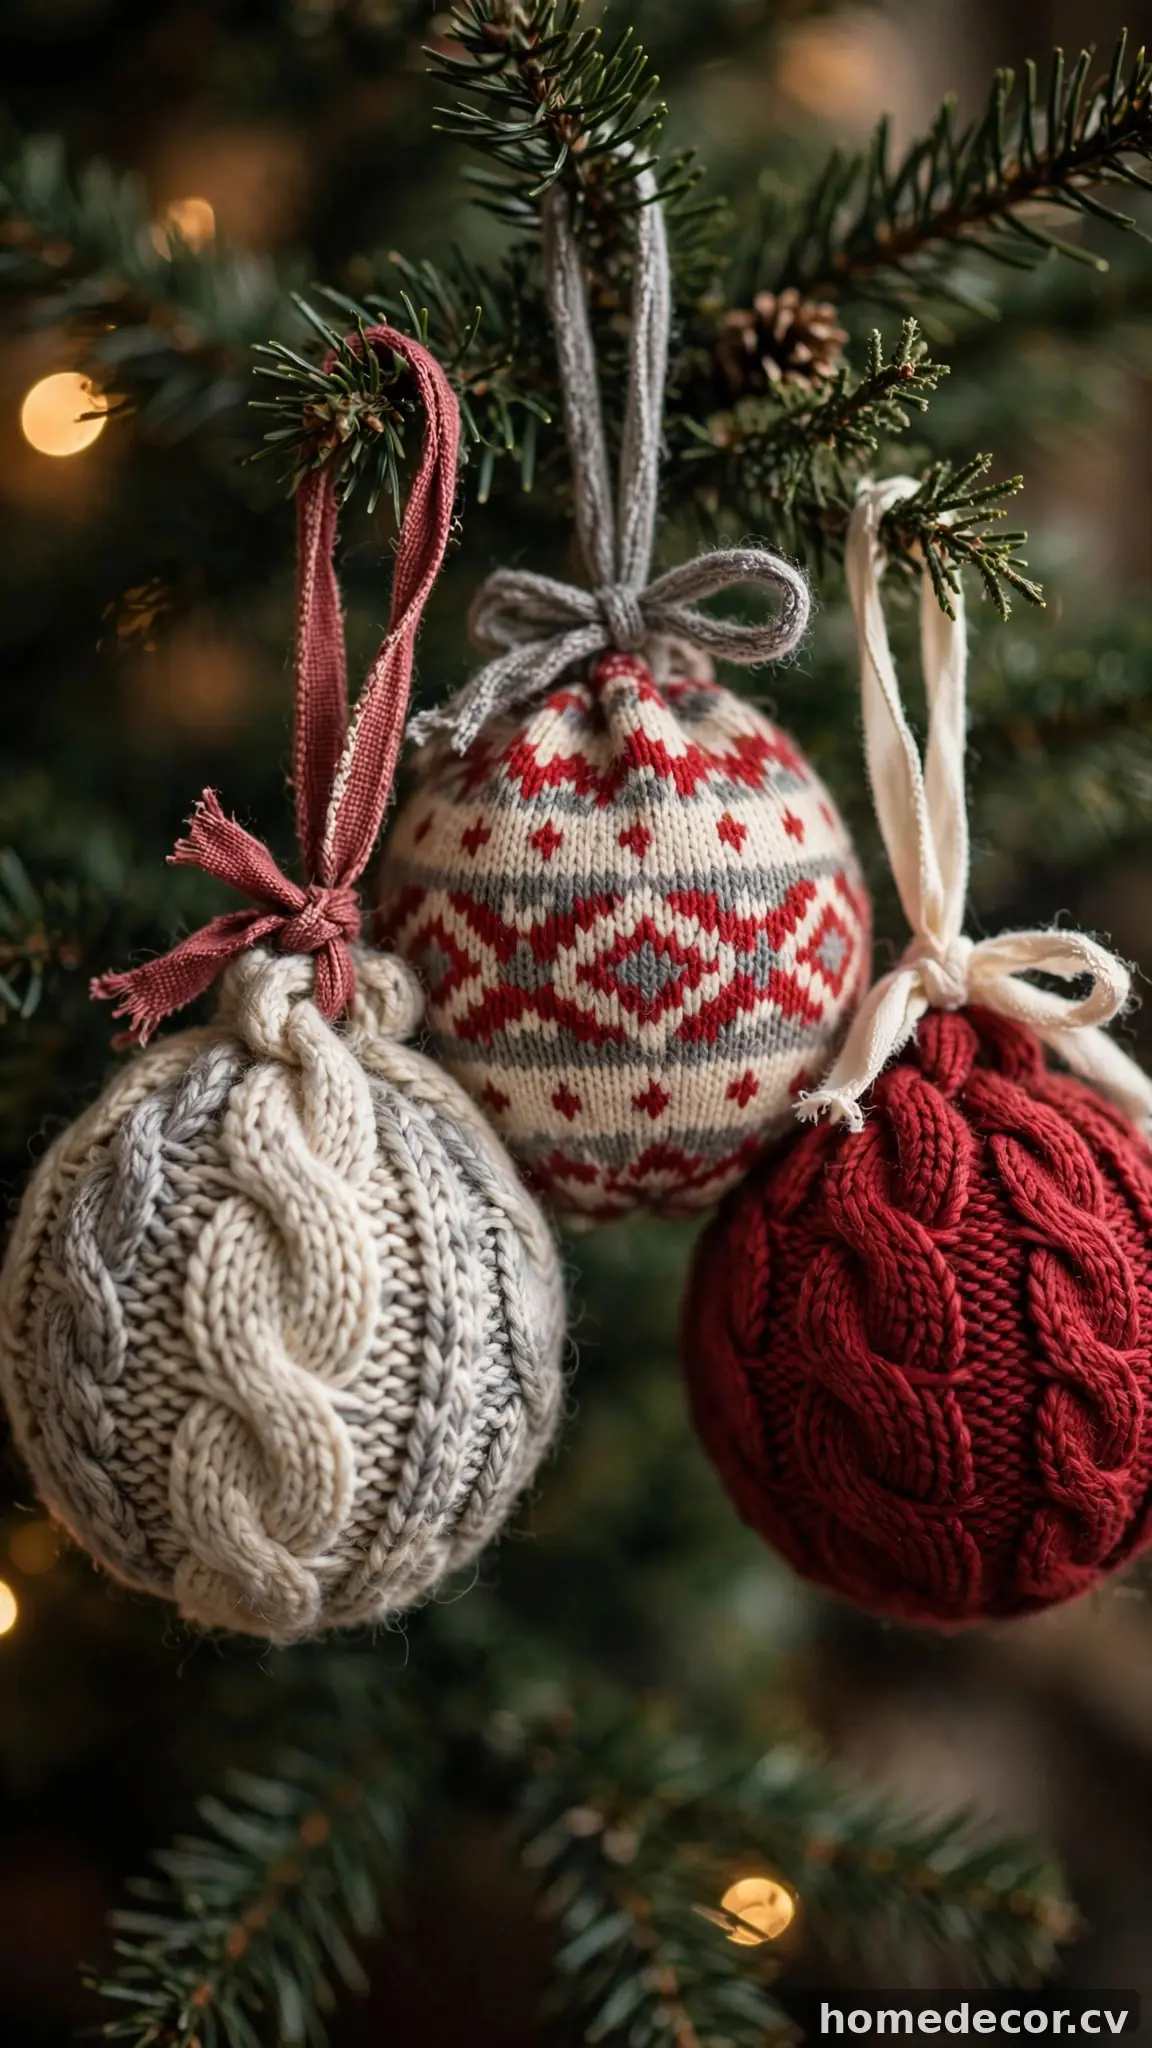
Old sweaters from the thrift store become the coziest ornaments on your tree with this simple wrap technique. Cut the sweater into strips about two inches wide, choosing interesting textures like cable knit, fair isle, or chunky ribbing. Wrap a plain foam or plastic bauble (the cheapest ones from the dollar store work perfectly) with the fabric strips, securing each layer with hot glue and overlapping slightly so no plastic shows through. Trim the excess, glue a cap of matching fabric over the top, and attach a ribbon loop for hanging. A tiny sprig of faux holly or a wooden button glued at the top adds a charming finishing detail.
These fabric-wrapped baubles bring wonderful texture and warmth to a tree, especially in a cozy cabin or Scandinavian-style scheme. Because thrifted sweaters cost a dollar or two and yield enough fabric for a dozen ornaments, this project stretches a tiny budget impressively far. Mix patterns — a red cable knit beside a cream fair isle beside a gray ribbed one — for a collected, curated look. They’re also lovely as bowl fillers on a coffee table or strung as a garland. Best of all, the soft fabric hides every imperfection, so even first-time crafters get professional-looking results. For extra charm, stitch a tiny initial or snowflake onto one bauble per family member — a personal touch that turns simple fabric into a treasured keepsake.
Dried Flower Glass Baubles
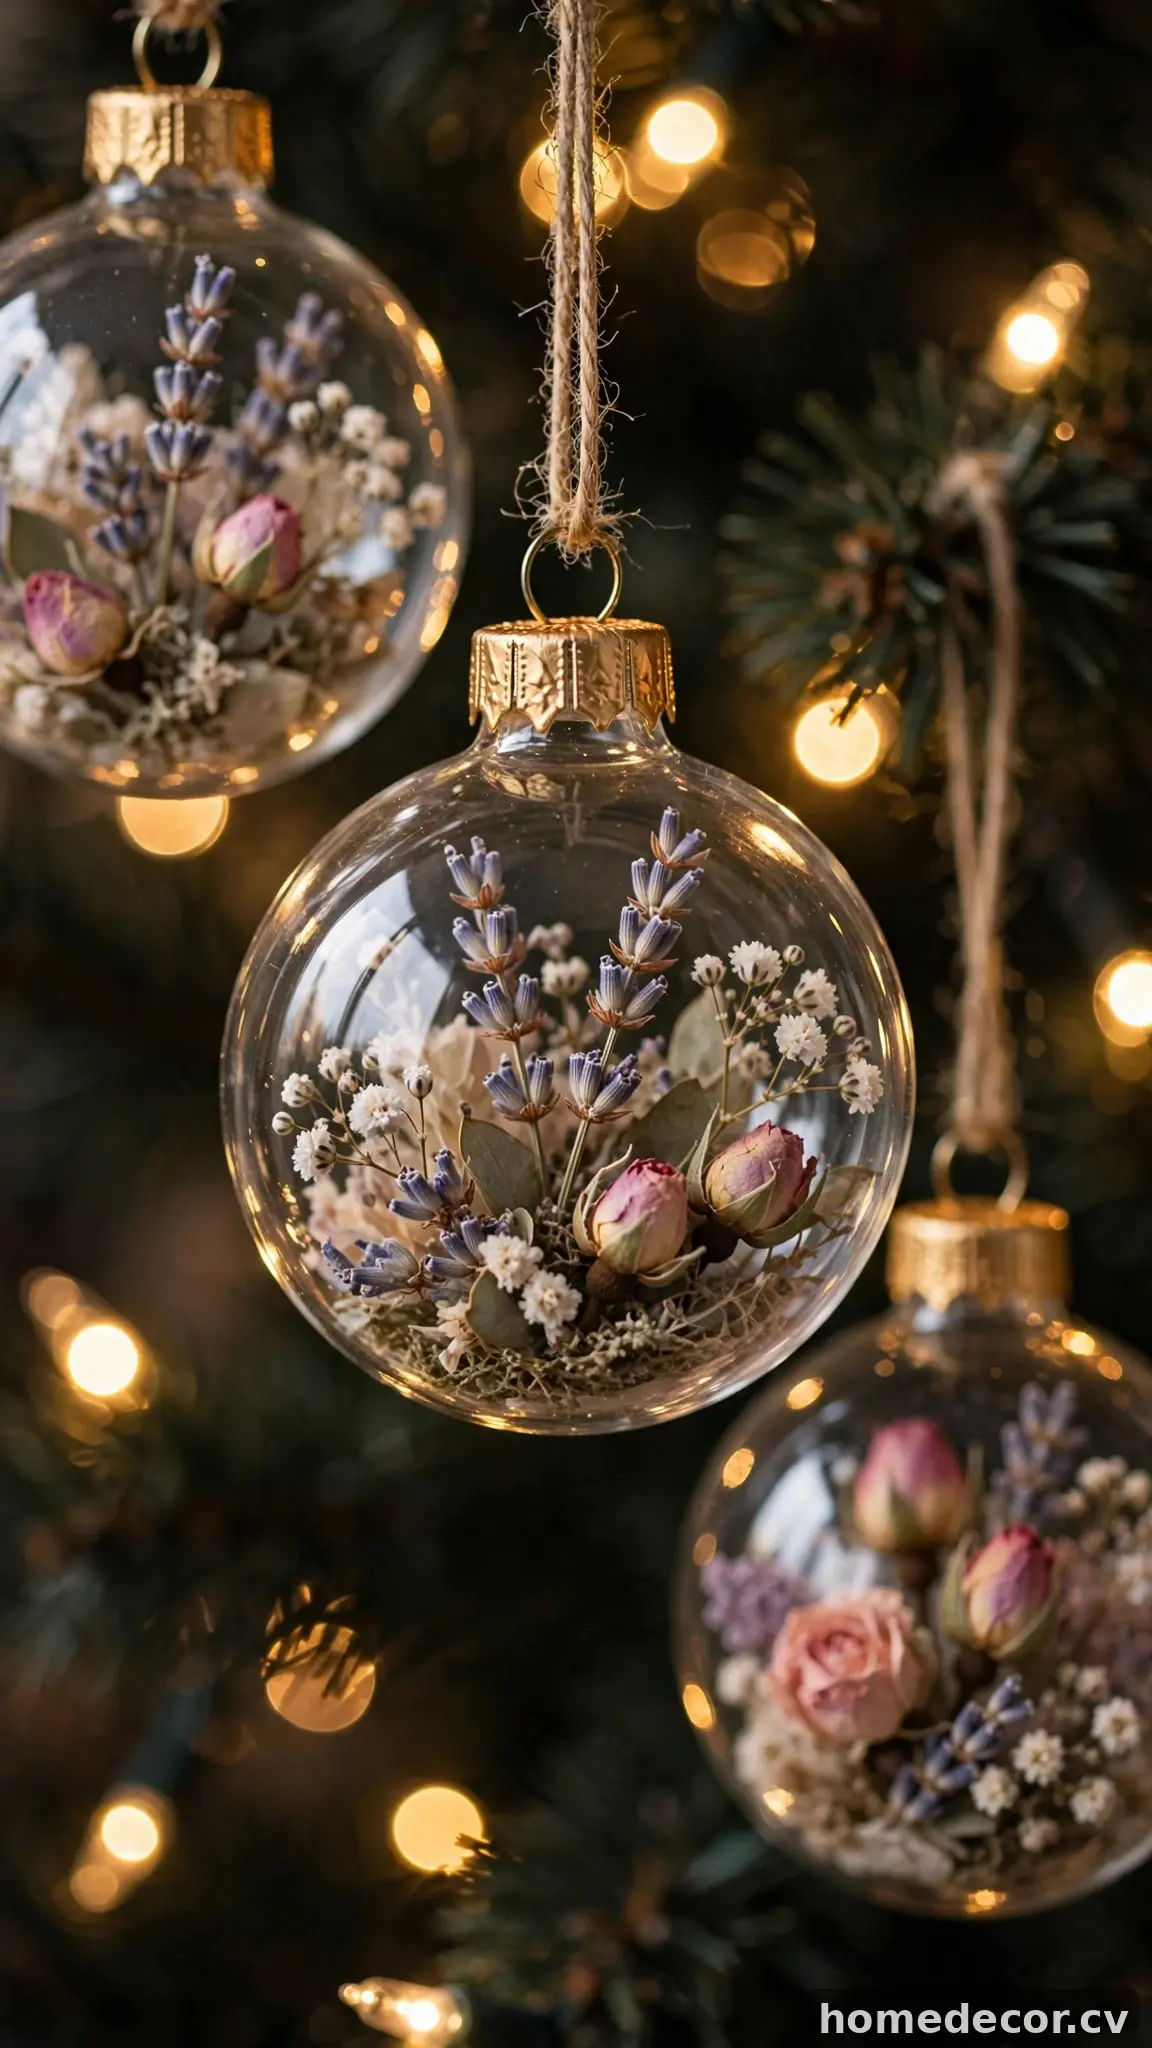
Clear glass or plastic baubles filled with dried flowers look like expensive artisan ornaments, but they’re simple to assemble. Buy inexpensive clear fillable baubles (craft stores sell them for about a dollar each, or reuse old clear ones). Fill each with a small arrangement of dried lavender, baby’s breath, tiny rosebuds, or preserved moss, using tweezers to position the stems through the bauble opening. Add a pinch of faux snow, a few gold stars, or dried petals for color. Replace the cap, tie a silk ribbon through the cap loop, and consider painting the cap gold or copper with metallic acrylic paint for an upscale detail that hides the plastic look.
Hang these on the tree where light passes through them — the dried flowers glow like tiny terrariums against the lights. They’re also gorgeous displayed in a glass bowl on a side table or hung in a sunny window where they catch daylight all winter. Choose dried flowers in a single color palette, like blush and cream or deep burgundy and gold, for a cohesive designer look. Dried flowers from the craft store or your own garden cost very little, and each bauble uses only a small handful. These heirloom-style ornaments elevate any tree and make thoughtful handmade gifts in a pretty box.
Wooden Bead Garland Ornaments
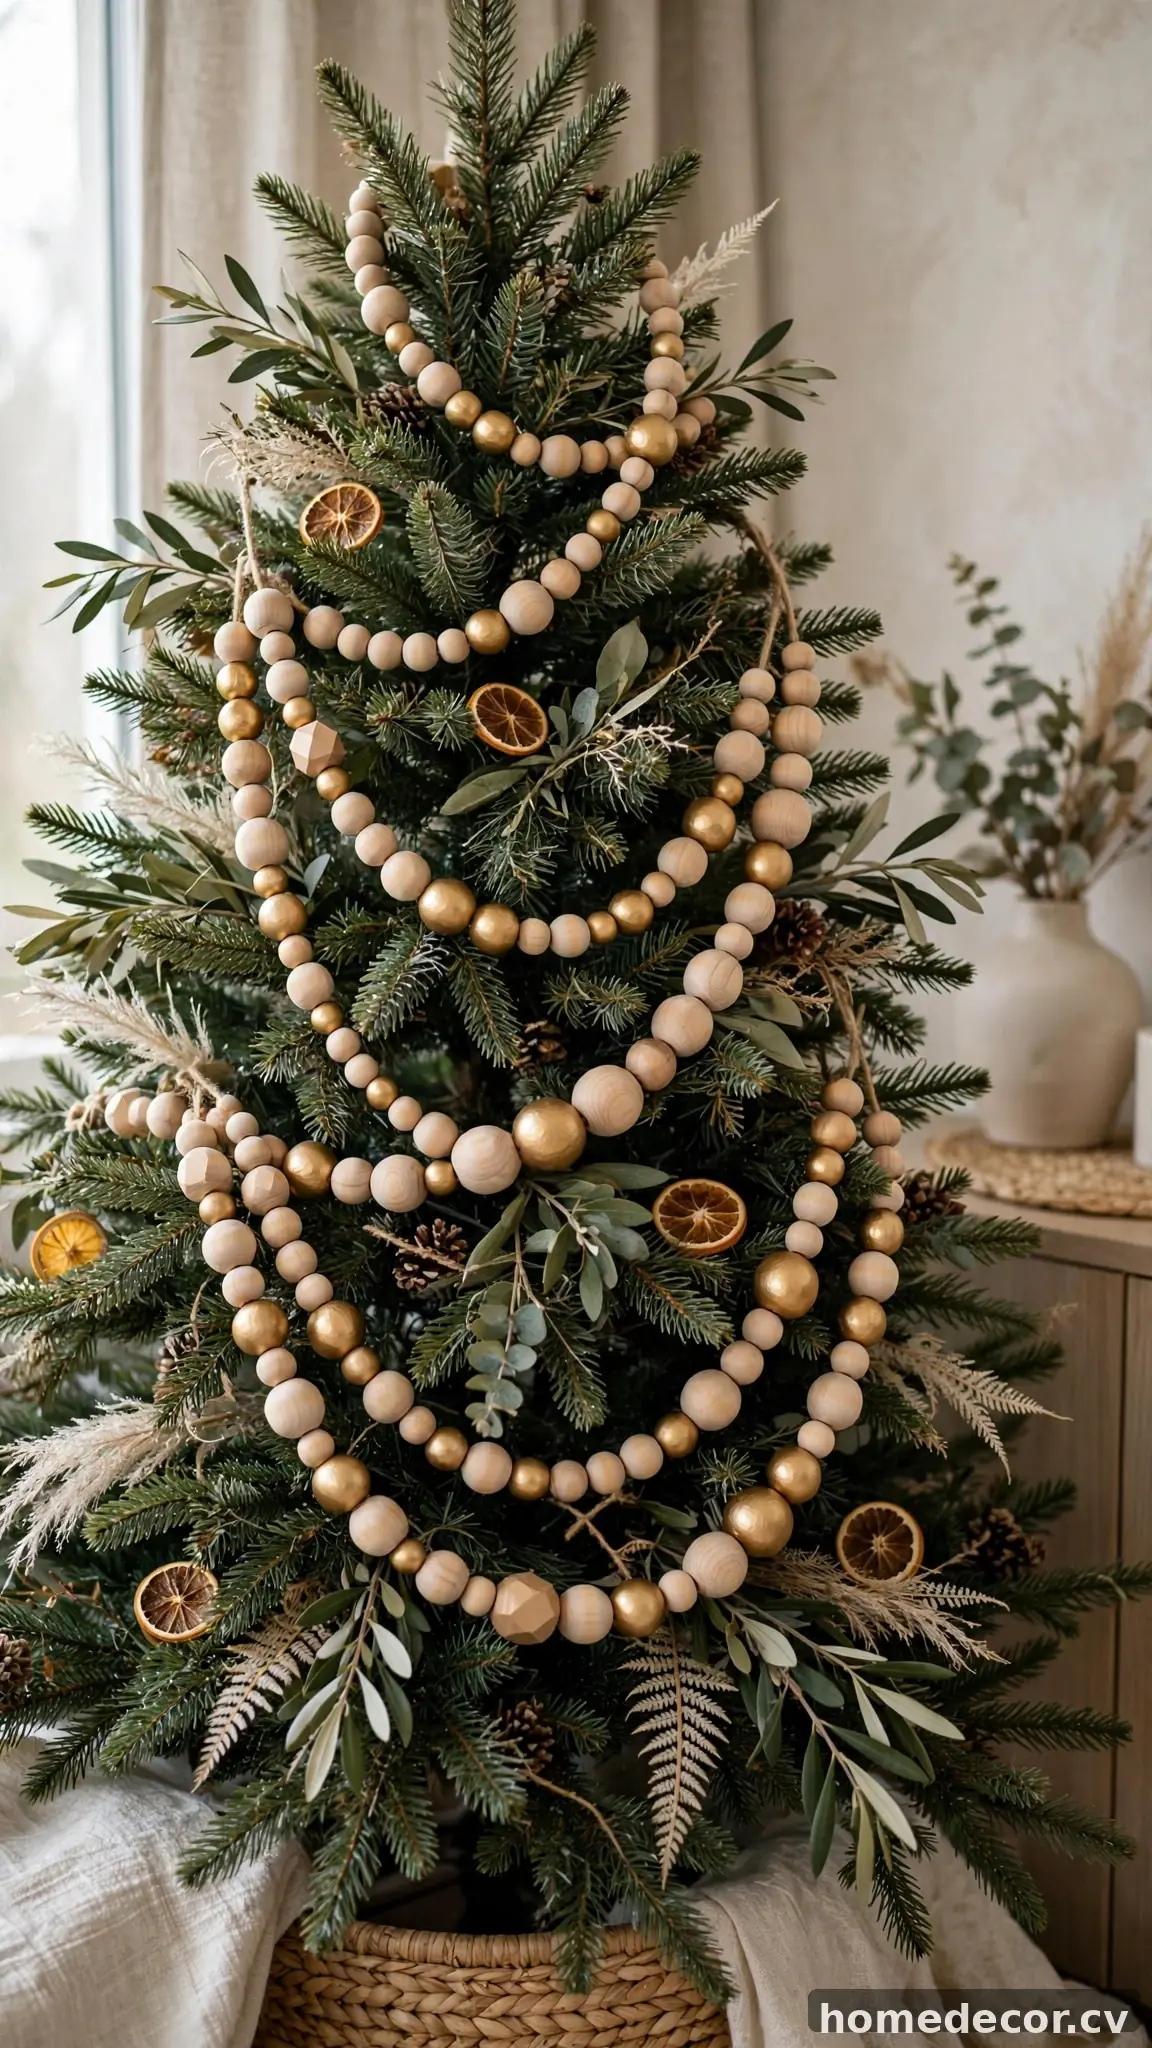
Wooden bead garlands draped on the tree look effortlessly stylish, and a whole strand costs just a few dollars in materials. Buy a bag of unfinished wooden beads in mixed sizes (round, oval, and faceted beads add the most interest) and a spool of jute twine or cotton cord. Thread the beads in a repeating pattern — for example, three small rounds, one large oval, three small rounds — until the strand reaches about six feet. Tie a loop at each end for draping. For extra polish, stain half the beads with wood stain or paint them in matte white, black, or metallic gold before stringing, letting them dry for two hours. A tassel of twine at each end finishes the look.
Drape these garlands in swags across the tree instead of traditional tinsel for a modern, organic feel that looks straight out of a home decor magazine. They’re also perfect strung along a mantel, across a doorway, or wrapped around a staircase banister for a coordinated whole-room look. If you’re styling a full holiday kitchen, wooden bead garlands echo the natural textures in many [christmas kitchen decor ideas](https://homedecor.cv/16-christmas-kitchen-decor-ideas-for-holiday-cheer/) and tie the rooms together beautifully. The beads are lightweight, reusable year after year, and endlessly customizable — one afternoon of threading gives you decor for the entire house. Keep a few strands neutral and paint others in your holiday palette so you can refresh the look each year without buying anything new.
Origami Paper Stars

Folded paper stars bring a crisp, graphic beauty to the tree and cost literally nothing if you use scrap paper. Cut strips of paper about one inch wide and ten inches long — old book pages, sheet music, maps, or patterned scrapbook paper all work beautifully. Tie each strip into a loose knot to form a pentagon, then wrap the long end around the pentagon, folding along its edges, until you reach the short tail. Tuck the tail in, then gently puff the star by pressing the center of each edge inward with your fingernail. String several stars on thread at intervals for a garland, or attach a single star to a ribbon loop for an individual ornament.
These little stars look stunning en masse — a tree dotted with dozens of gold and cream origami stars has a warm, festive glow that expensive ornaments can’t replicate. They’re also lovely scattered on the holiday table, tucked into gift wrapping, or hung in a window as a shimmering curtain on fishing line. Use metallic or glittered paper for maximum sparkle, or vintage book pages for a nostalgic, literary charm. The folding takes a few tries to master, but once you get the rhythm, you can make a star in under a minute. Kids love this craft too, making it a perfect family holiday activity.
Bottle Cap Photo Ornaments
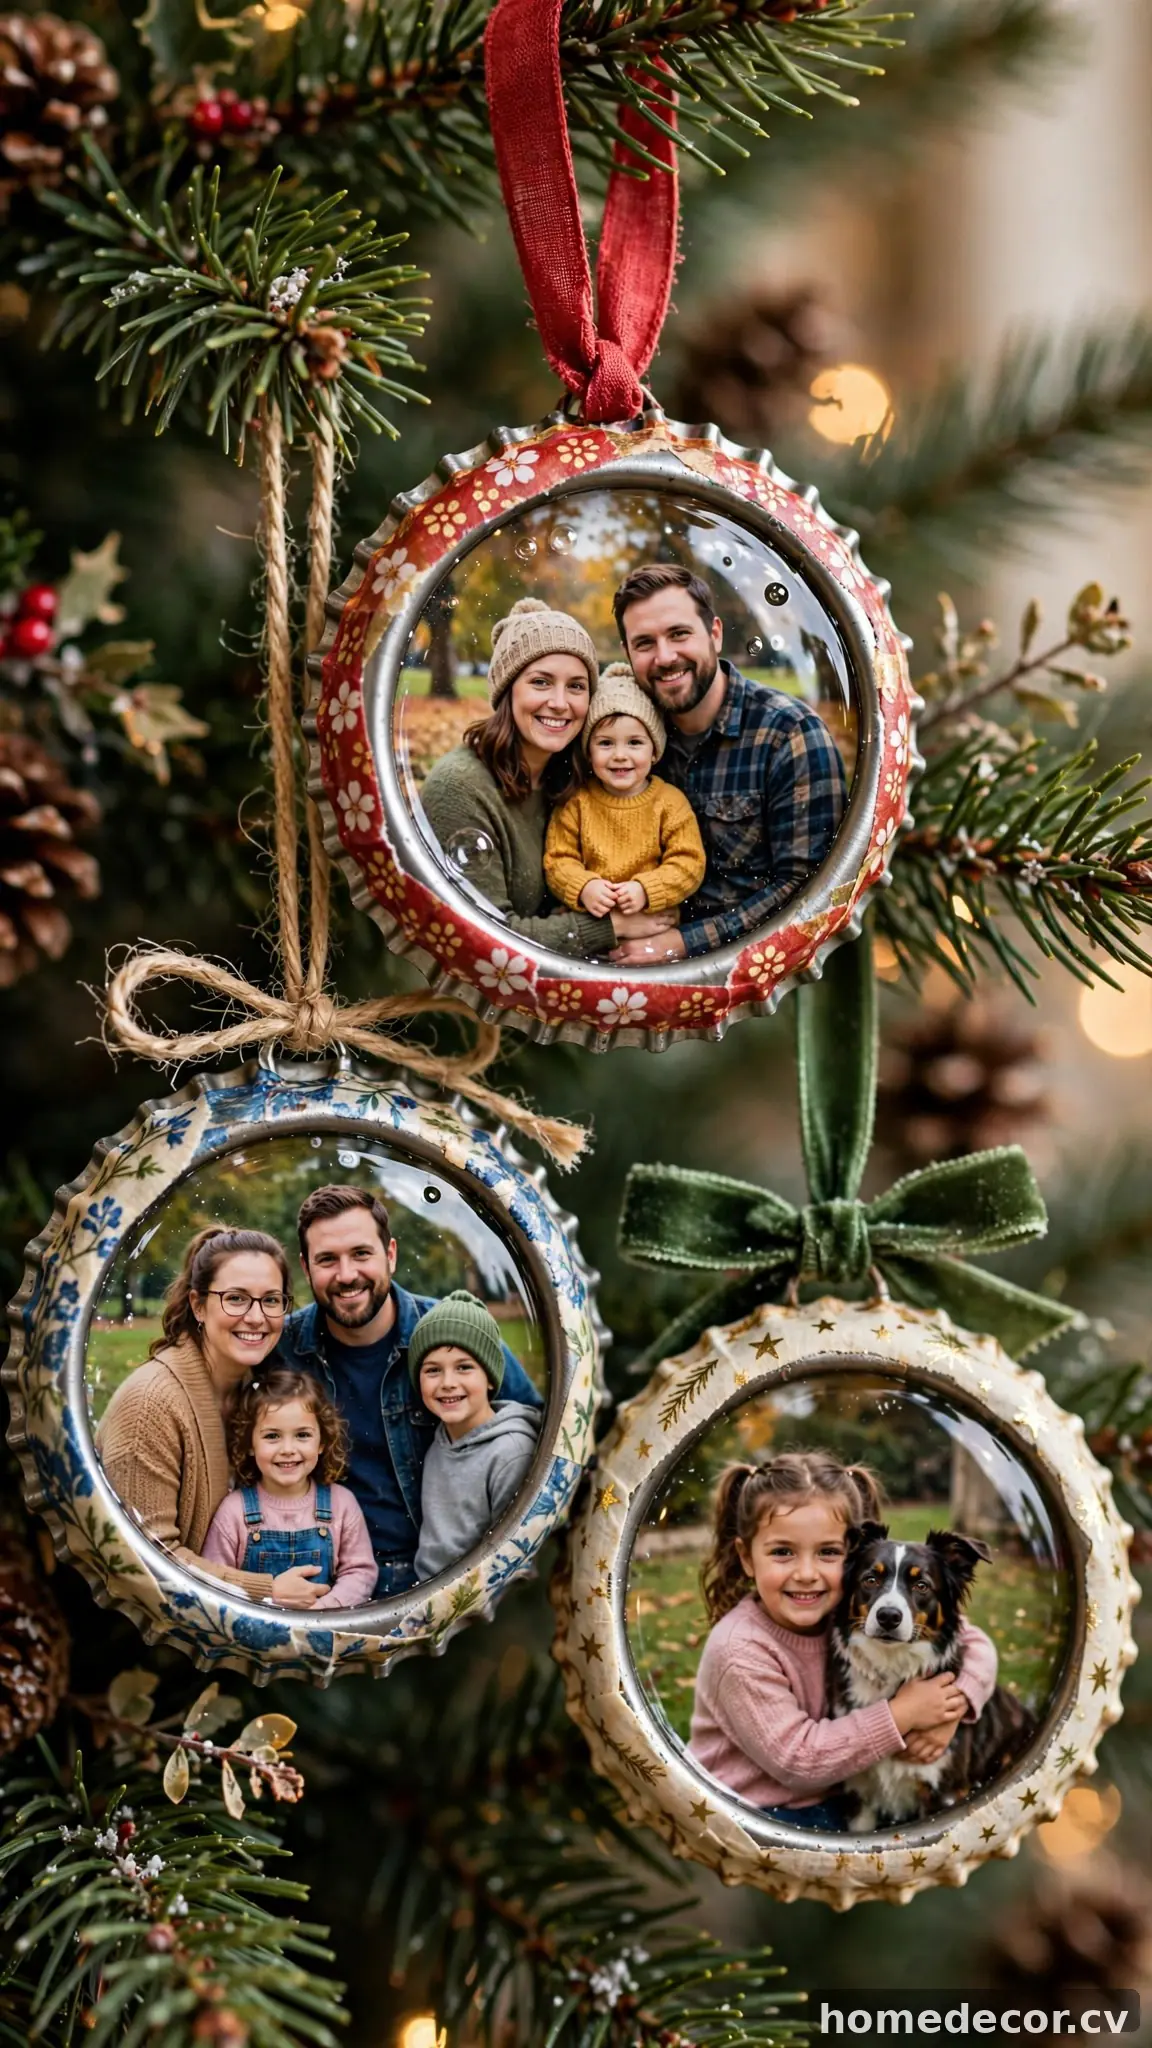
Bottle cap ornaments turn favorite family photos into the most meaningful decorations on the tree. Save metal bottle caps (or buy new craft caps cheaply online) and flatten them slightly with a hammer on a hard surface for a smooth base. Cut photos into one-inch circles — copies printed on regular paper work better than glossy prints, which can bubble. Glue the photo circle inside the cap with clear-drying craft glue, then fill the cap with a thin layer of clear resin or dimensional glaze (like Mod Podge Dimensional Magic) and let it cure for 24 hours for a glass-like domed finish. Glue a ribbon loop to the back with hot glue, and decorate the cap’s edge with washi tape or a thin line of glitter glue.
These photo ornaments become instant family treasures — make one each year with that season’s best photo and watch the collection grow. They hang beautifully on the tree, but they’re also the most personal gift toppers imaginable: tie one onto a wrapped present for grandparents and watch them tear up. Use school photos, pet portraits, or vacation snapshots for variety. The domed resin finish makes them look professionally manufactured, and the whole project costs pennies per ornament. Store them carefully between tissue layers, as the resin dome can scratch, and they’ll be cherished for decades. Tuck one into each stocking or hang a set on a small tabletop tree for a display that’s entirely about the people you love most.
Pressed Eucalyptus Hoop Ornaments
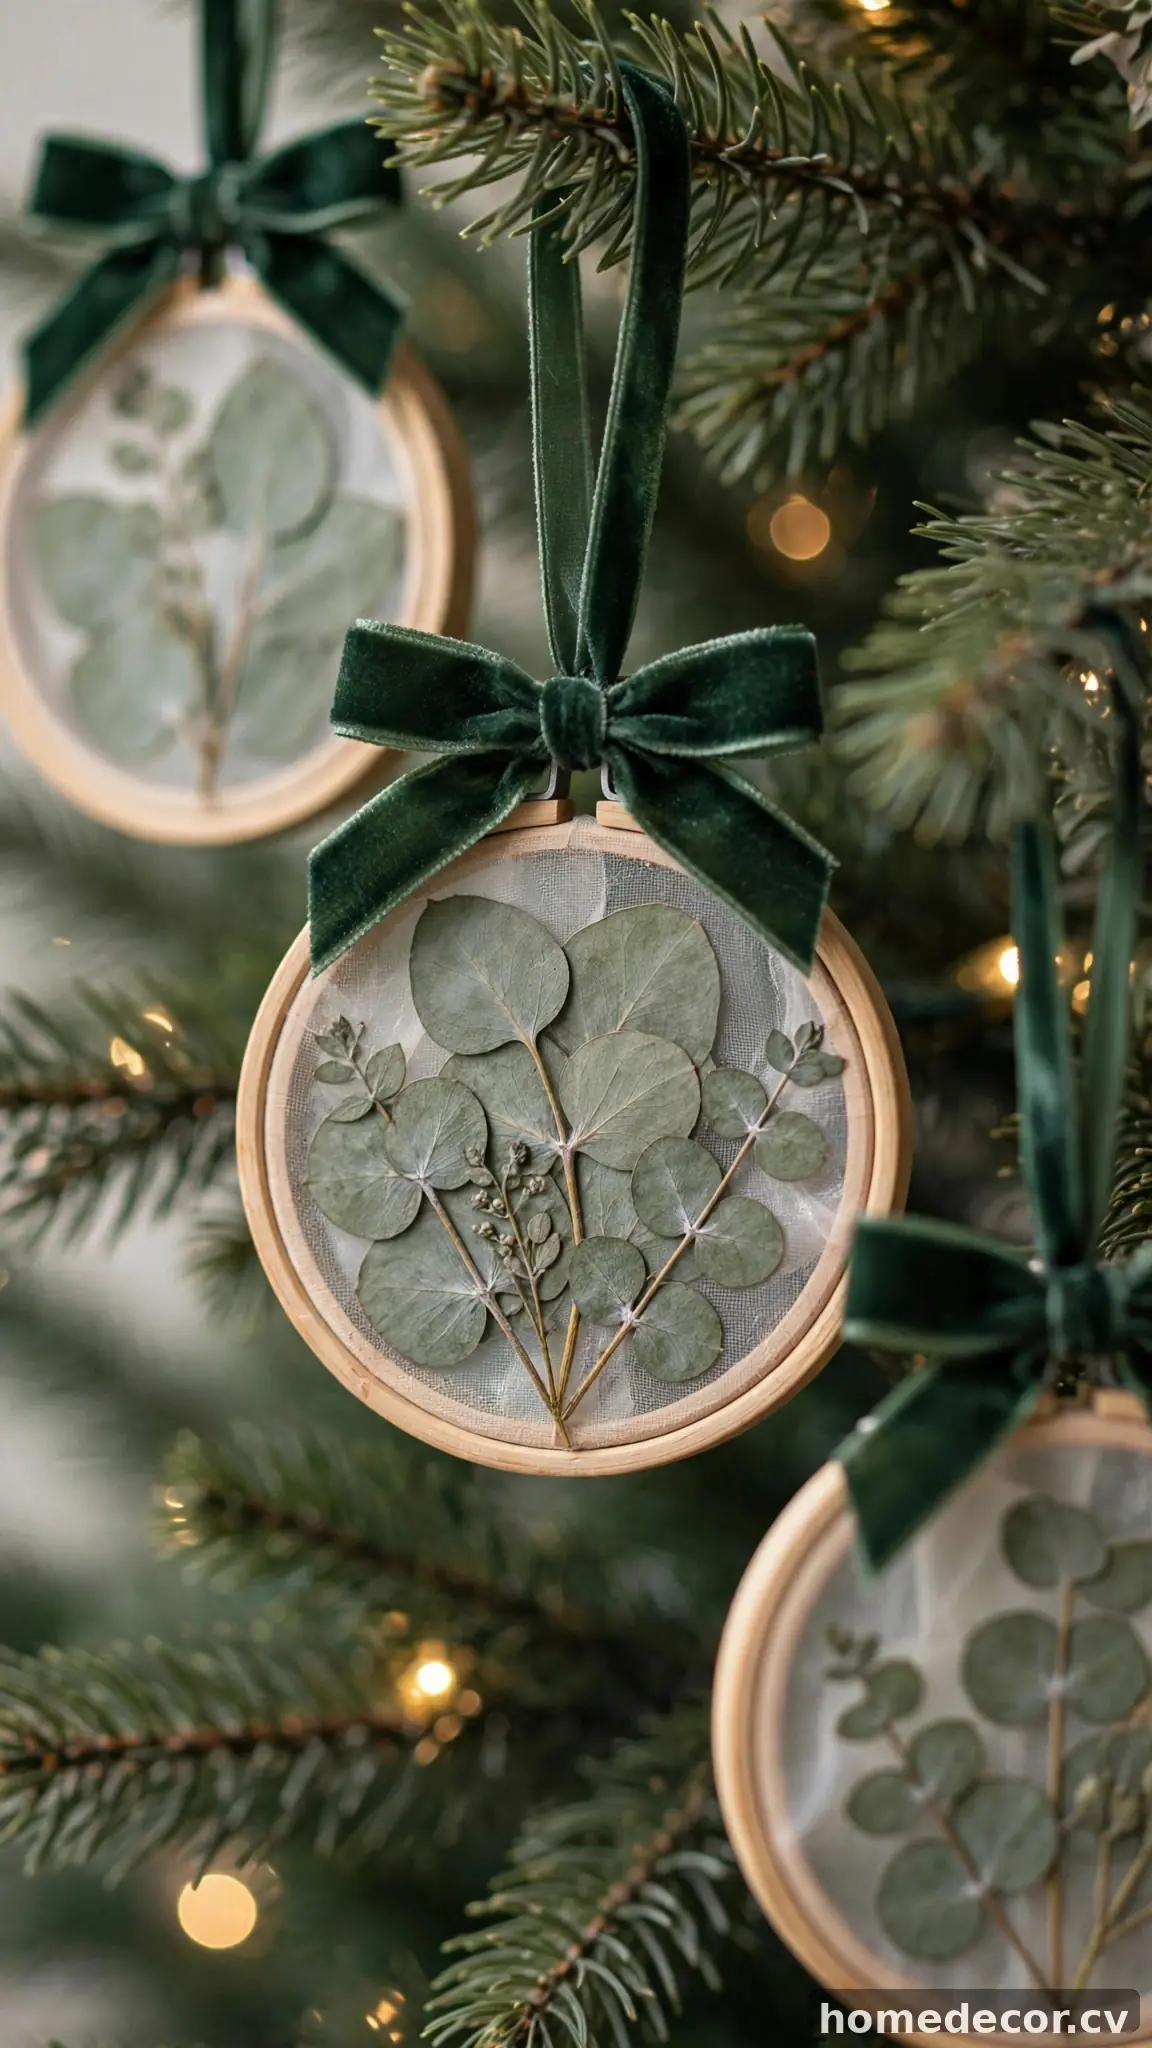
Embroidery hoops filled with pressed eucalyptus look like modern botanical art, yet they’re simple to create. Press fresh eucalyptus sprigs between heavy books for about a week, or buy pre-pressed leaves from a craft store to skip the wait. Open a small wooden embroidery hoop (three to four inches across), lay a piece of sheer white organza or plain muslin across the bottom ring, and arrange the pressed leaves in a pleasing spray on the fabric. Close the hoop, pull the fabric taut, trim the excess, and tighten the screw. Tie a bow of velvet ribbon at the top screw and add a hanging loop of twine. A few tiny dried flowers or a gold-painted leaf adds a festive accent.
These hoops hang like miniature wreaths on the tree, bringing an airy, botanical elegance that balances heavier ornaments. They also look beautiful grouped on a wall as holiday art, or hung in a window where light shines through the sheer fabric. Eucalyptus dries with a lovely silvery-green tone that suits modern, minimalist, and farmhouse styles alike. Small embroidery hoops cost about a dollar each in multipacks, and eucalyptus is inexpensive at florists or grocery stores. For a dramatic look outdoors, these hoops also pair nicely with lights — see these [outdoor christmas lighting ideas](https://homedecor.cv/12-outdoor-christmas-lighting-ideas-that-wow/) for ways to make botanical decor glow after dark.
Lace Doily Balloon Baubles
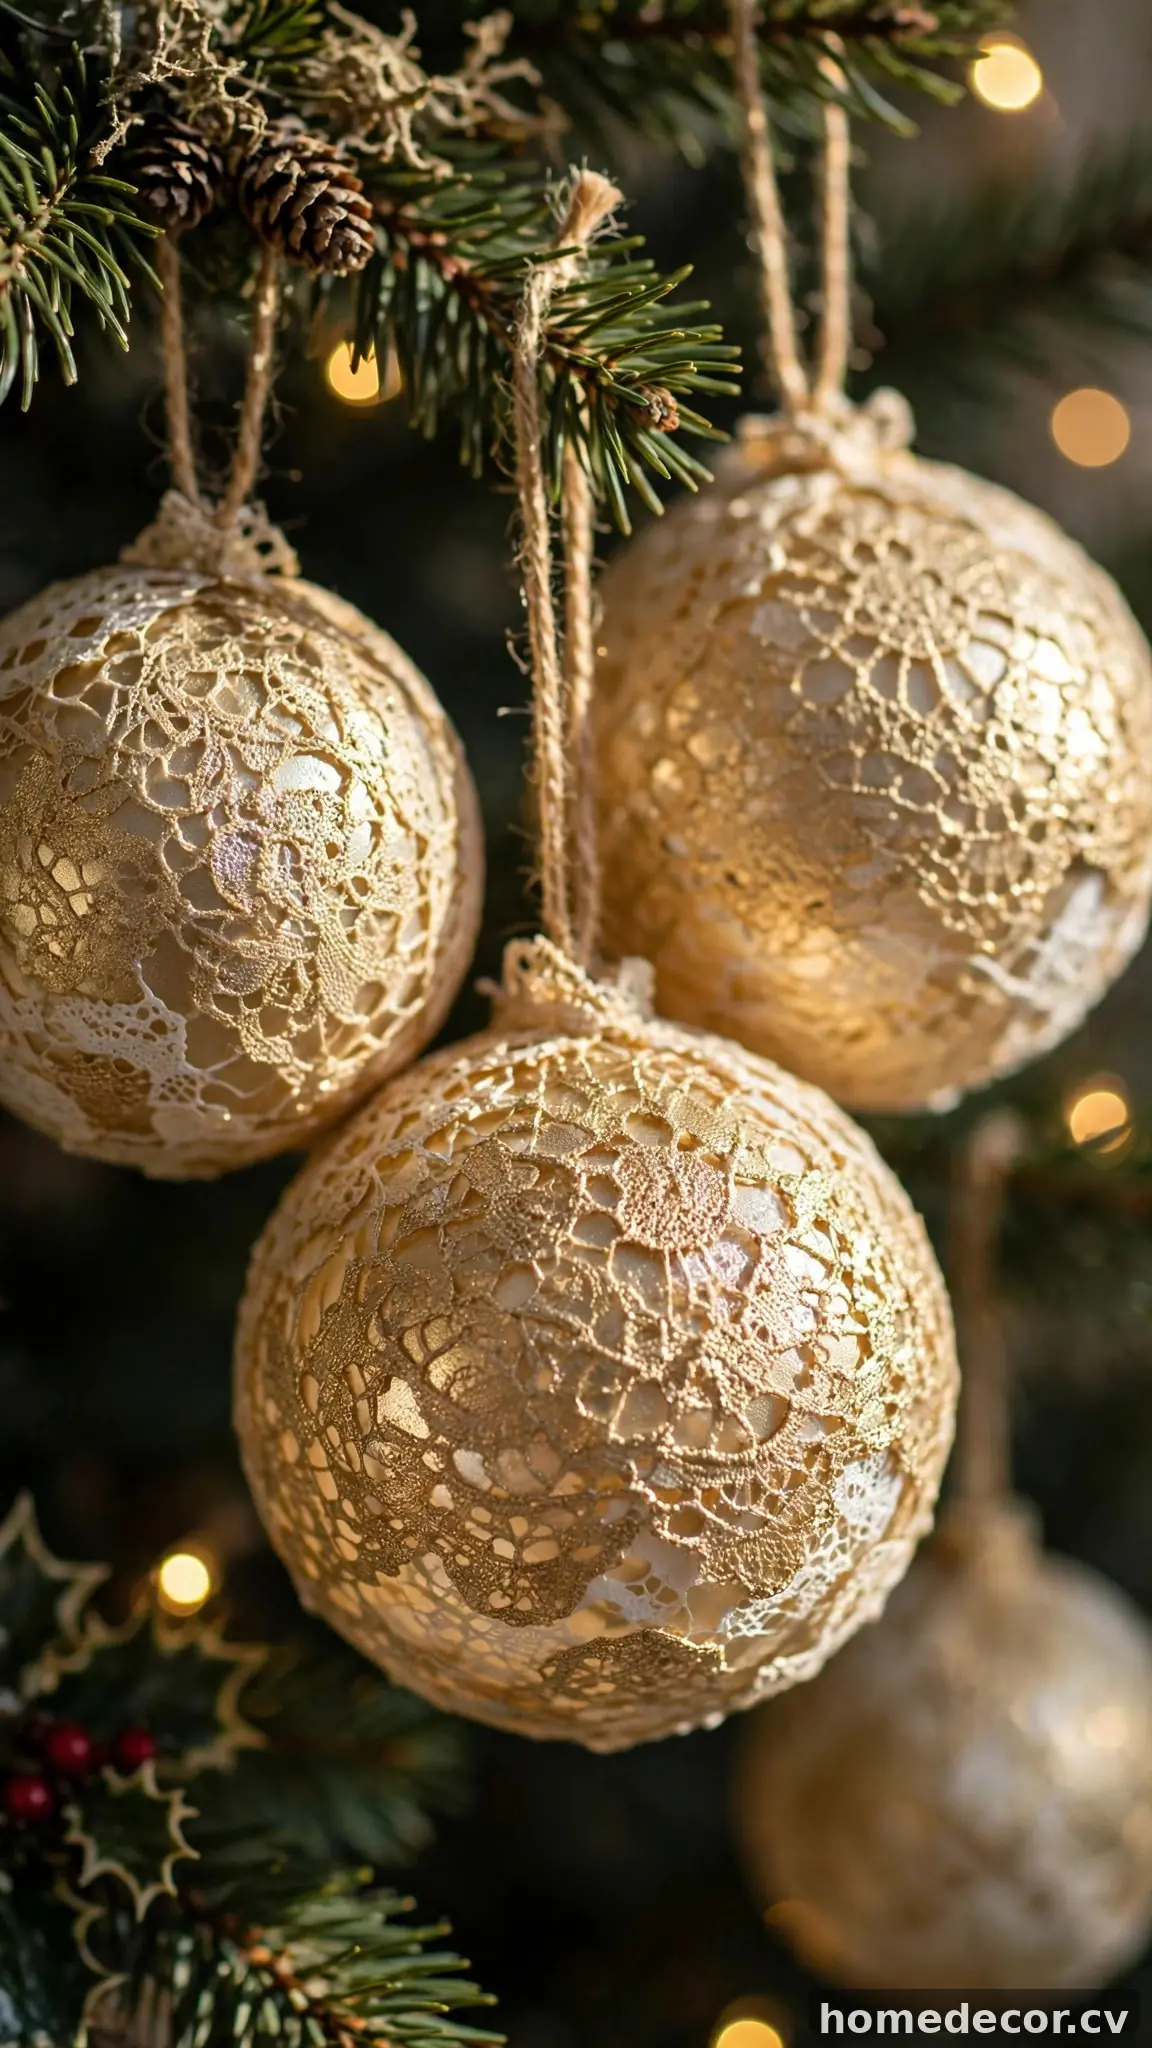
Lace-covered baubles look like vintage heirlooms, made with nothing more than doilies, balloons, and fabric stiffener. Blow up small water balloons to ornament size (about three inches) and tie them off. Cut paper doilies into pieces and soak them in liquid fabric stiffener or a mixture of equal parts white glue and water. Drape the soaked doily pieces over the balloon, overlapping them to cover the surface completely, and let dry for 24 hours until stiff. Pop the balloon and carefully remove it through a gap, then paint the lace shell with metallic gold or pearl-white spray paint for a luxurious finish. Glue a ribbon loop to the top with hot glue.
These ethereal lace orbs look like they cost twenty dollars each at a boutique, but a pack of doilies makes a whole set. Hang them on the tree where they catch the light, or cluster them in a bowl with fairy lights woven through for a magical centerpiece. They also make stunning large-scale decorations hung from the ceiling on long ribbons over the dining table. The spray paint unifies the lace into an elegant single tone, hiding the humble paper origins completely. Handle them gently, as the lace shells are delicate, and store them in individual tissue nests so they keep their shape for many holidays.
Spiced Orange Pomander Ornaments
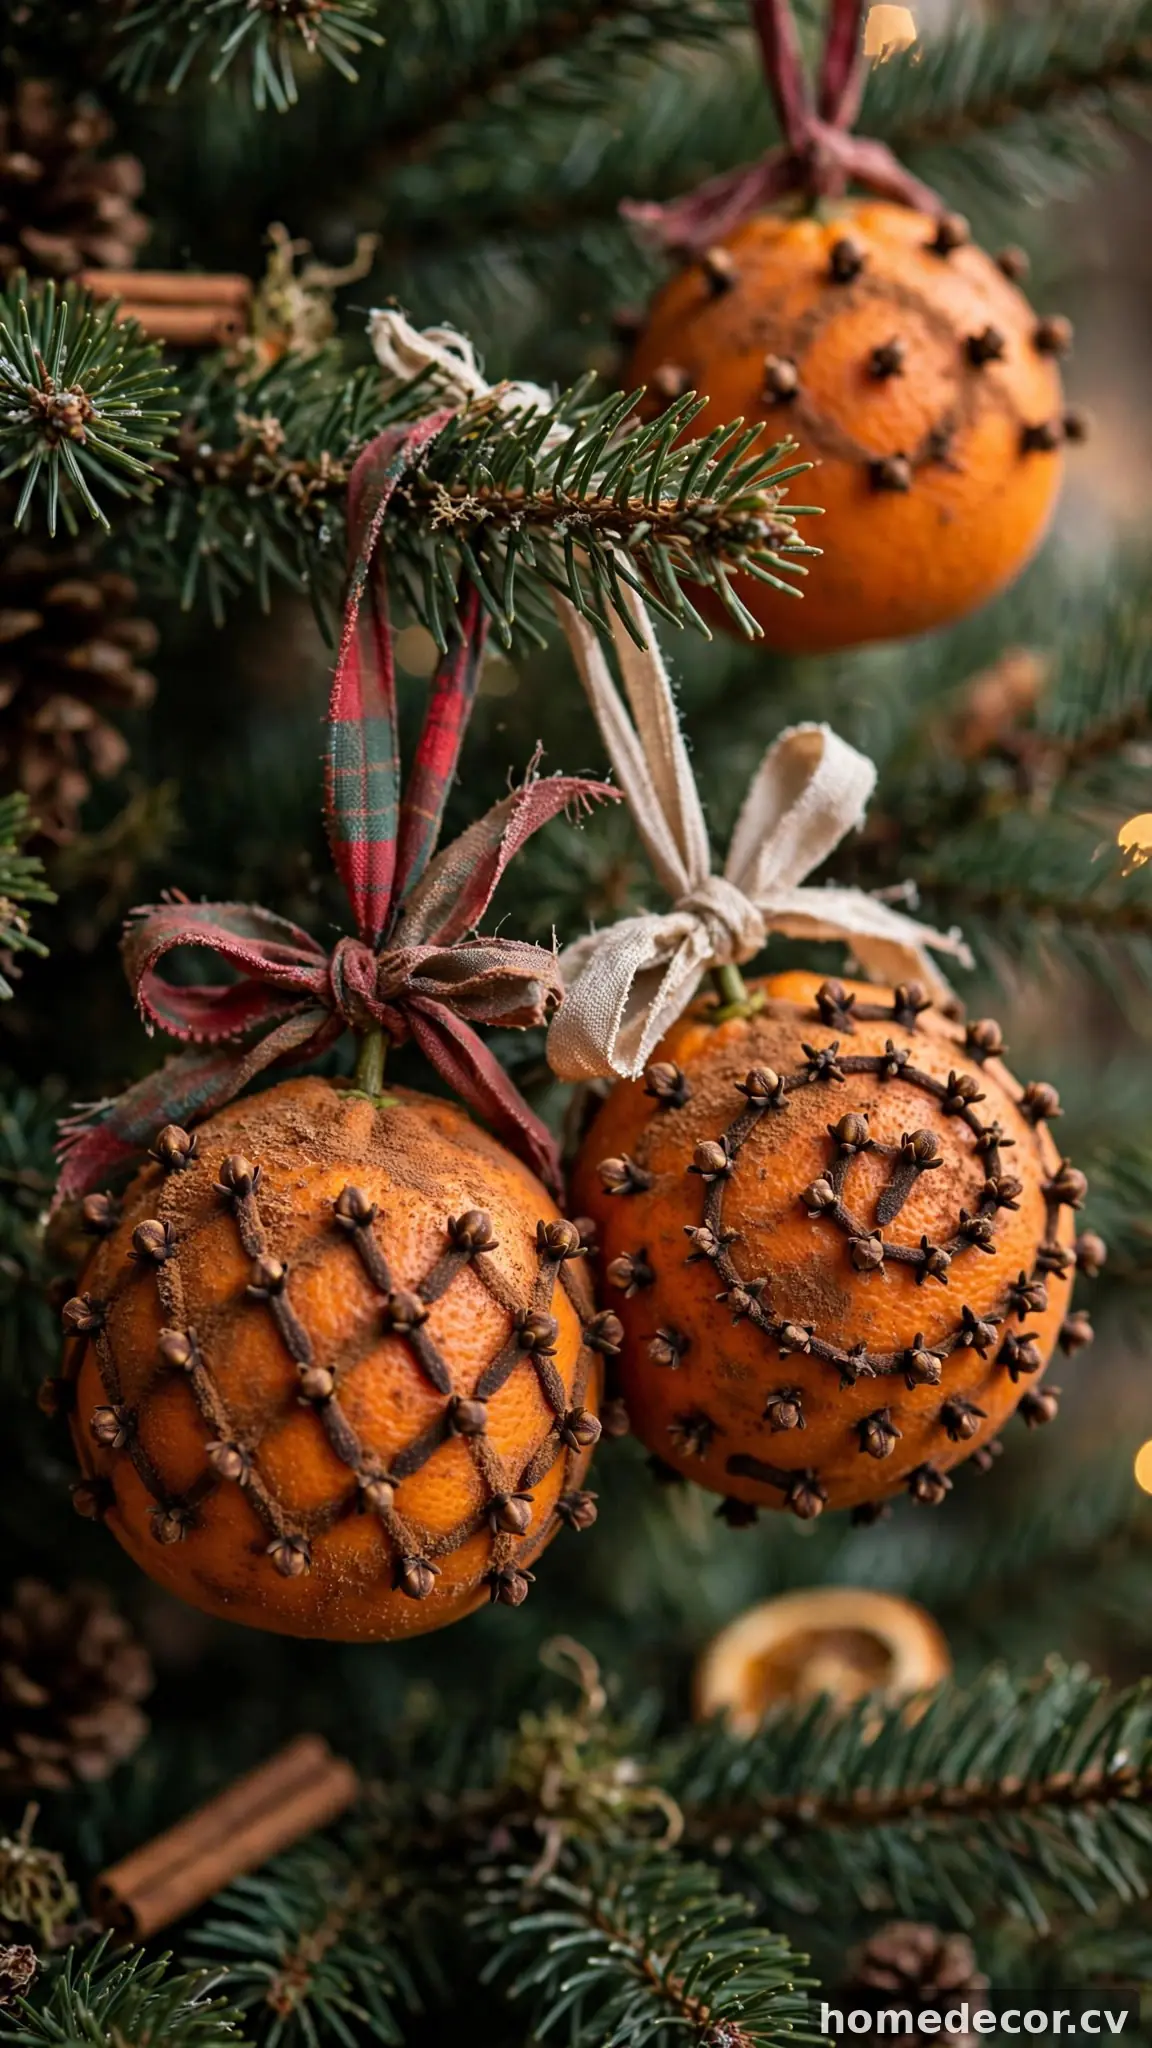
Orange pomanders studded with cloves are a centuries-old tradition that looks and smells absolutely luxurious. Choose firm, unblemished oranges and use a toothpick or small nail to poke holes in decorative patterns — spirals, stripes, stars, or simple all-over dots. Press whole cloves firmly into each hole, covering as much of the peel as you like. Roll the finished orange in a mixture of ground cinnamon, nutmeg, and orris root powder (available at spice shops), which helps preserve it and deepens the fragrance. Let the pomander cure in a cool, dry place for two to three weeks, turning occasionally, until the orange shrinks slightly and hardens. Tie a pretty ribbon around it with a hanging loop.
Hang these fragrant ornaments on the tree, tuck them into a wreath, or pile them in a bowl as a centerpiece that perfumes the whole room. They also make the most thoughtful handmade gifts — nestle one in tissue paper inside a gift bag. The curing process takes patience, so start these in late November for Christmas-ready pomanders. As they age, they shrink and darken into beautifully rustic keepsakes that last for years. Few ornaments engage the senses like a spiced pomander, and the combination of glowing orange peel, dark cloves, and rich spice scent is pure old-world holiday magic on a pennies budget.