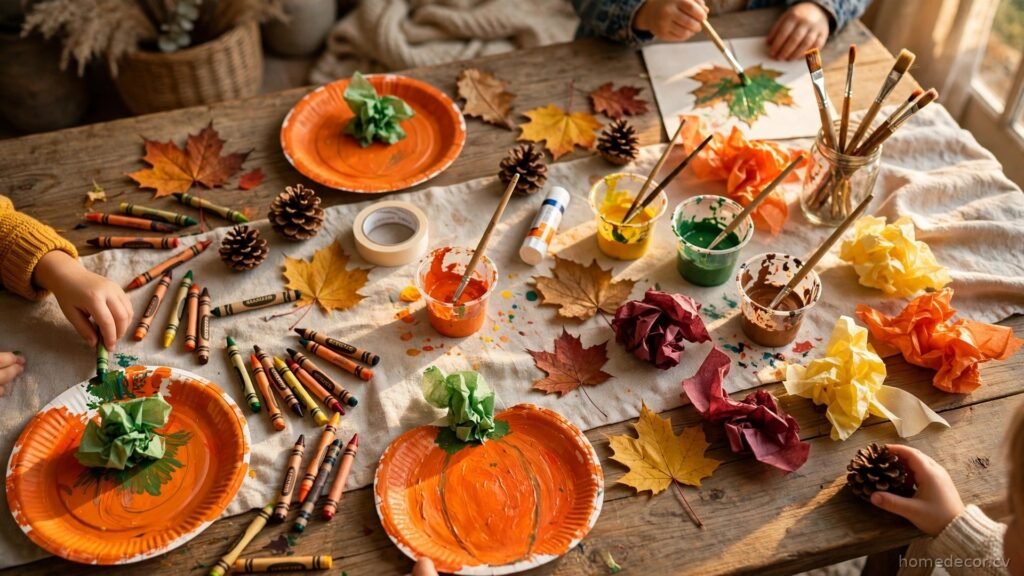
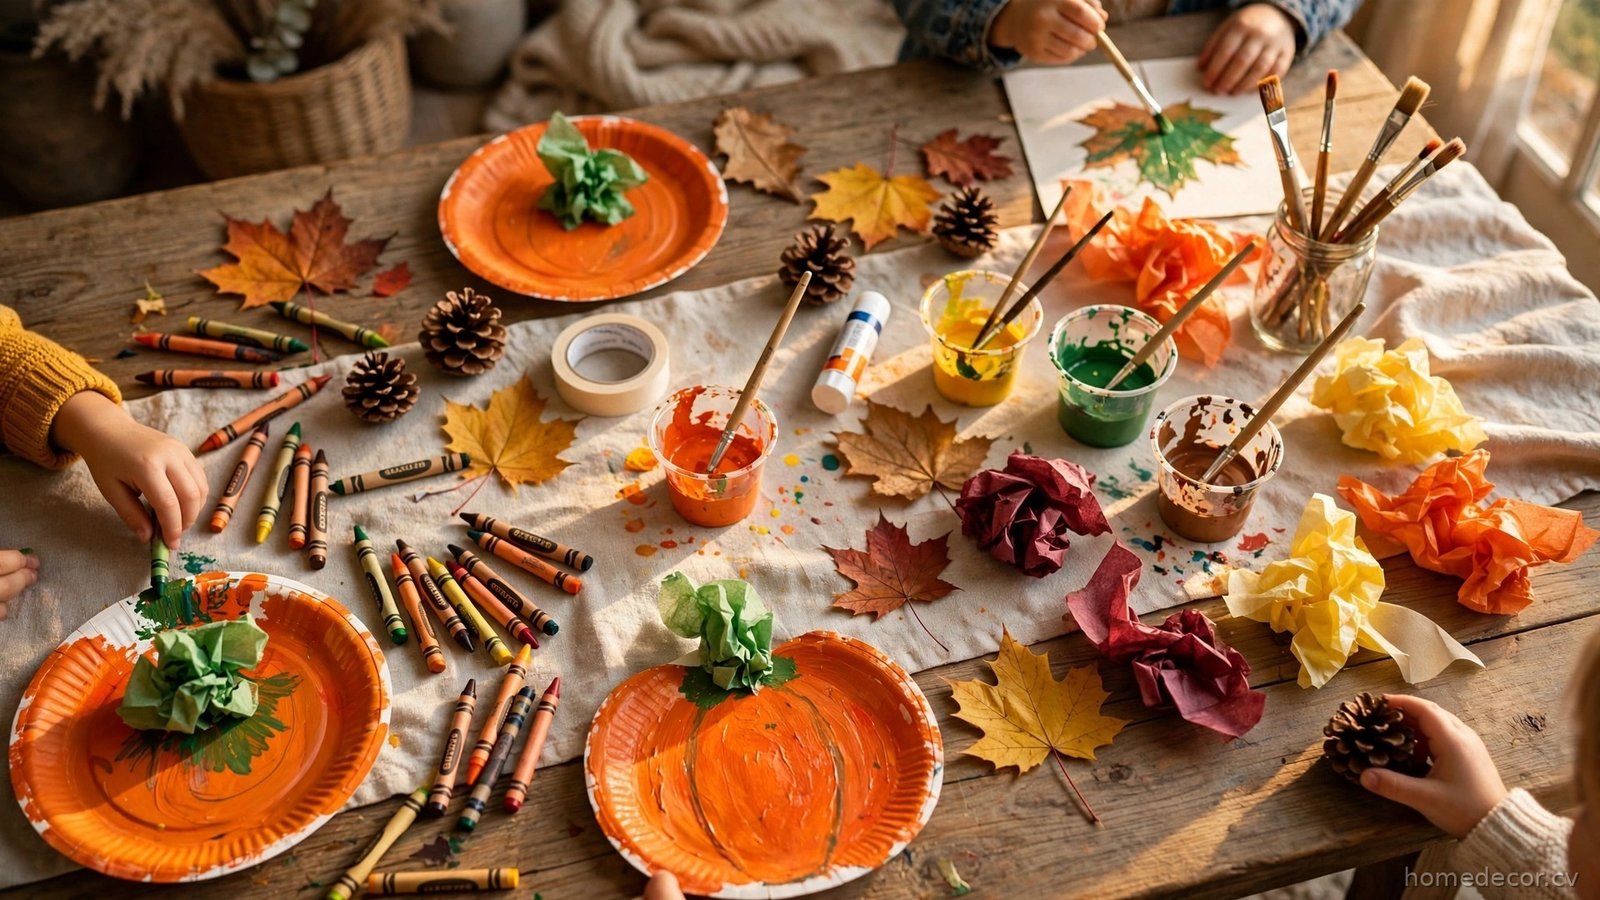
Crisp air, colorful leaves, and cozy weekends make fall the perfect season to craft with your kids. These fall crafts for kids use simple supplies you probably already have, like paper, glue, crayons, and treasures collected on a nature walk. Every project is designed to be safe and satisfying for young makers, with clear steps, big pieces, and plenty of room for imagination. Set up a craft table, put on some music, and enjoy making memories together. When the holidays arrive, you can keep the fun going with christmas crafts for kids to make using the same basic supplies.
Leaf Rubbing Art with Crayons
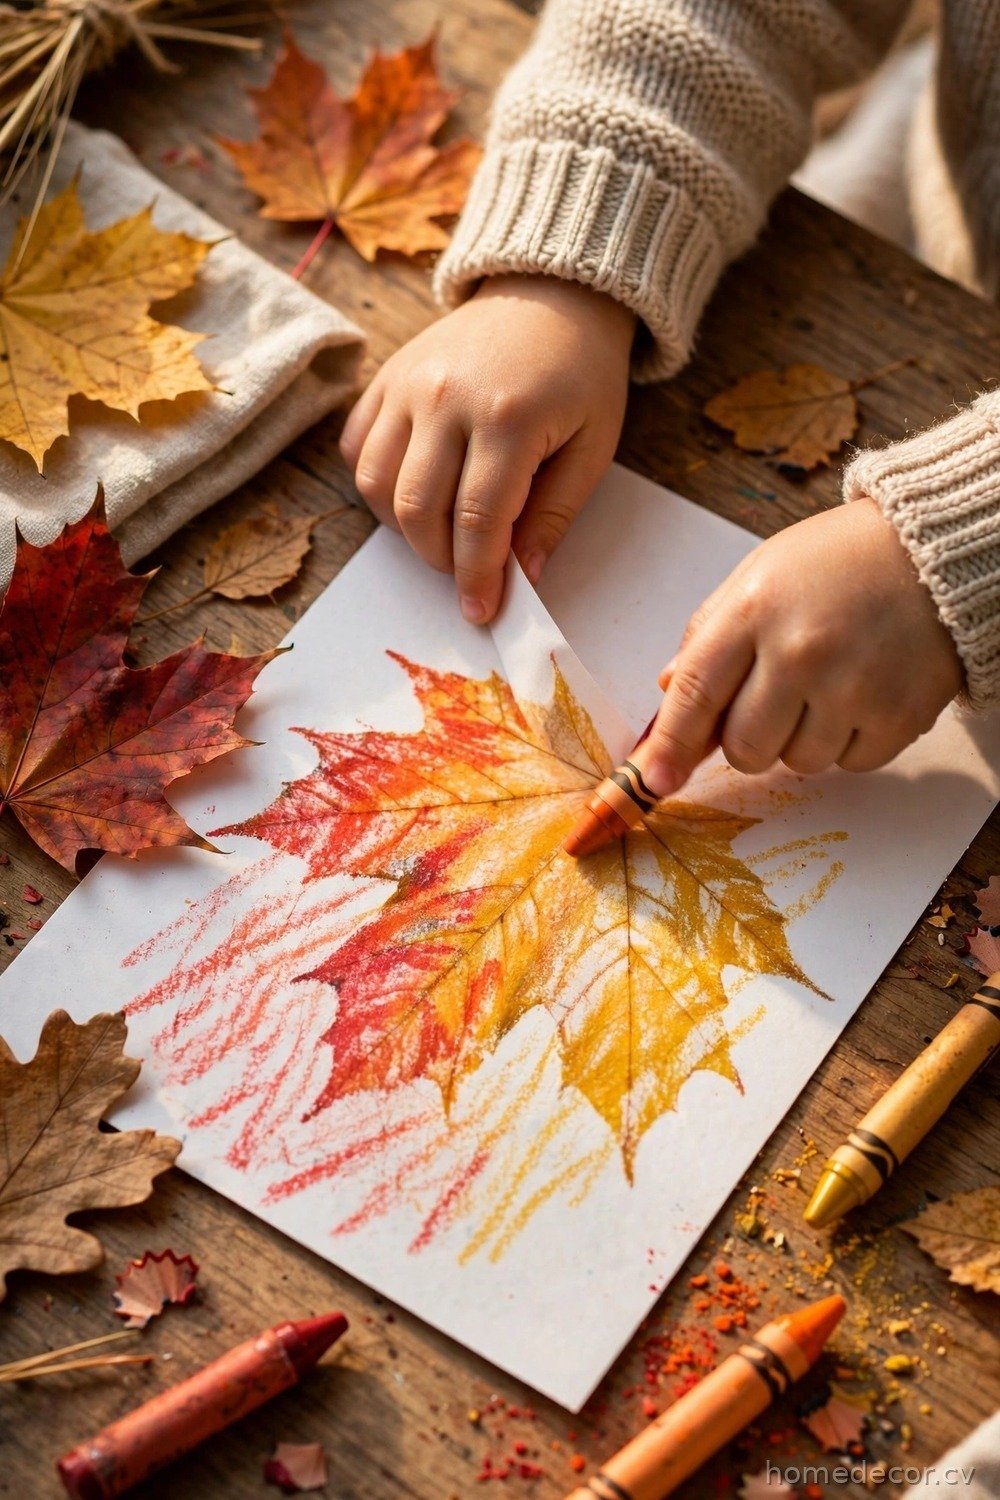
Leaf rubbing art is a magical first fall craft because children reveal a hidden leaf pattern just by coloring over it. Collect flat, freshly fallen leaves with strong veins on a walk together, choosing maple, oak, and birch shapes in different sizes. Place a leaf vein-side up under a sheet of thin white paper, then let your child rub the side of an unwrapped crayon across the paper. The leaf outline and veins appear like magic, which delights even very young children and teaches them to notice the details of different tree species. Older children can try rubbing two leaves in two colors on the same page to create layered artwork with surprising depth and detail.
I spend far too much time saving home ideas.
If you'd like the best ones, I'll send a short email once or twice a month.
Try layering several rubbings in orange, red, gold, and brown on one large sheet to make a falling leaves picture worth framing. An adult should help younger children hold the paper steady and choose leaves that are dry but not crumbly. Avoid leaves from the ground near roadsides, and wash hands after collecting. Turn finished rubbings into placemats, greeting cards, or a classroom display by gluing them onto construction paper. This craft costs almost nothing, needs no drying time, and works beautifully for a wide range of ages at the same table. Slip the best rubbings into clear page protectors if your child wants to keep them in a fall binder alongside pressed leaves and drawings.
Paper Plate Pumpkin Faces
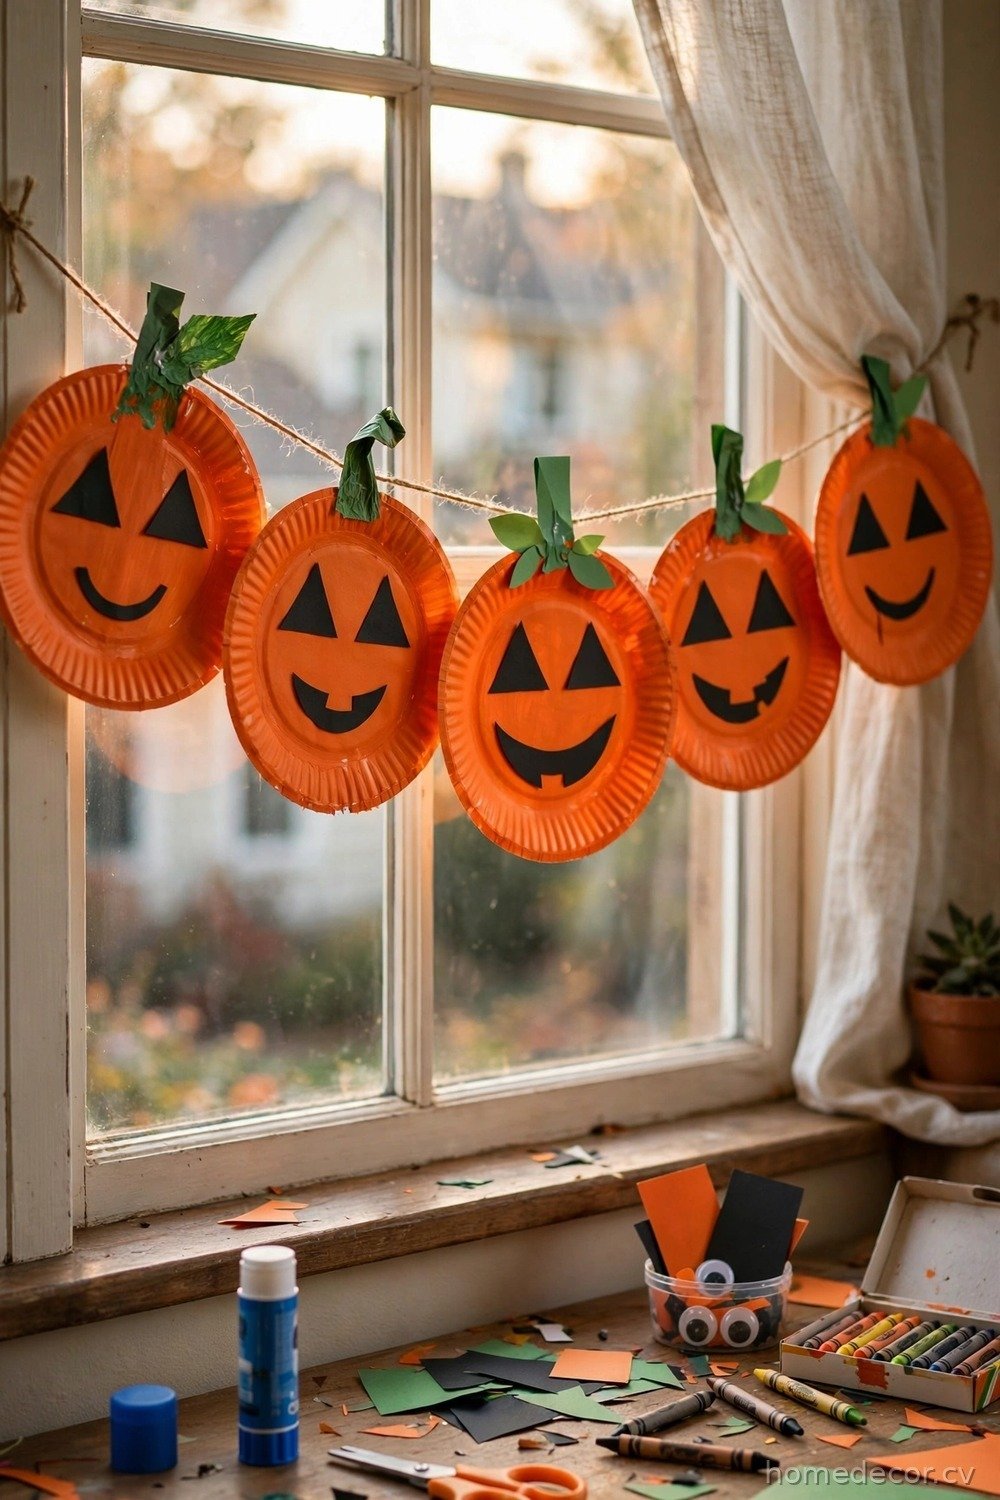
Paper plate pumpkins are a happy, mess-light craft that gives every child a jack-o-lantern without any carving. Give each child a sturdy white paper plate and let them paint or color the front orange using washable paint, markers, or crayons. While it dries, an adult can cut simple face shapes, triangles, circles, and friendly smiles, from black and yellow construction paper. Children then glue on the eyes, nose, and mouth to design their own pumpkin personality, silly, sleepy, or surprised, and add a green paper stem and a curly pipe cleaner vine on top. Let children who dislike round pumpkins stretch the plate slightly into an oval, because real pumpkins come in many shapes and theirs can too.
Use washable supplies and cover the table with newspaper or a plastic cloth so cleanup stays easy for adults. For younger children, pre-cut larger face pieces and offer a glue stick instead of liquid glue to reduce mess and frustration. These pumpkins look wonderful strung together as a garland across a window or classroom wall. Write each child’s name and the date on the back, and you will have a sweet keepsake to bring out each October. Families who enjoy this project will also love planning ahead for diy christmas craft ideas in December. Hang the garland with small clothespins on a ribbon so you can easily take pumpkins down, rearrange them, or add new ones later together.
Pinecone Owl Decorations
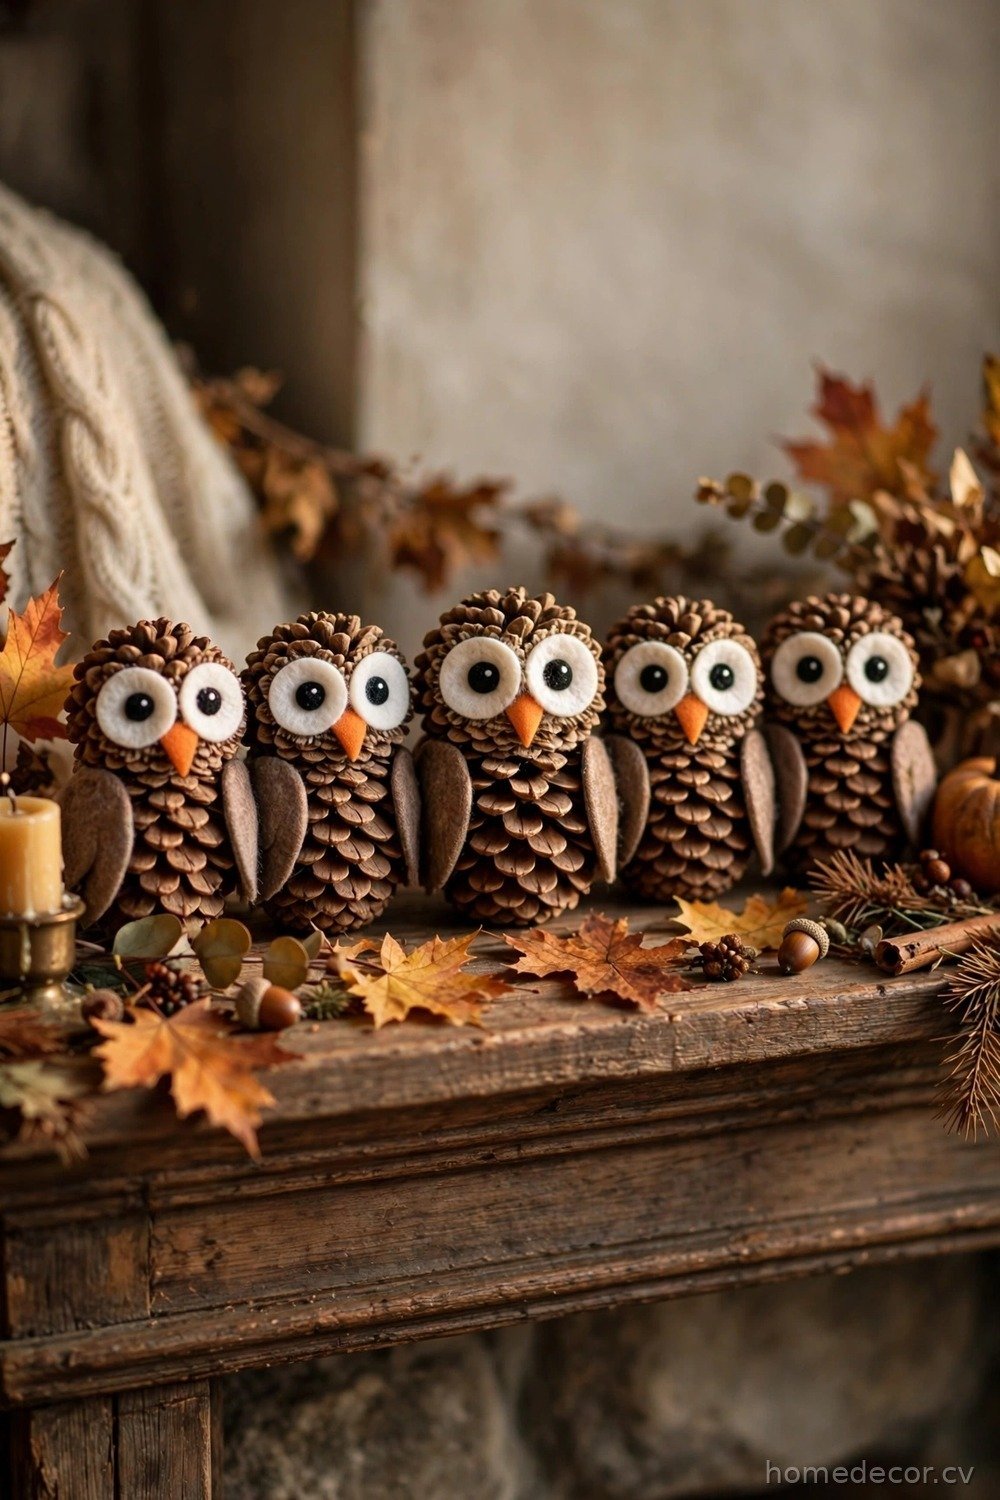
Pinecone owls turn a nature treasure into an adorable decoration that children are proud to display. Start with clean, dry pinecones collected on a walk or bought in a craft bag, and check each one for bugs before bringing it indoors. Children glue on two large white felt or paper circles for eyes, add smaller black circles in the center, and tuck small felt triangles behind the top scales for ears. A tiny orange triangle becomes the beak, and two leaf-shaped felt pieces on the sides make simple wings that complete the sleepy woodland look. Set each owl on a small slice of wood or a jar lid if it wobbles, which gives it a stable perch for display.
An adult should handle a low-temperature glue gun if you use one, or simply offer tacky craft glue and let children press pieces firmly and wait a little longer for drying. Baking collected pinecones on a lined tray at a low temperature, done only by an adult, can remove sap and insects before crafting. Perch the finished owls on a mantel, bookshelf, or fall table centerpiece where everyone can admire them. Make a whole family of owls in different sizes, and let your child name each one for extra storytelling fun during dinner. Photograph your child holding their owl in the garden among real leaves, because those pictures capture both the craft and the season beautifully.
Handprint Fall Tree Painting
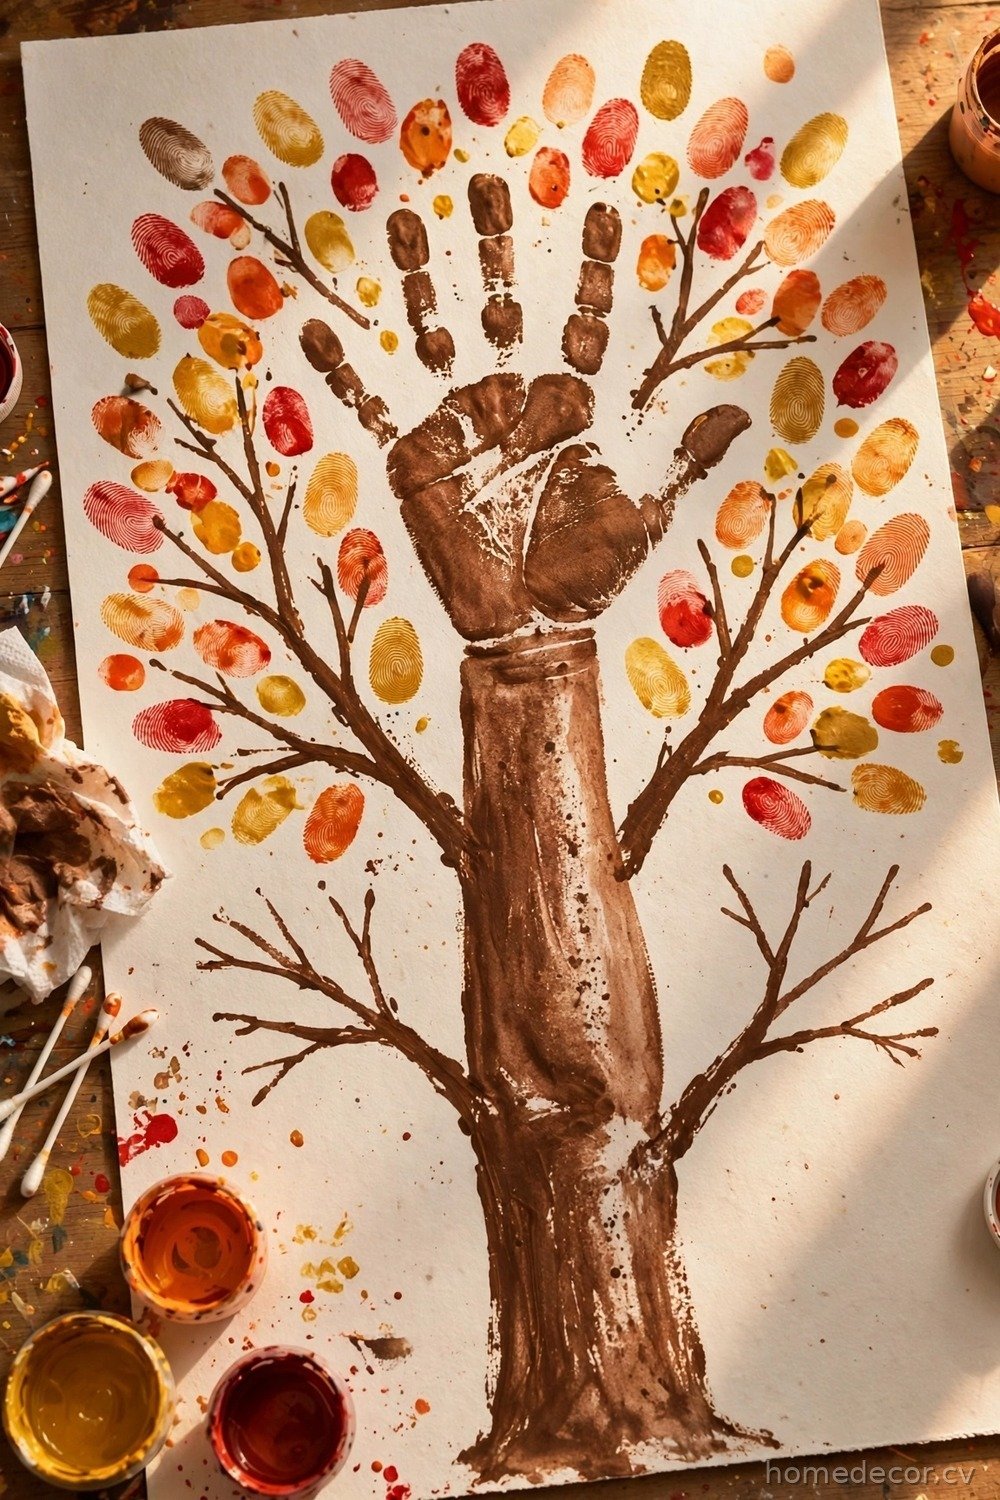
A handprint fall tree turns your child’s own hand and arm into the trunk and branches of a colorful autumn tree. An adult paints the child’s forearm and hand with washable brown paint, or the child does it with help, then presses it firmly onto a large sheet of paper to print the tree shape. Once the trunk dries, children dip fingertips, cotton swabs, or corks into red, orange, yellow, and gold paint and dab leaves all around the branch fingers. Every tree looks completely different, just like real trees in fall. If paint gets on the table or floor, washable formulas wipe up easily with a damp sponge, so do not let mess worries stop you.
Dress children in old shirts or smocks, use only washable paint, and keep a bowl of water and a towel nearby for quick hand washing. For children who dislike paint on their skin, trace their hand and arm on brown paper instead and cut it out as the trunk, with an adult doing the cutting for younger kids. Add a painted green line for grass and a few falling leaves on the ground to finish the scene. Date the back of the artwork, because handprint crafts become treasured records of how small those hands once were. Make one tree for each family member using their own hand size, and the set becomes a wonderful comparison of big and small together.
Apple Stamping Fall Art
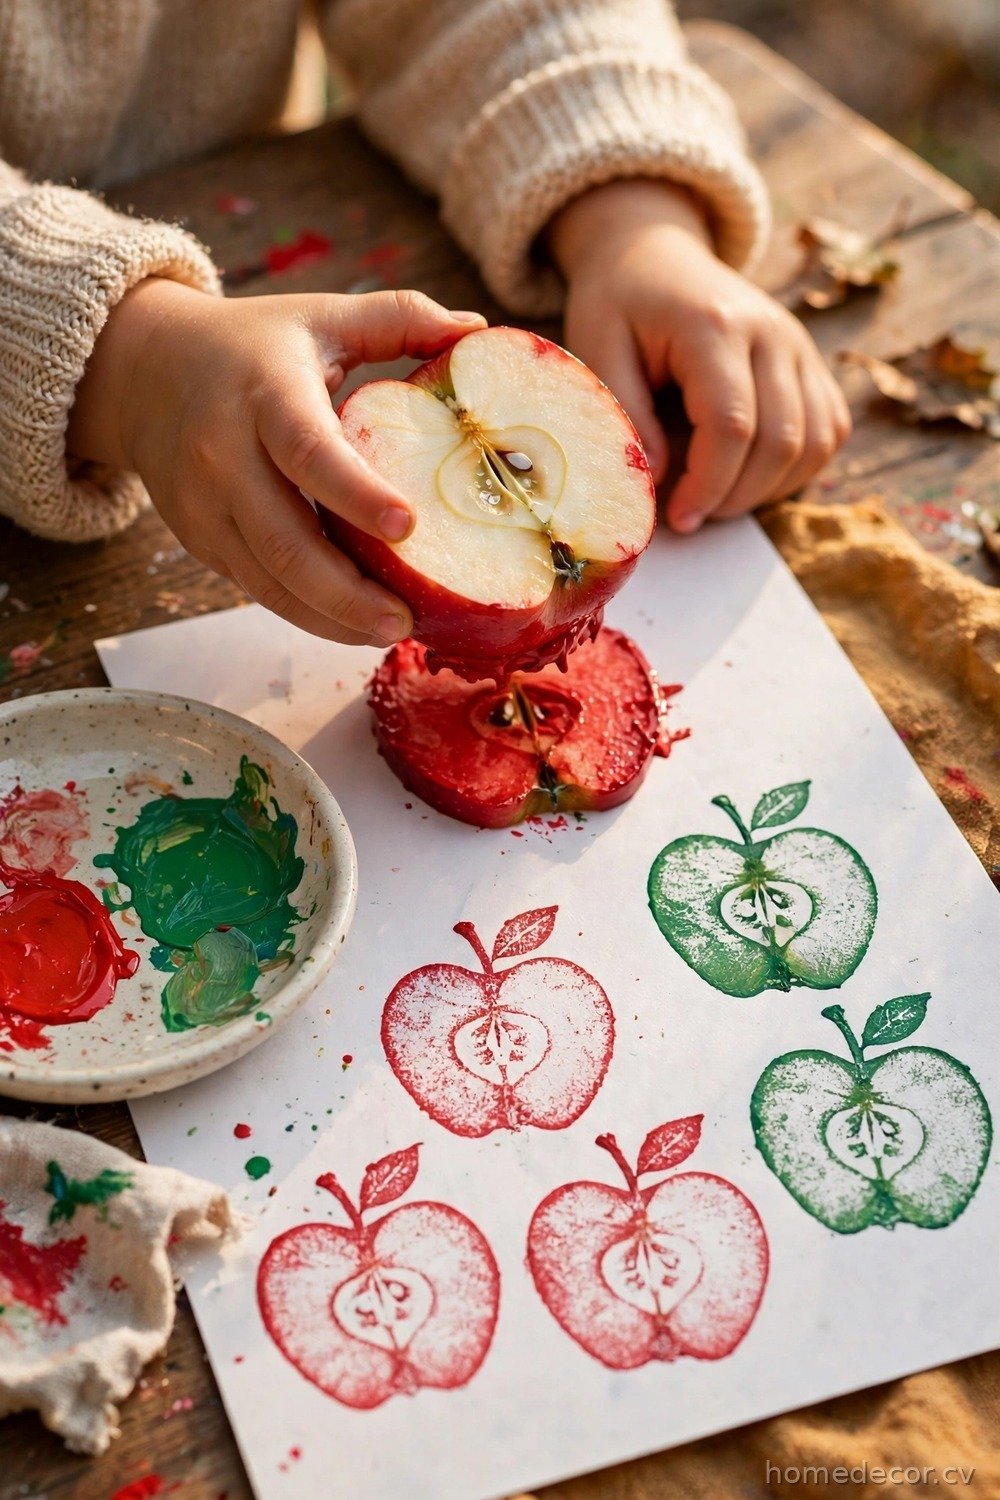
Apple stamping is a classic fall craft that combines a healthy snack with a printing project children love. An adult cuts a firm apple in half from top to bottom, pats the cut side dry with a paper towel, and presses it into washable red, green, or golden paint on a flat plate. Children grip the apple by its sides, or by a fork an adult has pushed into the skin as a handle, and stamp apple shapes across paper or a plain tote bag. The little star pattern in the center often shows through, which is a fun discovery to point out. Cut apples in different sizes if you can, because mixing large and small prints makes the finished orchard picture look more natural and playful.
Use washable, non-toxic paint only, and set aside crafting apples that are never eaten afterward, explaining this clearly to children. Add details once the stamps dry: a brown marker stem, a green paper leaf, and a smiling face if your child wants apple characters. This project is perfect during apple-picking season and makes lovely wrapping paper, cards for grandparents, and classroom bulletin board art. Keep stamps spaced out so each print stays clear, and let children experiment with overlapping colors on a practice sheet first before starting their final masterpiece together. Stamp on brown paper bags to make lunch bags with personality, and children will proudly carry their own artwork to school the next day.
Tissue Paper Autumn Wreath
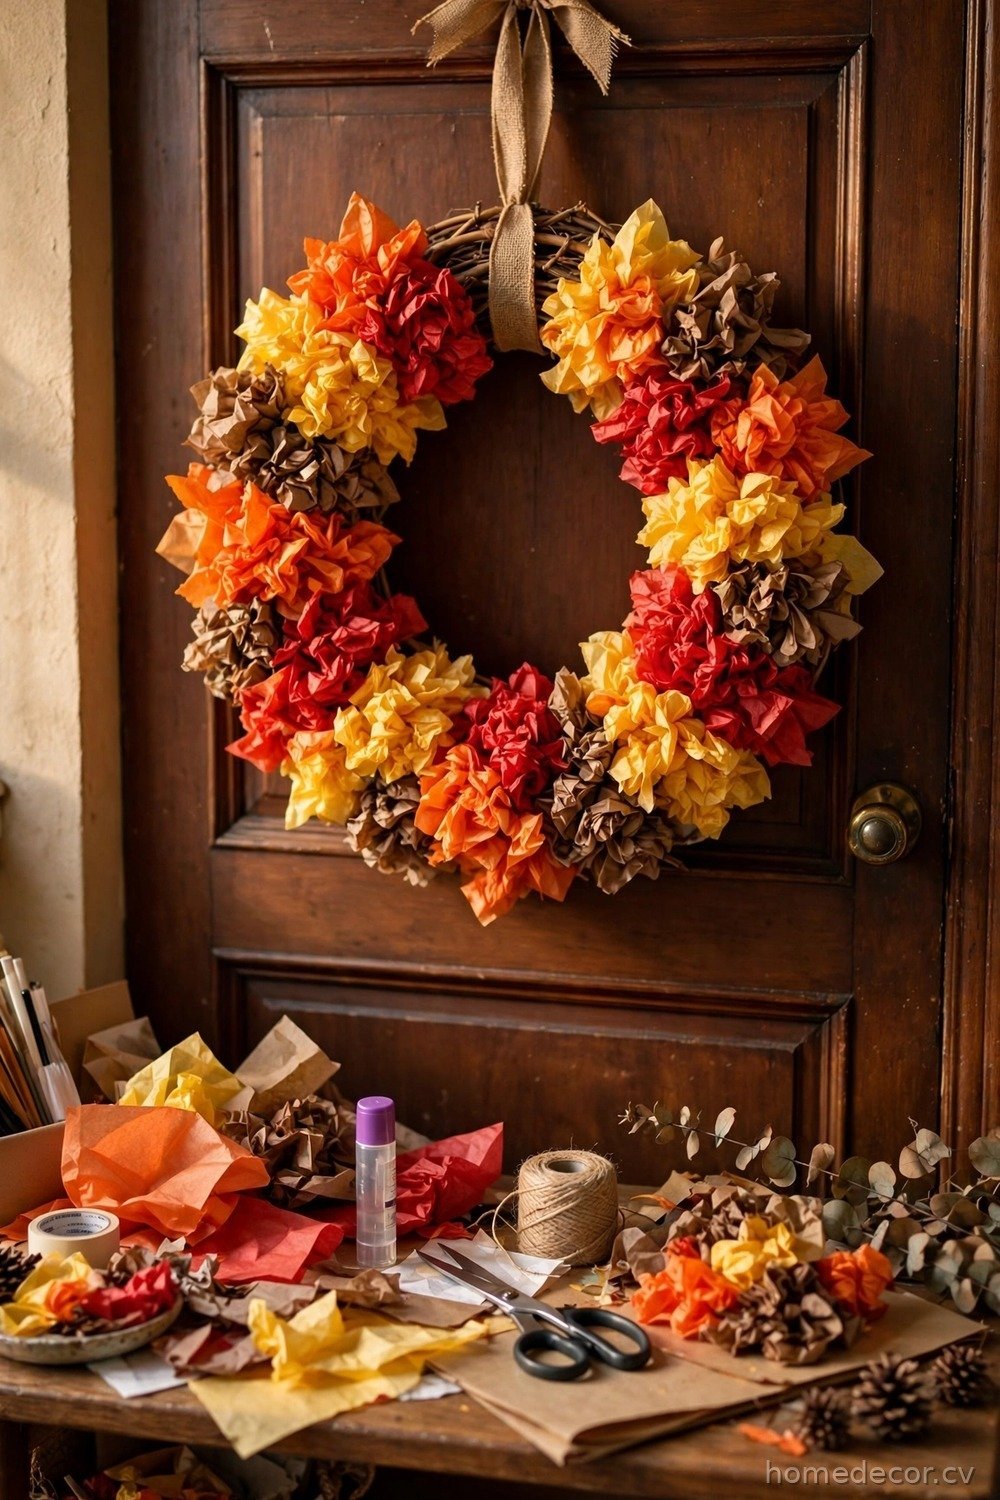
A tissue paper wreath gives children a colorful decoration for their bedroom door or your front door inside the house. An adult cuts a ring from a paper plate or cardboard to make the base, then children scrunch small squares of orange, red, yellow, and brown tissue paper into little puffs. They glue each puff onto the ring, working around the circle until the base is completely covered in soft autumn color. A loop of ribbon at the top, tied by an adult, turns the finished ring into a wreath that looks surprisingly full and festive. Work in small sections and let children rest their hands, because scrunching many tissue puffs is real exercise for little fingers and muscles.
Tissue squares should be pre-cut by an adult for younger children, while older kids can practice with safety scissors under supervision. A glue stick or a small dish of glue with a cotton swab keeps this project tidy enough for classrooms. Encourage children to mix colors randomly rather than following a pattern, because the blended, leafy effect is exactly what makes it look like fall foliage. Hang wreaths at child height so makers can proudly show visitors their work, and store them flat between sheets of paper to enjoy again next year without crushing the puffs. Add a few glued leaves or a paper pumpkin in the center if your child wants a focal point, and let them decide the design.
Cardboard Tube Scarecrow Puppets
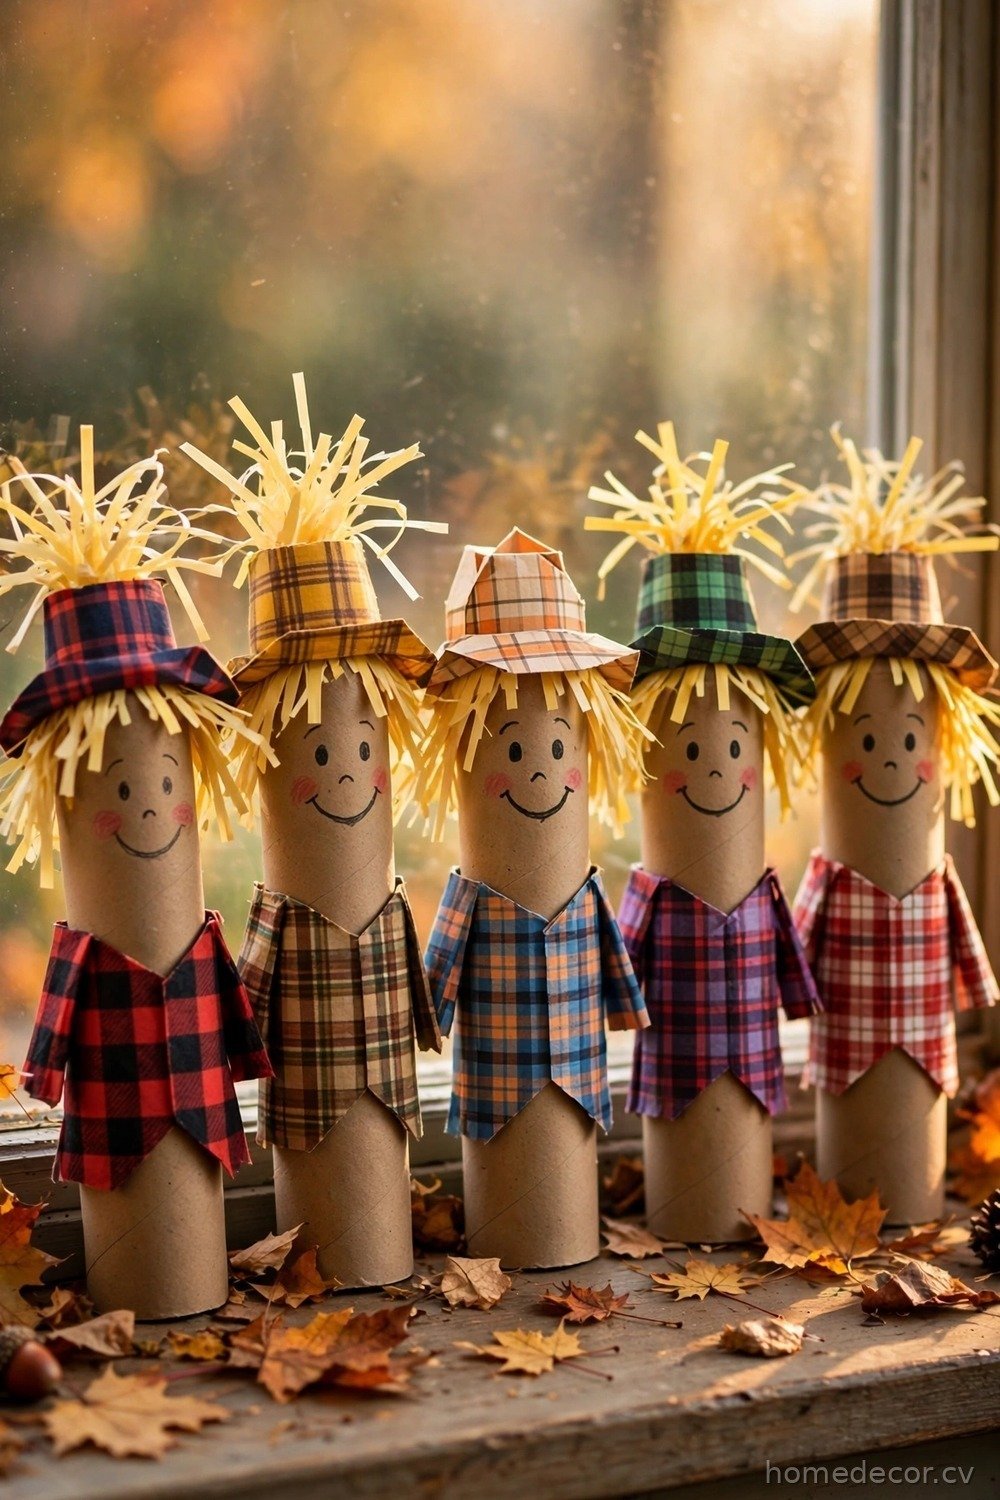
Cardboard tube scarecrows recycle empty paper towel or toilet paper rolls into friendly fall puppets. Children cover the tube with orange, plaid, or brown construction paper using a glue stick, then add a paper circle face with a drawn smile, triangle nose, and rosy cheeks. An adult helps cut thin strips of yellow paper or yarn for straw hair sticking out under a paper hat, and more straw strips at the bottom of the tube. Glue on two small paper arms, and the scarecrow is ready to bob and dance in a child’s hand during story time. Draw simple patched clothes on the tube with markers to give each scarecrow its own outfit, personality, and story for imaginative play afterwards.
Keep all pieces large and simple, and let children draw faces with crayons or markers instead of gluing tiny parts if they are very young. These puppets are wonderful for acting out fall stories, practicing friendly conversations, and putting on a small show for family after dinner. Line up a row of scarecrows on a windowsill as a harvest display when playtime ends. If your family loves seasonal making, save extra tubes now so you are ready for christmas crafts for preschoolers when winter arrives and the craft box comes out again. Store puppets upright in a shoebox between play sessions so the straw hair and paper hats stay neat and ready for the next show.
Popsicle Stick Pumpkins
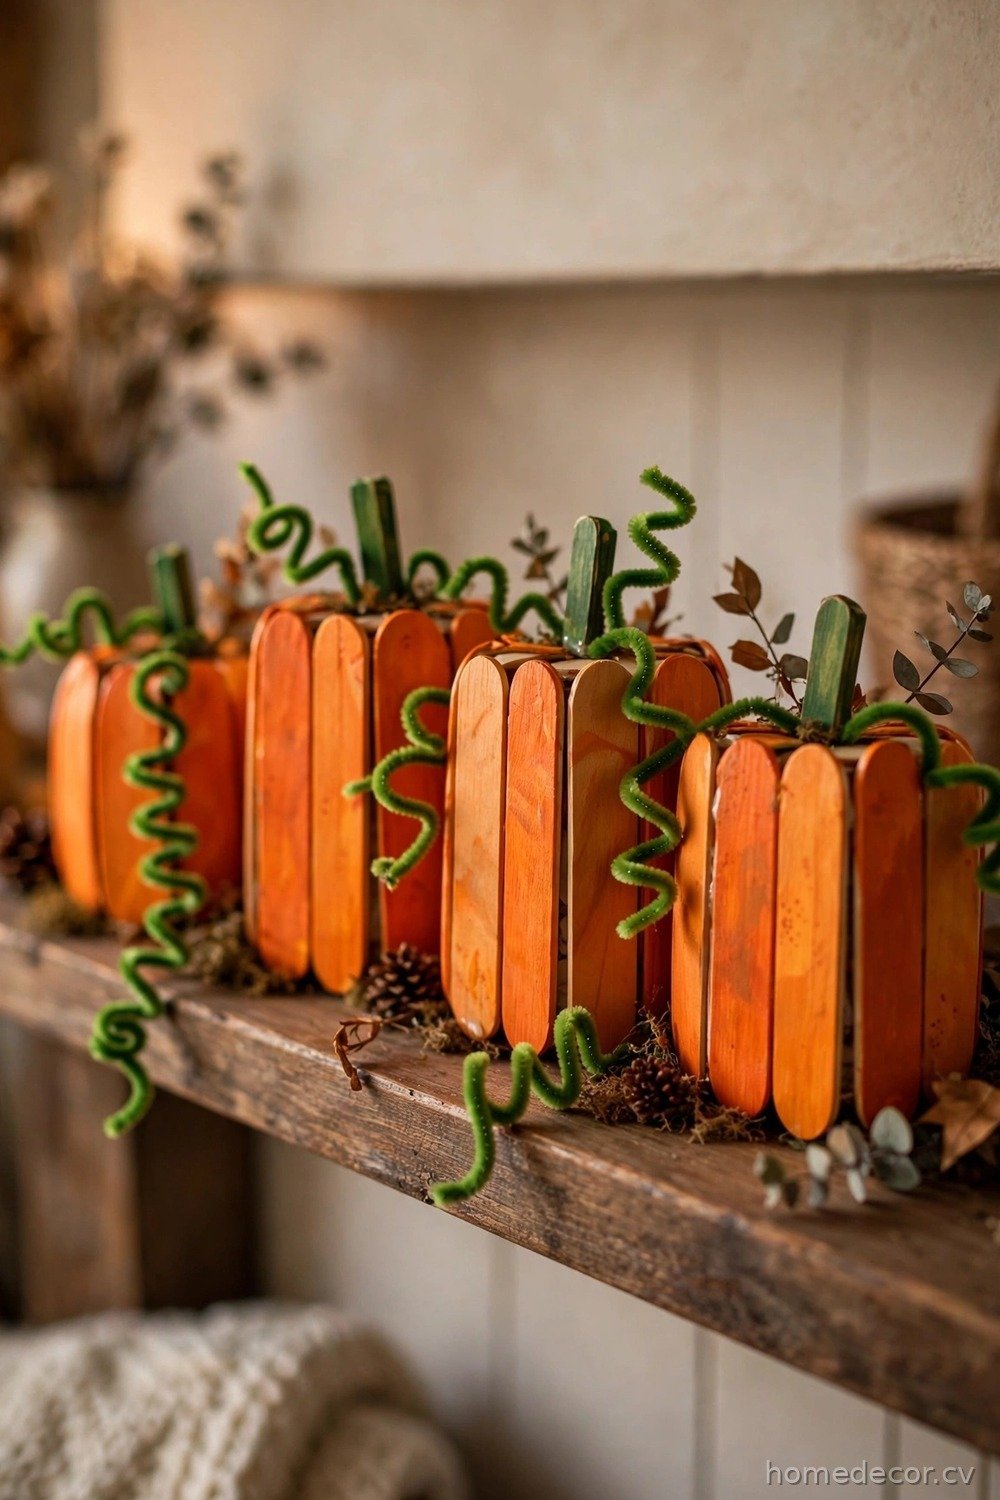
Popsicle stick pumpkins are a sturdy, satisfying craft that older preschoolers and early elementary children especially enjoy. Line up five to seven clean craft sticks side by side, and an adult helps glue two sticks across the back to hold the panel together like a tiny fence. Once dry, children paint the front orange with washable paint, add a short green or brown stick at the top for a stem, and draw or glue on a friendly face. A curl of green pipe cleaner makes a vine that gives the little pumpkin real charm and dimension on display. Younger children can paint with fingers instead of brushes, turning the pumpkin orange with joyful handprints that wash off easily with soap and water.
Let the glued panel dry fully before painting, ideally for an hour, so the sticks do not slide while children work. Use wide sticks for younger children because they are easier to hold and paint without breaking. Glue a magnet, with adult help, to the back for a fridge decoration, or attach ribbon for a hanging ornament. Make a whole pumpkin patch in different sizes and expressions, and arrange them along a mantel or classroom shelf. This project teaches patience, sequencing, and the reward of letting one step dry before starting the next one. Write a kind word or the child’s name across the pumpkin front to personalize the patch, making each piece easy to identify in class.
Nature Walk Collage Placemats
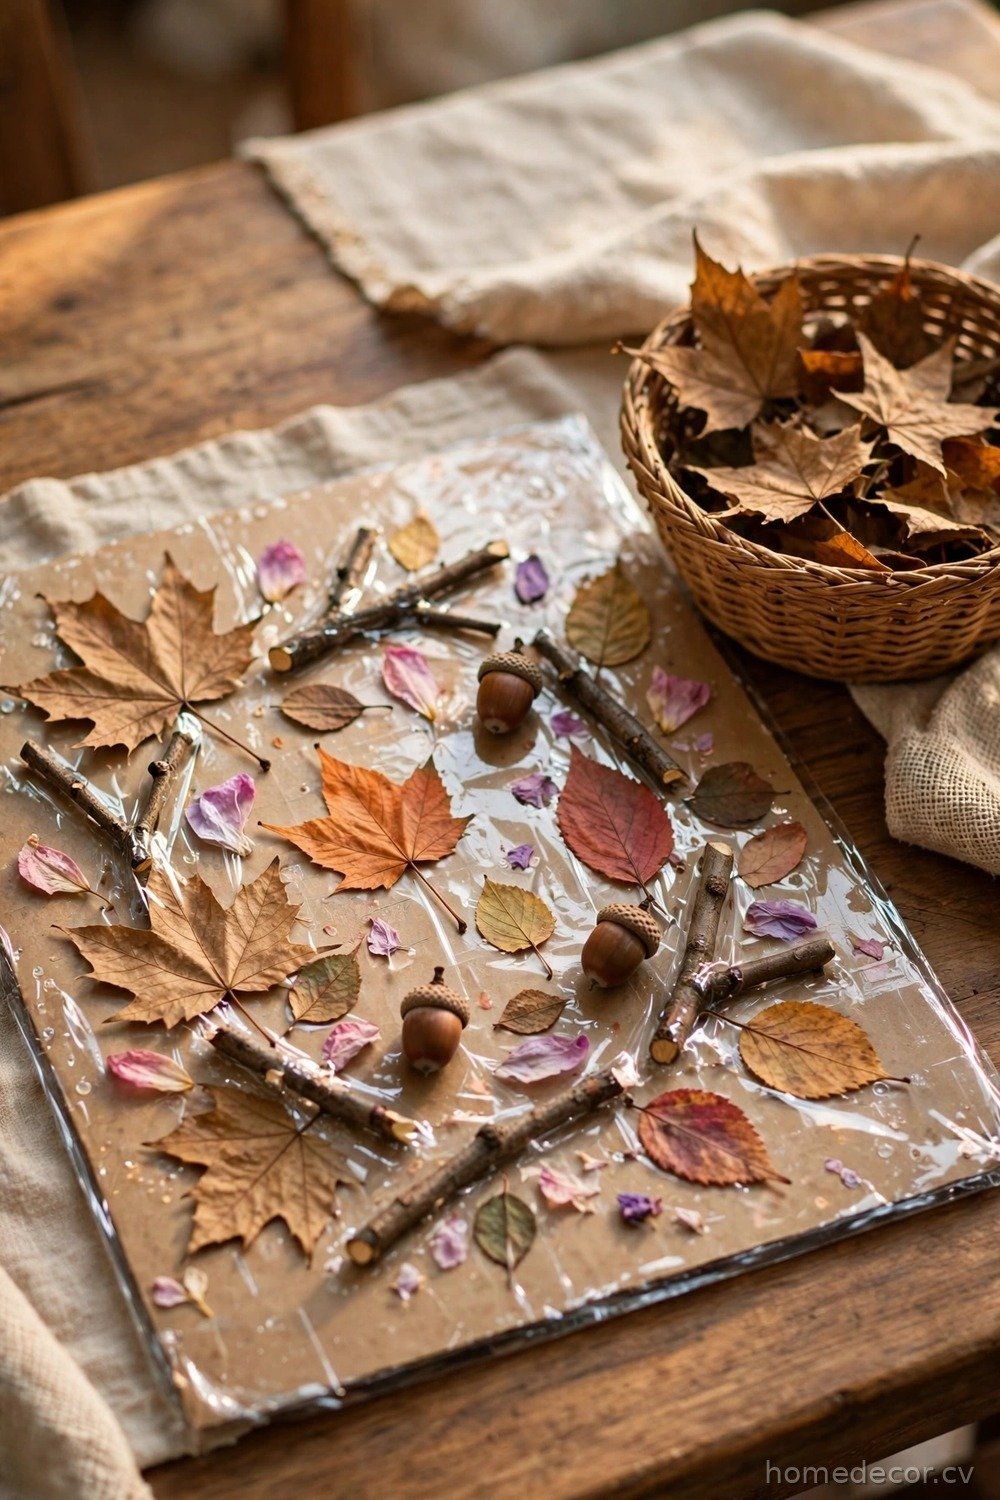
A nature walk collage turns a family walk into art and helps children look closely at the changing season. Walk together in a park or yard and collect fallen leaves, acorns, small twigs, flower petals, and interesting seeds, taking only items already on the ground. At home, children arrange their treasures on a sheet of construction paper or card, experimenting with patterns, faces, and leaf-animal shapes before gluing anything down. Once they love their design, they glue each piece in place, and an adult can cover the finished collage with clear contact paper to protect it as a placemat. Talk about textures as you sort, comparing smooth acorns, rough bark, and papery leaves, because sensory words build vocabulary while little hands stay busy exploring.
Remind children never to pick plants from other people’s gardens and to leave enough natural material for animals and insects. Wash hands after the walk, and skip any berries or mushrooms, which should never be handled or used in crafts. Talk about the names of trees and why leaves change color while you work, turning craft time into gentle science learning. These placemats make mealtimes special all season, and children eat more proudly at a table they helped decorate with their own careful, creative work and discoveries. If contact paper feels tricky, slide the collage into a clear sheet protector instead, which gives a similar protected finish with far less fuss.
Paper Bag Fall Trees
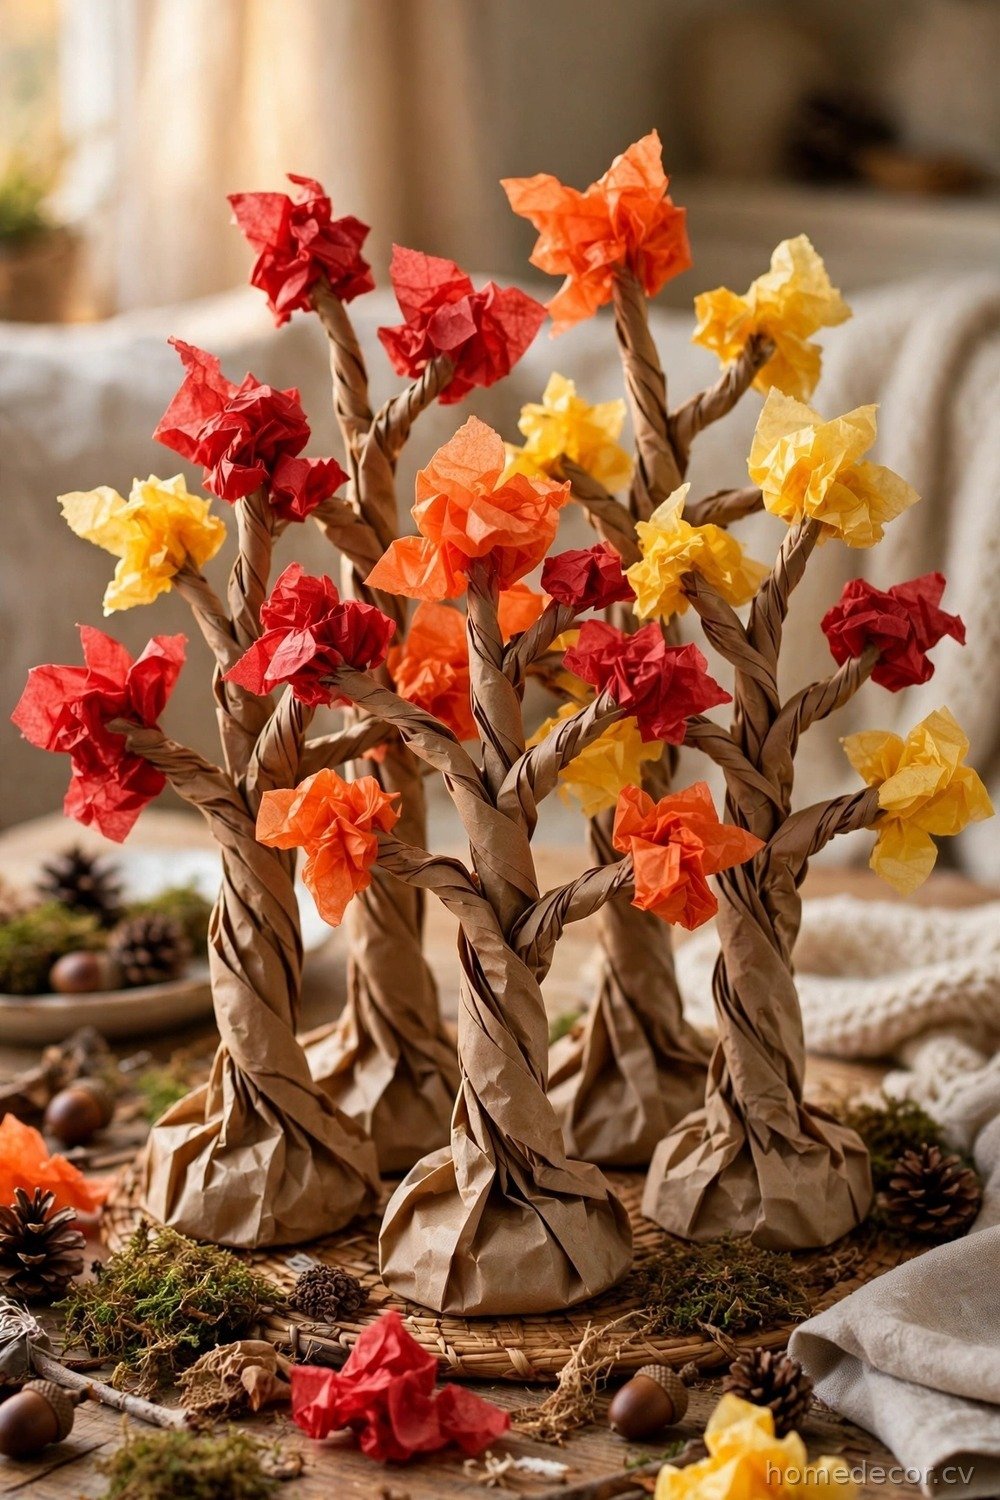
Paper bag fall trees stand up on their own, which makes them a delightful table or classroom display craft. Give each child a plain brown lunch bag, and an adult helps twist the top half of the bag tightly to form branches while the bottom stays flat as the trunk base. Children then glue small squares of red, orange, and yellow tissue paper, or torn construction paper leaves, all over the twisted branches. The crinkled brown bag already looks like bark, so even a few leaves create a convincing little autumn tree that children find very satisfying to finish. Flatten the bottom by pressing the bag gently on the table before twisting, because a steady base makes decorating much easier for children.
Show children how to twist gently so the bag does not tear, and offer a fresh bag without fuss if one rips, keeping the mood light and encouraging. A small weight, like a stone or a few coins in a sealed envelope placed inside by an adult, helps the tree stand steadily on display shelves. Group several trees together to make a fall forest centerpiece for the dining table. Vary leaf colors from mostly green to fully gold to show how trees change at different times, which gives you a natural way to talk about the season progressing week by week. Add a tiny paper squirrel or owl, cut and colored by your child, hiding in the branches for a playful surprise that delights visiting grandparents.
Sponge Painted Leaf Banner
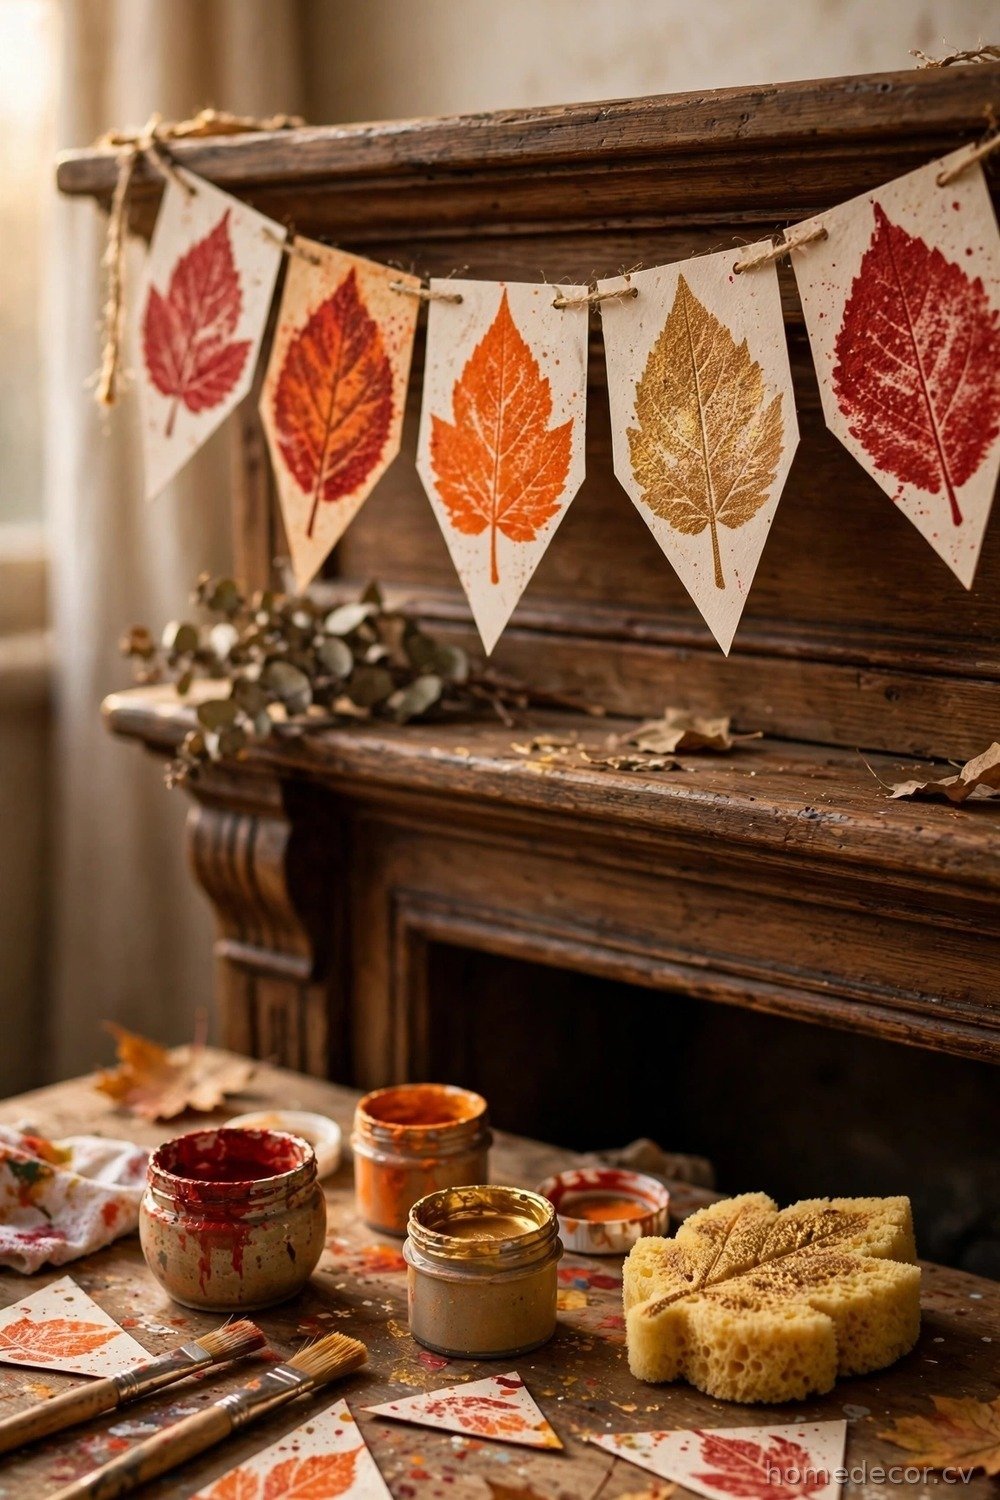
A sponge painted leaf banner creates a reusable fall decoration and gives children the joy of painting without needing fine brush control. An adult cuts a simple kitchen sponge into a leaf shape, or buys leaf-shaped sponges at a craft store. Children dip the sponge lightly into washable paint in fall colors and press leaf prints along a long strip of paper, a fabric banner, or a row of connected paper triangles. Repeating the print builds pattern skills, and mixing two colors on one sponge creates beautiful blended leaves that look like real changing foliage. Space prints with small gaps so the banner does not look crowded, and remind children that real trees leave sky between their leaves too.
Hang the painting strip up to dry where little hands cannot reach it, and protect clothes with smocks since sponge painting encourages enthusiastic pressing. If using a fabric banner, choose fabric paint and let an adult handle the heat-setting step with an iron afterward, away from children. String the finished banner across a mantel, doorway, or classroom wall with clothespins for instant fall celebration. Store it rolled, not folded, so it comes out smooth next year. Children beam with pride every time they walk under a banner they printed themselves, leaf by colorful leaf. Invite children to count their leaves and name each color aloud as they work, weaving simple math and language practice into the painting fun.
Rolling Acorn Painting
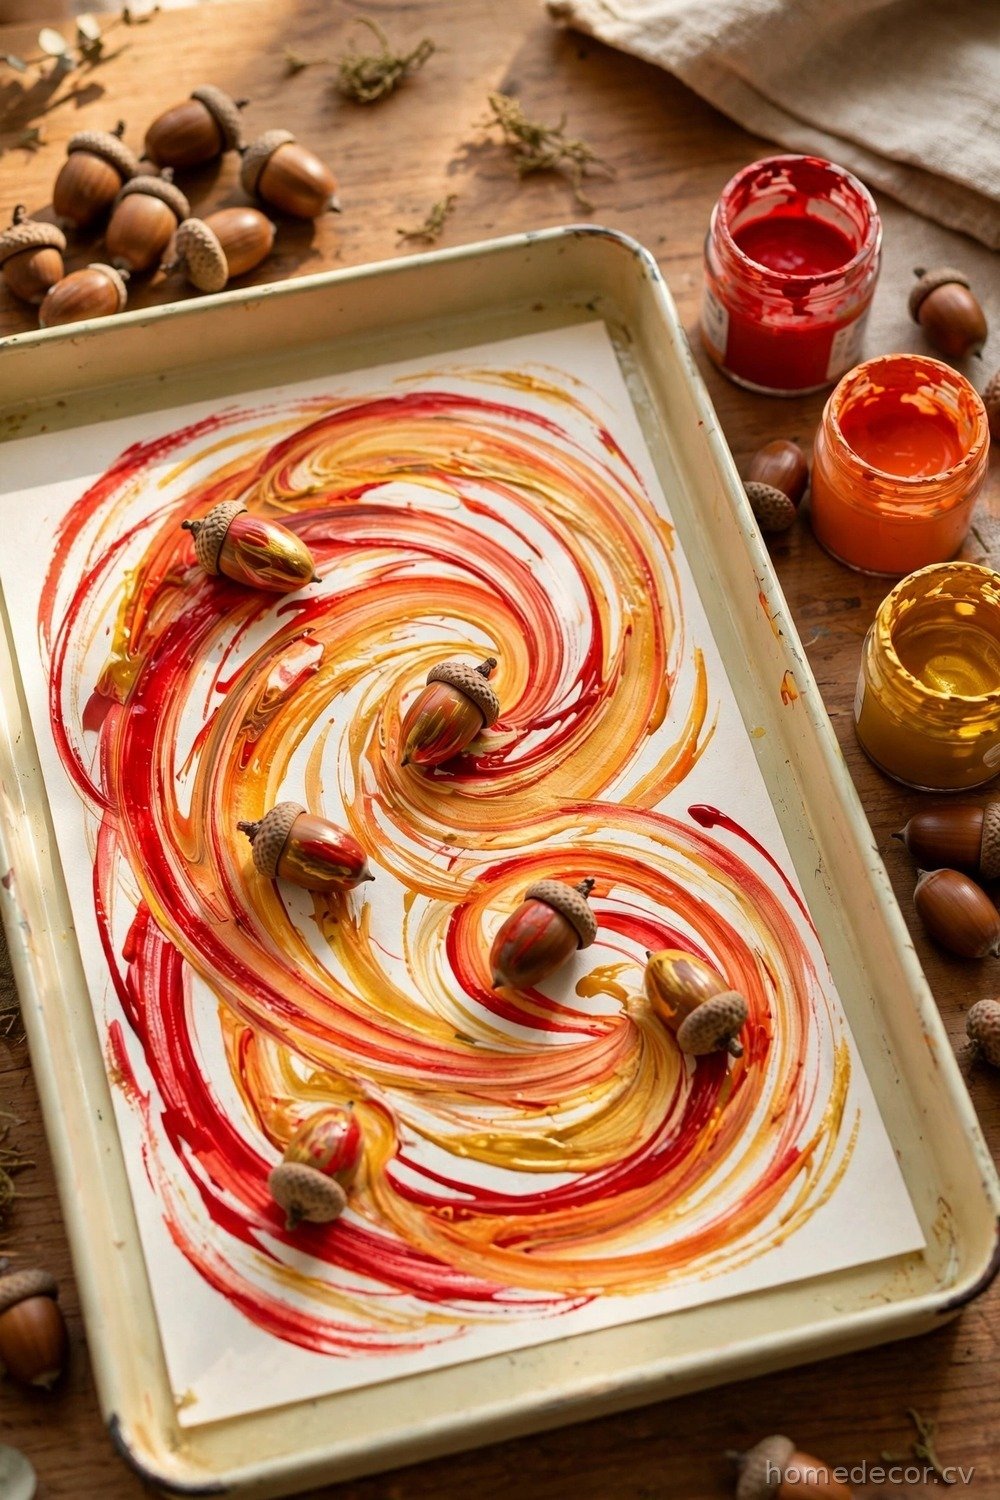
Rolling acorn painting is an active, giggly craft that makes marble-style art with a real fall treasure. Place a sheet of paper inside a shallow box, tray, or baking pan with raised sides. Drop a few small blobs of washable paint in fall colors onto the paper, then add two or three clean acorns or round nuts. Children hold the tray with both hands and tilt it slowly from side to side, watching the acorns roll through the paint and leave swirling autumn trails behind them. Every finished picture is a surprise, which keeps children asking to make just one more. Use three colors at most per picture, because too many shades mixed together quickly turn muddy and hide the pretty swirling trails children love.
An adult should wash collected acorns, check them for cracks or insects, and supervise closely so acorns are never put in mouths, since they are a choking hazard for young children. For toddlers, use larger balls instead and enjoy the same rolling effect safely. Work on a covered table or the floor to contain any escapes, and keep a damp cloth ready for painted fingers. Once dry, these swirling papers make beautiful backgrounds for fall cards, or you can cut leaf shapes from them with adult help for a second craft from the first. Let children choose which rolled painting becomes a card for a teacher or grandparent, because giving handmade art teaches generosity along with creativity.
Torn Paper Leaf Mosaics
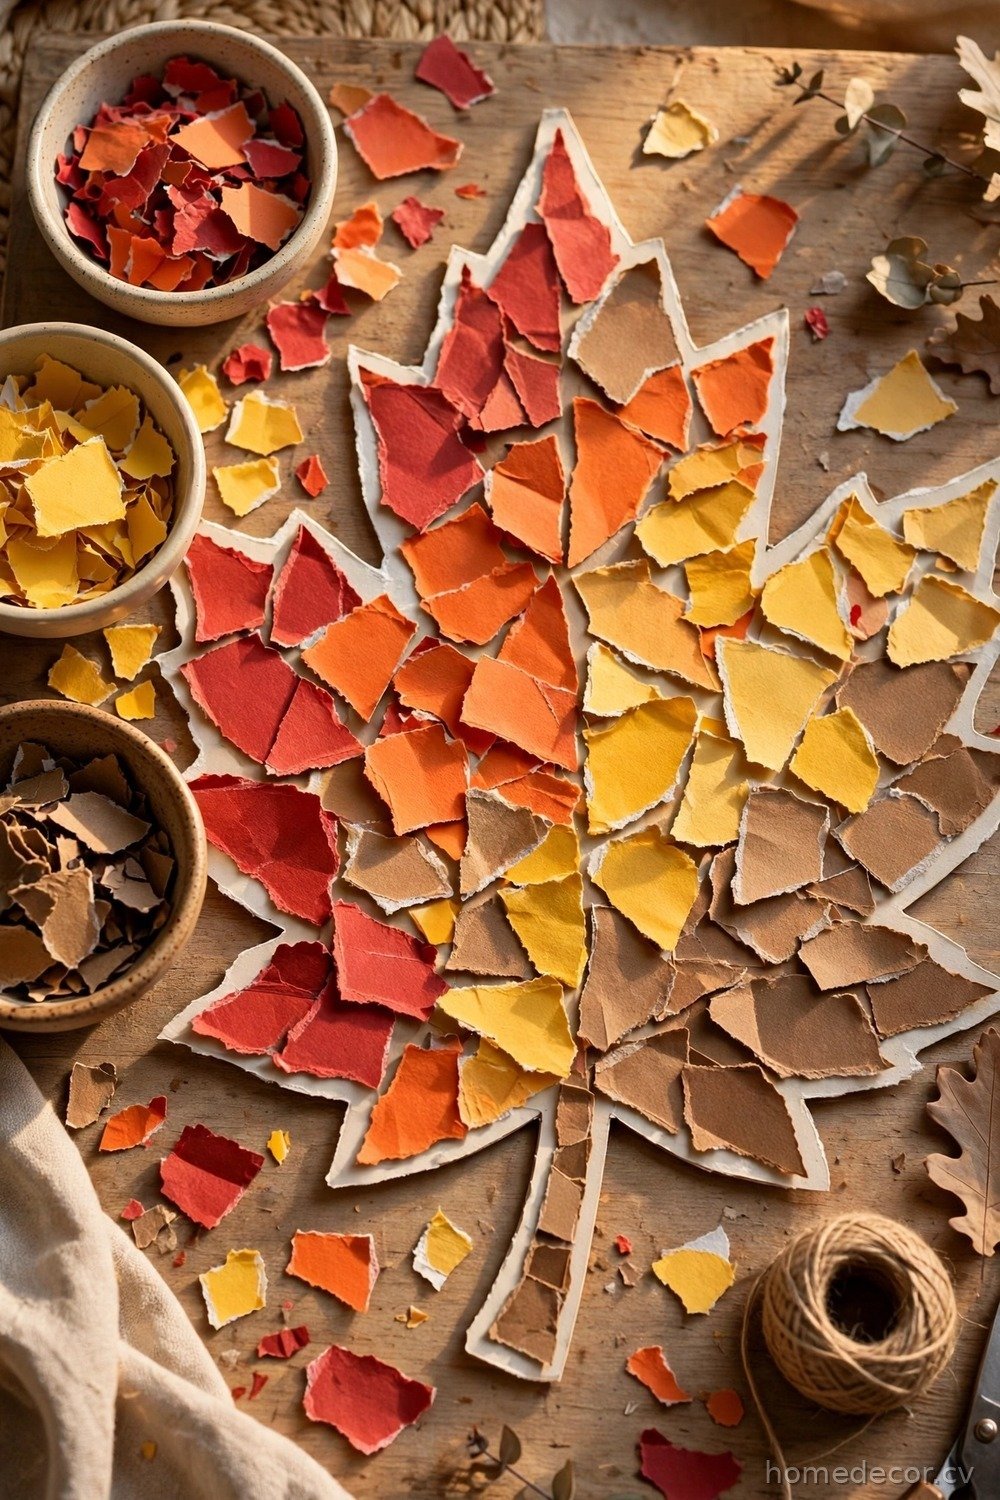
Torn paper mosaics build strong little fingers while creating rich, textured fall leaves that look impressive on any wall. An adult draws or prints a large leaf outline on card, and children tear red, orange, yellow, green, and brown construction paper or old magazine pages into small pieces. Tearing is the skill here, so no scissors are needed, which makes this craft especially suitable for younger children. They glue the pieces inside the outline, overlapping slightly like real mosaic tiles, until the whole leaf glows with mixed autumn color and no white spaces remain showing through underneath the paper. If tearing is hard at first, start the tear with a tiny snip made by an adult, and most children can finish the rip themselves.
Encourage children to sort their torn pieces by color in small bowls before gluing, which adds a quiet organizing game to the project. Use a glue stick for the least mess, and show children how to press each piece flat with a fingertip. Bigger outlines are easier for little hands, so start large and offer smaller leaves to older children who want a challenge. Display a collection of mosaic leaves together as a falling leaves wall, and step back to enjoy how professional the group looks, even though every piece was made by small hands tearing and sticking happily. Sign the back with name and year before hanging, because teachers and parents both love knowing exactly when each little artist created their masterpiece.
Handprint Turkey Gratitude Craft
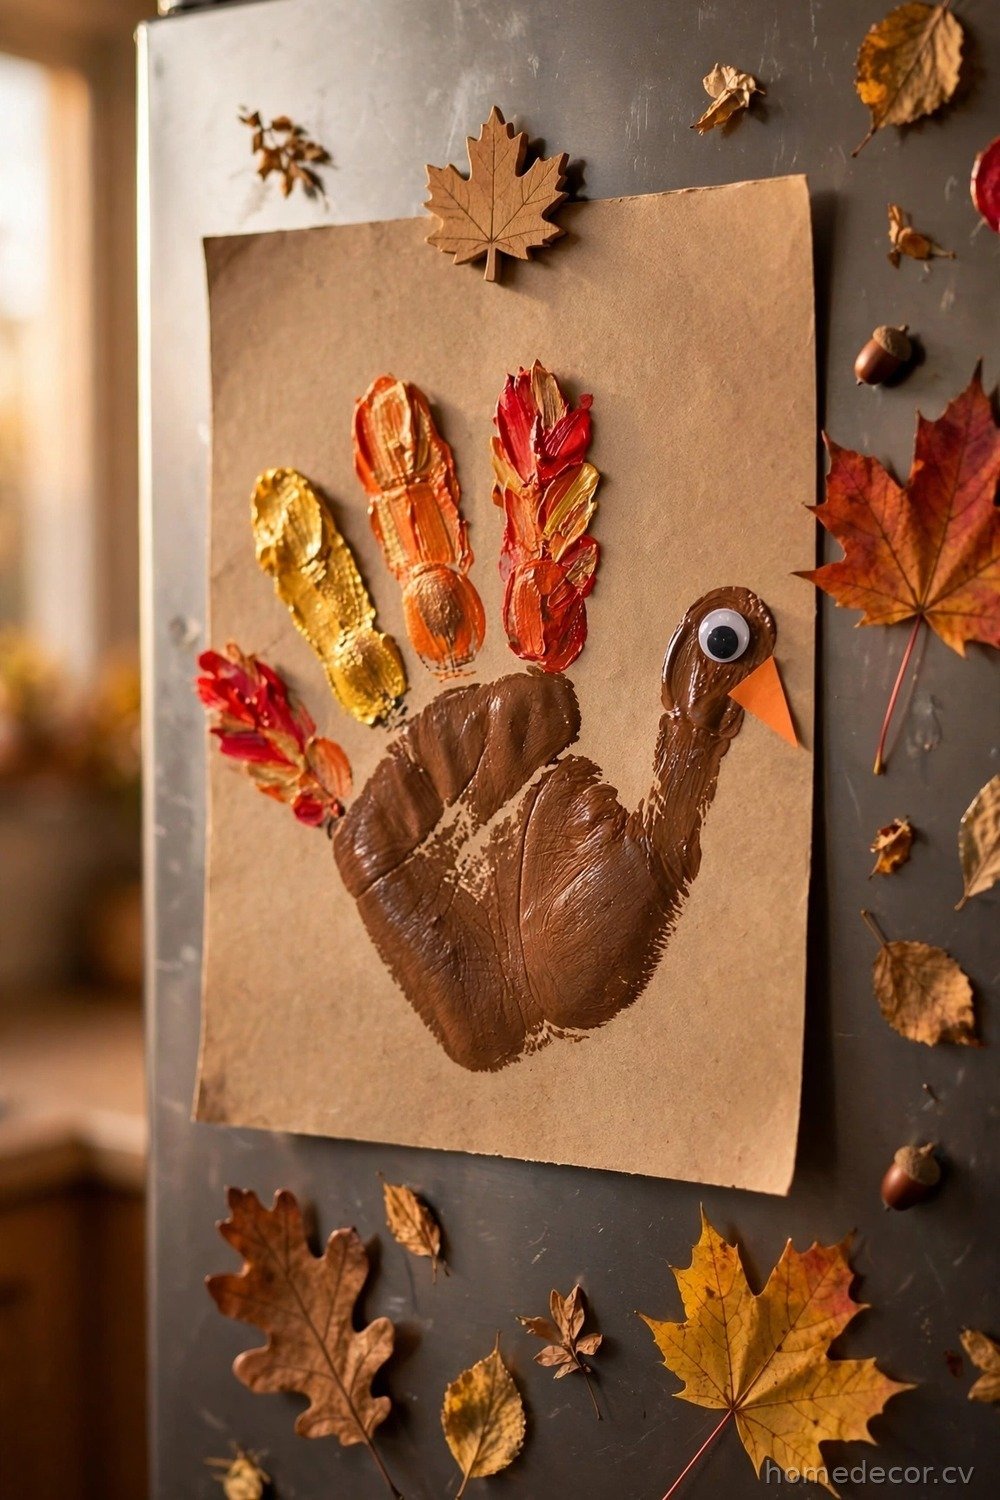
A handprint turkey is a beloved fall craft that doubles as a sweet gratitude activity for the Thanksgiving season. Trace your child’s hand on brown paper or paint the hand with washable brown paint and press it onto card, with the thumb becoming the turkey’s head and the fingers becoming its feathers. Children add a googly eye, an orange triangle beak, and a red wattle with glue, then color each finger feather in bright fall shades. On each feather, an adult writes something the child says they are thankful for, turning the craft into a keepsake families treasure for years. Make a matching set for grandparents using the same hand on the same day, and mail one as a surprise they will truly cherish.
Use large paper so little hands fit comfortably, and let children who dislike paint use the tracing method instead with the same happy result. Keep the gratitude conversation light and joyful, accepting answers like pizza, grandma, and the family dog with equal seriousness, because those honest answers are what make the keepsake so charming later. Display turkeys on the fridge or string them into a gratitude garland for your gathering. Reading the feathers aloud each year becomes a family tradition that reminds everyone how much love fits inside one small handprint and one thankful season. Photograph the turkey next to your child each year if you repeat the craft, because the growing hand beside the old prints tells the story.