Your front door is the first thing trick-or-treaters see, so it deserves to make a statement. These Halloween door decoration ideas range from five-minute projects to weekend showstoppers, and every one of them works on a budget. Pick the style that fits your home, grab a few supplies, and get ready for the whole neighborhood to slow down at your doorstep.
The Classic Monster Door
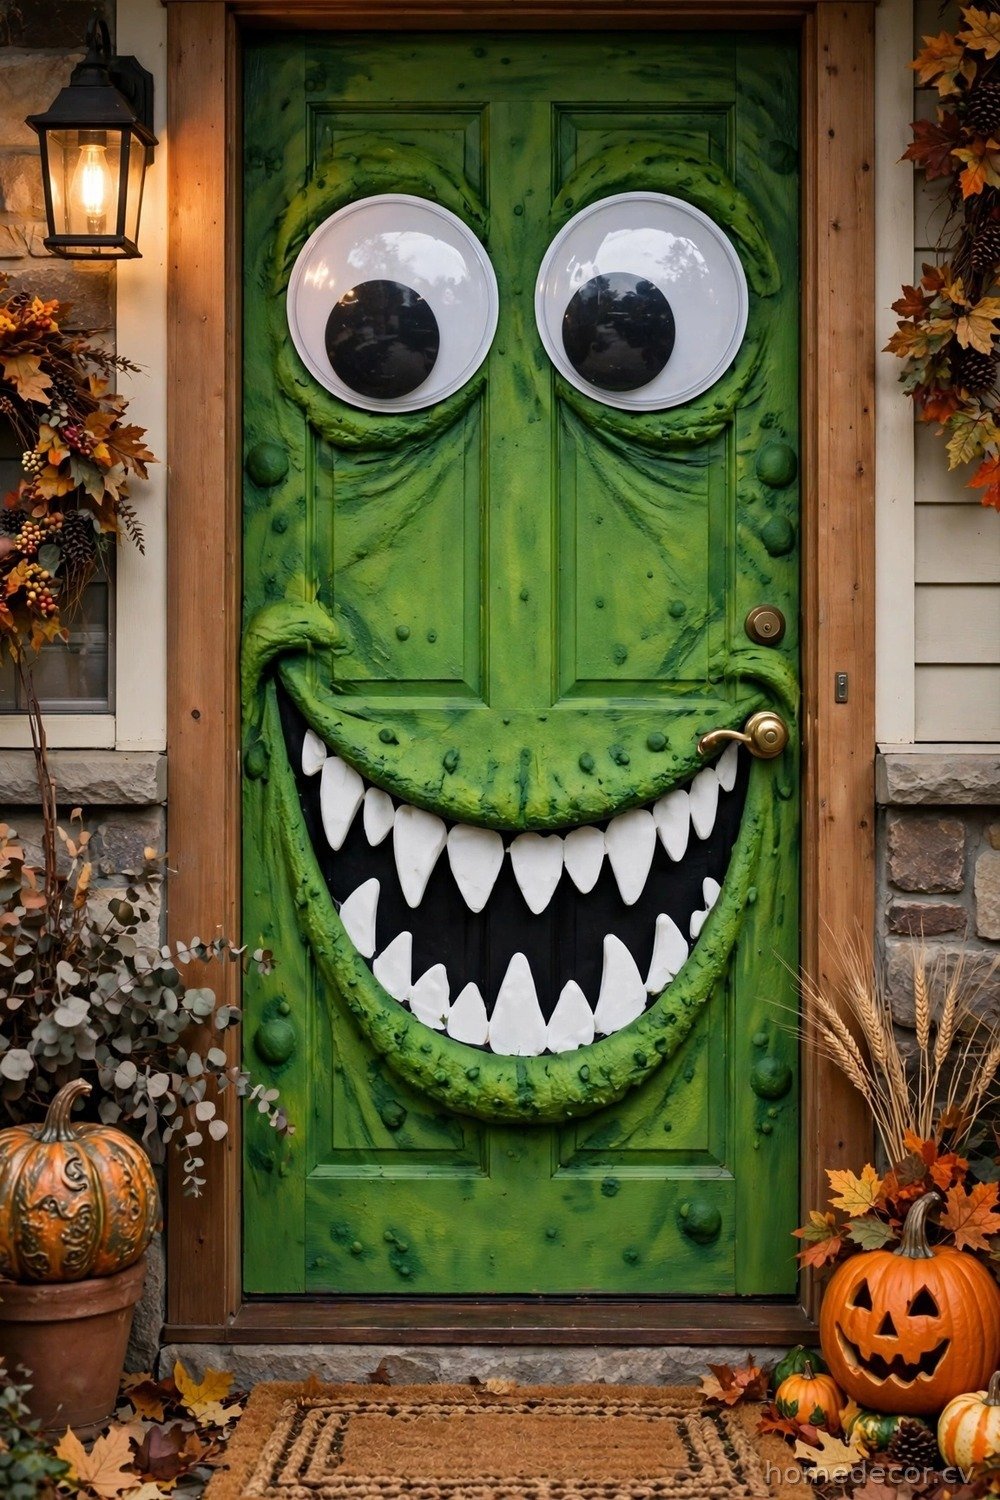
Turn your entire door into a friendly monster face, and watch kids light up before they even ring the bell. Start with a solid-colored door or cover it with a cheap plastic tablecloth in green, purple, or orange, then add two giant googly eyes made from paper plates and black construction paper. Cut a wide, toothy grin from white cardstock and tape it across the middle of the door, adding a few jagged teeth for extra personality. This project costs under ten dollars, takes less than an hour, and works beautifully on any door color because the monster face does all the talking. Kids love posing for photos in front of it, and it is just silly enough to keep the littlest visitors from getting scared.
I spend far too much time saving home ideas.
If you'd like the best ones, I'll send a short email once or twice a month.
For a sturdier version that survives wind and rain, swap the paper for foam board or thin craft foam, which holds up far better outdoors. Attach everything with painter’s tape or removable mounting strips so your door paint stays safe, and seal paper edges with clear packing tape if rain is in the forecast. Add a pair of foam horns or paper ears at the top corners to give your monster even more character, and place a small “Feed Me Candy” sign near the handle for a funny finishing touch. When Halloween night arrives, you can even add a motion-activated sound box behind the door so your monster growls a greeting. The whole display comes down in minutes on November first, leaving no damage behind.
Mummy-Wrapped Door

A mummy door is one of the easiest Halloween door decoration ideas, and it looks impressively spooky for almost no money. Wrap your door in strips of white crepe paper streamers, crisscrossing them at angles and leaving a few ends dangling loose for a tattered, just-escaped-the-tomb effect. Layer the strips unevenly rather than neatly, because real mummies are messy, and use tape on the back edges to keep everything in place. Then add two large eyes peeking out from between the wraps, made from paper plates with black pupils, and your door instantly becomes a giant mummy guarding the house. The whole project takes about thirty minutes and costs less than five dollars.
To make your mummy last through October weather, choose plastic tablecloth strips or white fabric gauze instead of crepe paper, which melts in the rain. Cheesecloth works especially well because it frays naturally and looks authentically ancient, and you can stain it with a quick tea bath for an aged, dusty color. Secure the layers with a staple gun on wooden doors or strong double-sided tape on metal ones, and tuck a battery-operated string light behind the wrapping for a subtle glow at night. Pair the door with a couple of small tombstones on the porch and a “Beware of Mummy” sign, and your entry becomes a mini haunted graveyard. Cleanup is as simple as cutting the strips away and tossing them in the bin.
Spider Web Door with Giant Spiders

Nothing says Halloween quite like a giant spider web stretched across your front door, especially when a few oversized spiders are lurking in it. Buy a stretchable spider web bag from any dollar store, pull it open until the fibers are thin and wispy, and anchor the corners around your door frame with small hooks or tape. The trick is to stretch it unevenly and leave a few thicker strands, because real webs are never perfect. Then add two or three large plastic spiders, positioning one near the top corner and one lower down, as if they are crawling toward visitors. Add a few smaller spiders scattered through the web for detail, and your door looks genuinely creepy.
For extra impact after dark, weave a string of purple or orange fairy lights through the web so it glows eerily when the sun goes down. You can also spray the web lightly with glow-in-the-dark paint, which charges during the day and gives the whole entry a ghostly shimmer at night. If you have kids, let them place the spiders themselves, since arranging the web is half the fun and they will proudly show friends exactly where each spider hides. Keep the web clear of the door handle and hinges so the door still opens easily, and use removable hooks to avoid holes in your trim. This decoration costs under fifteen dollars and looks far more expensive than it is.
Pumpkin Patch Doorstep Display

If you love a classic fall look with a Halloween twist, turn your doorstep into a miniature pumpkin patch. Arrange pumpkins of different sizes, shapes, and colors on your steps, mixing traditional orange pumpkins with white, green, and striped varieties for visual interest. Stack smaller pumpkins in crates or baskets, place one large pumpkin beside each side of the door, and tuck in a few gourds and dried corn stalks to fill the gaps. Add a rustic wooden sign that says “Pumpkin Patch” or “Pick Your Poison,” and suddenly your entry feels like a charming farm stand with a spooky edge. This idea works for the entire fall season, not just Halloween night.
To give the display a Halloween punch, carve or paint a few of the pumpkins with jack-o’-lantern faces and add battery-operated candles inside so they glow after dark. Scatter a handful of faux autumn leaves across the steps and drape a plaid blanket over a nearby bench or chair to complete the cozy harvest feeling. Real pumpkins last several weeks outdoors in cool weather, but if your porch gets hot sun, use high-quality faux pumpkins for the pieces closest to the door and real ones further out. Vary the heights by placing pumpkins on overturned buckets or wooden crates hidden under fabric, which creates a fuller, more professional display. When the season ends, the uncarved pumpkins can be composted or cooked, so almost nothing goes to waste.
Black Cat Silhouette Door
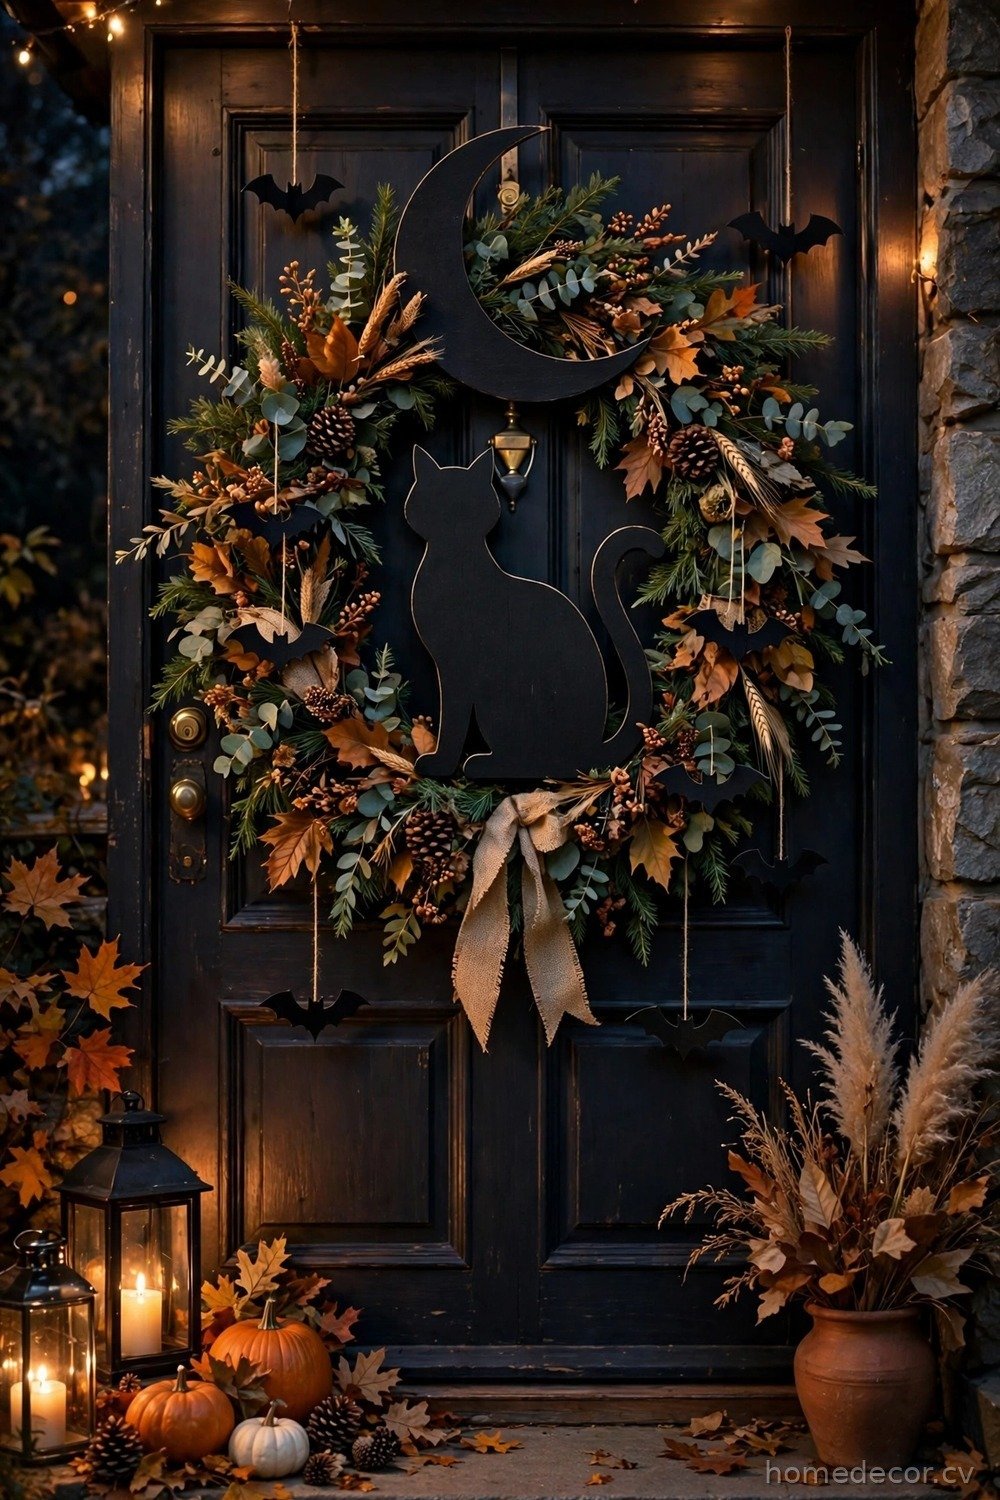
Black cats are Halloween icons, and a bold silhouette design turns your door into a striking piece of seasonal art. Cut a large black cat shape from black poster board or craft foam, complete with an arched back, a curled tail, and glowing yellow eyes, then mount it in the center of your door. Add a crescent moon cut from yellow or gold paper in the upper corner, plus a few small black bats, to create a simple night-sky scene. The contrast of black on a light-colored door is dramatic, while on a dark door you can flip the design and use orange or white silhouettes instead. This idea costs almost nothing and looks surprisingly polished.
For a more detailed scene, layer several silhouettes at different sizes to create depth, placing a large cat in the foreground and smaller bats and a bare tree branch behind it. Use foam board for the main shapes so they stand slightly off the door and cast small shadows, which adds dimension in porch light. You can find free cat and bat templates online, print them at a copy shop in large format, and trace them onto your material in an evening. Attach everything with removable mounting putty so the design survives October winds but peels off cleanly afterward. Finish with a small “Beware of Cat” sign or a scattering of orange fairy lights around the frame, and your door becomes the classiest spooky entry on the street.
Ghostly Door Curtain
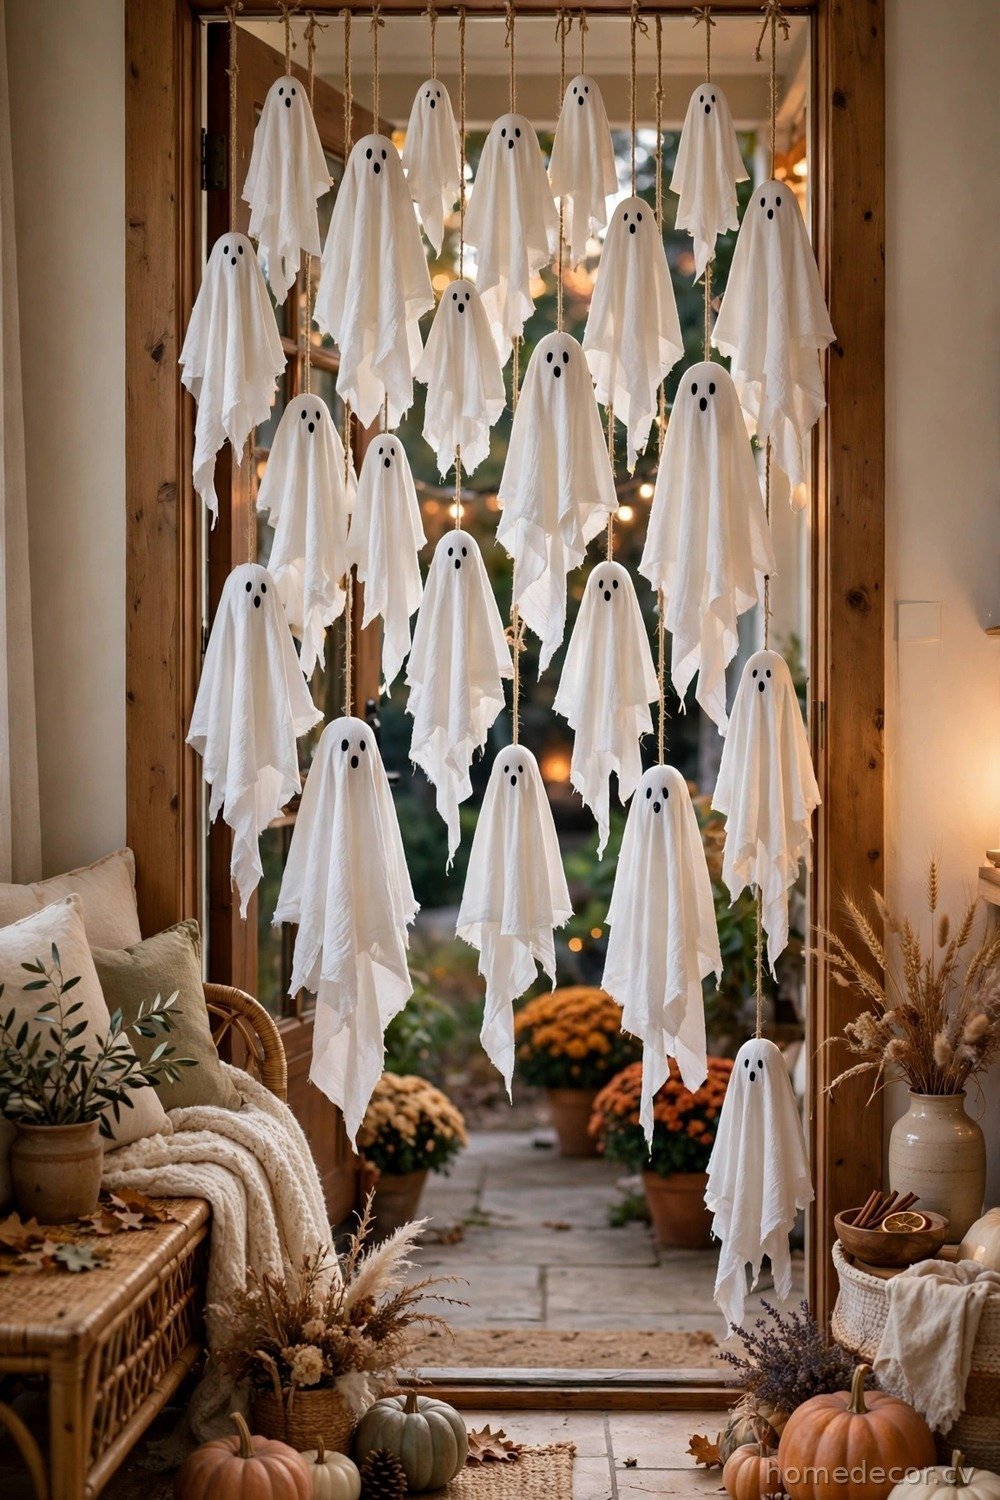
A curtain of hanging ghosts turns your doorway into a haunted entrance that guests actually walk through, which makes it unforgettable. Cut ghost shapes from white fabric, cheesecloth, or even old white sheets, varying the sizes from small to large, and hang them from the top of your door frame at different lengths using fishing line or thin string. Add black felt eyes to each ghost, and let the breeze move them gently so they appear to float. Visitors will brush past soft, friendly ghosts as they approach, and kids absolutely love it. The materials are cheap, and you can make a full curtain in a single afternoon.
To make the ghosts glow at night, tuck small battery-operated tea lights or a string of white fairy lights behind the curtain, which makes the fabric shine from within. For a spookier version, use gray or slightly yellowed fabric instead of bright white, and add a few longer, tattered ghosts at the edges that reach nearly to the ground. Keep the center of the doorway clear enough for people to walk through comfortably, and make sure nothing blocks the doorbell or handle. If rain is a concern, use lightweight plastic or outdoor fabric so the ghosts dry quickly and do not get heavy. When Halloween ends, fold the ghosts flat and store them in a bag, and they will be ready to hang again next year with zero extra work.
Witch Hat Wreath

A witch hat wreath is a playful twist on the traditional fall wreath, and it is much easier to make than it looks. Start with a grapevine or foam wreath form, wrap it in black mesh or tulle, and attach a small pointed witch hat at the top, tilted at a jaunty angle. Add a band of orange or purple ribbon around the hat, plus a few miniature pumpkins, black roses, or glittery spiders tucked into the wreath. Hang it on your door with a sturdy hook, and you have a decoration that reads Halloween instantly from the street. The whole project takes about an hour and uses supplies from any craft store.
To personalize your witch hat wreath, match the ribbon and accents to your porch colors, using lime green for a wicked witch look or deep purple for a more elegant, mysterious feel. Hot glue works best for attaching decorations, but use floral wire for anything heavy so it does not fall off in wind. Add a small broomstick charm, a dangling “Witch Parking” tag, or a few faux autumn leaves for extra charm. If you want the wreath to last for years, store it in a wreath box or large bag after Halloween, keeping it away from moisture and direct sunlight. This wreath also pairs beautifully with a doormat that says “Come In, My Pretties” for a coordinated, whimsical entry that guests will remember.
Haunted House Door Frame
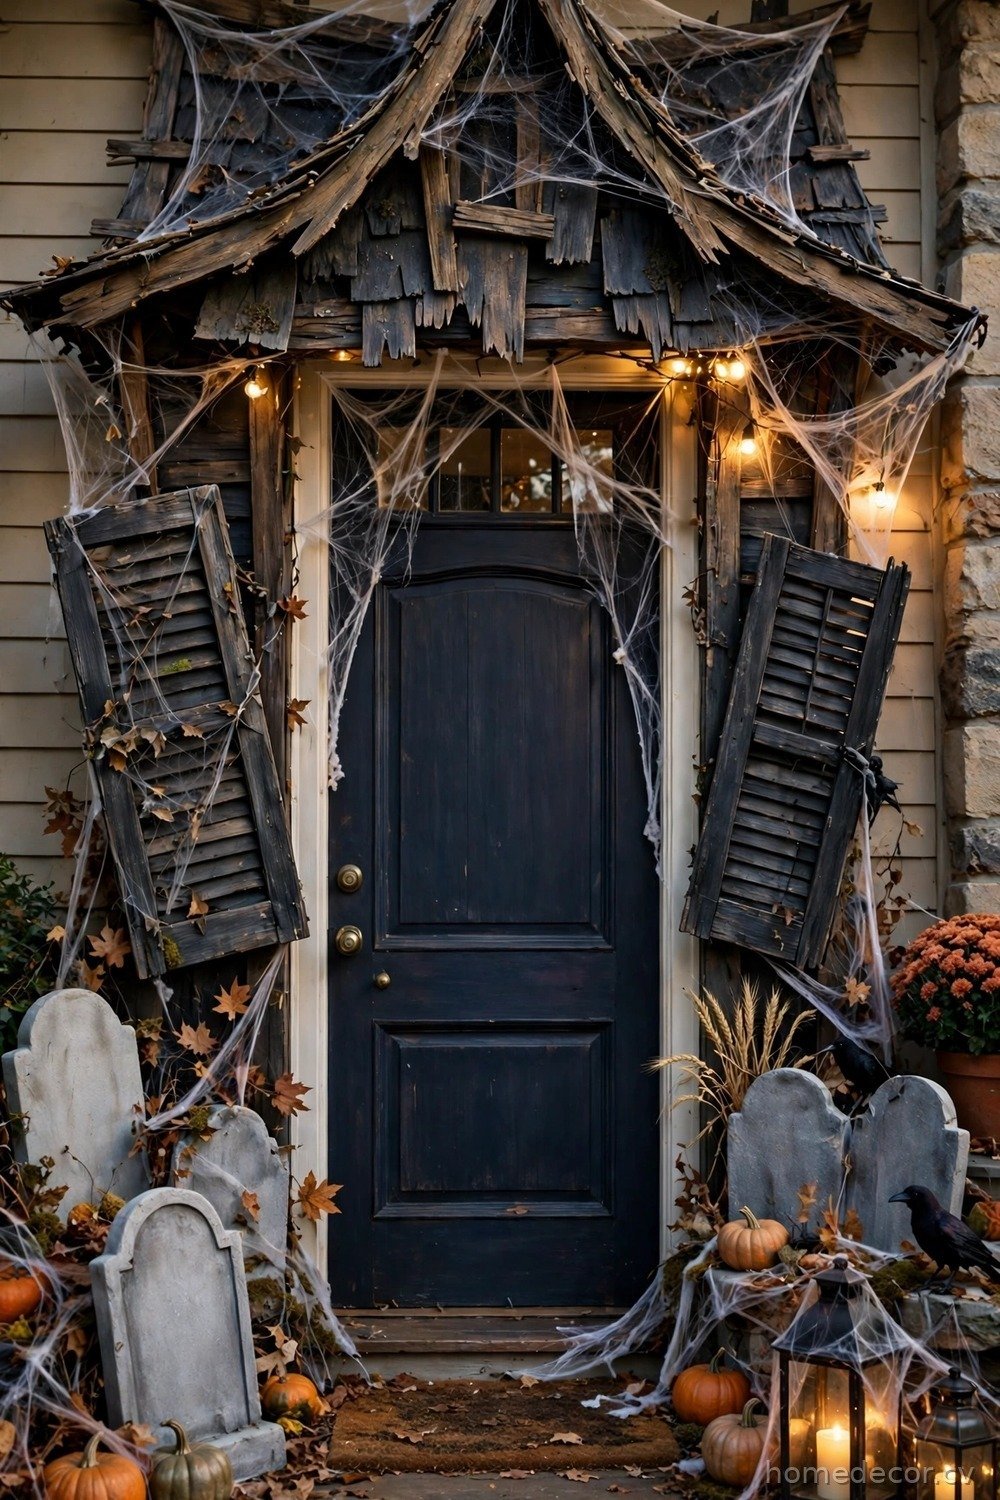
Transform your door frame into a miniature haunted house, complete with crooked shutters, tombstones, and eerie details. Frame the door with black or gray foam boards cut to look like weathered wood siding, add two crooked shutters on either side, and top the whole thing with a peaked “roof” sign or a banner that reads “Haunted House.” Place small foam tombstones at the base, scatter plastic bones or a skeleton hand reaching from behind a planter, and drape fake cobwebs across the corners. The effect is a full scene rather than a single decoration, which makes your entry feel like a real attraction. This idea takes a weekend afternoon but creates the biggest wow factor on this list.
Keep the structure lightweight and removable by using foam board and command strips rather than nails, especially if you rent your home. Paint the foam with gray and black craft paint, adding dry-brush strokes of white for a weathered, aged-wood look that photographs beautifully. Add a motion-activated cackling witch or a fog machine on the porch for Halloween night itself, turning your display from decoration into an experience. Make sure the walkway stays clear and well-lit so trick-or-treaters can approach safely, and avoid anything that blocks the door from opening fully. When the holiday passes, the foam pieces stack flat for storage, and the whole haunted house can return next October with just a fresh coat of paint.
Caution Tape and Crime Scene Door

For a funny, eye-catching entry, wrap your door like a spooky crime scene using yellow caution tape and a few clever props. Crisscross the tape across the door in an X pattern, add a printed “Enter at Your Own Risk” sign, and place a chalk outline of a body shape on the porch floor using sidewalk chalk or white tape. Add a few plastic skeleton bones, a fake evidence marker or two, and a sign that reads “Zombie Crossing” to complete the joke. This decoration is hilarious for older kids and adults, costs almost nothing, and takes about twenty minutes to set up. It also works perfectly for a Halloween party entrance.
To keep the humor friendly for younger visitors, add a goofy twist like a sign that says “The Candy Did It” or a chalk outline shaped like a gingerbread man instead of a person. Use real caution tape from a party store rather than actual safety tape, since party tape tears easily and will not leave residue on your door. Secure the tape ends with painter’s tape on the frame, and keep the door handle free so guests can still knock or ring the bell. At night, add a single flickering lantern or a red porch bulb to give the scene a dramatic, movie-set glow. This is one of the easiest ideas on the list, and it consistently gets laughs and photos from everyone who visits.
Skeleton Door Greeter
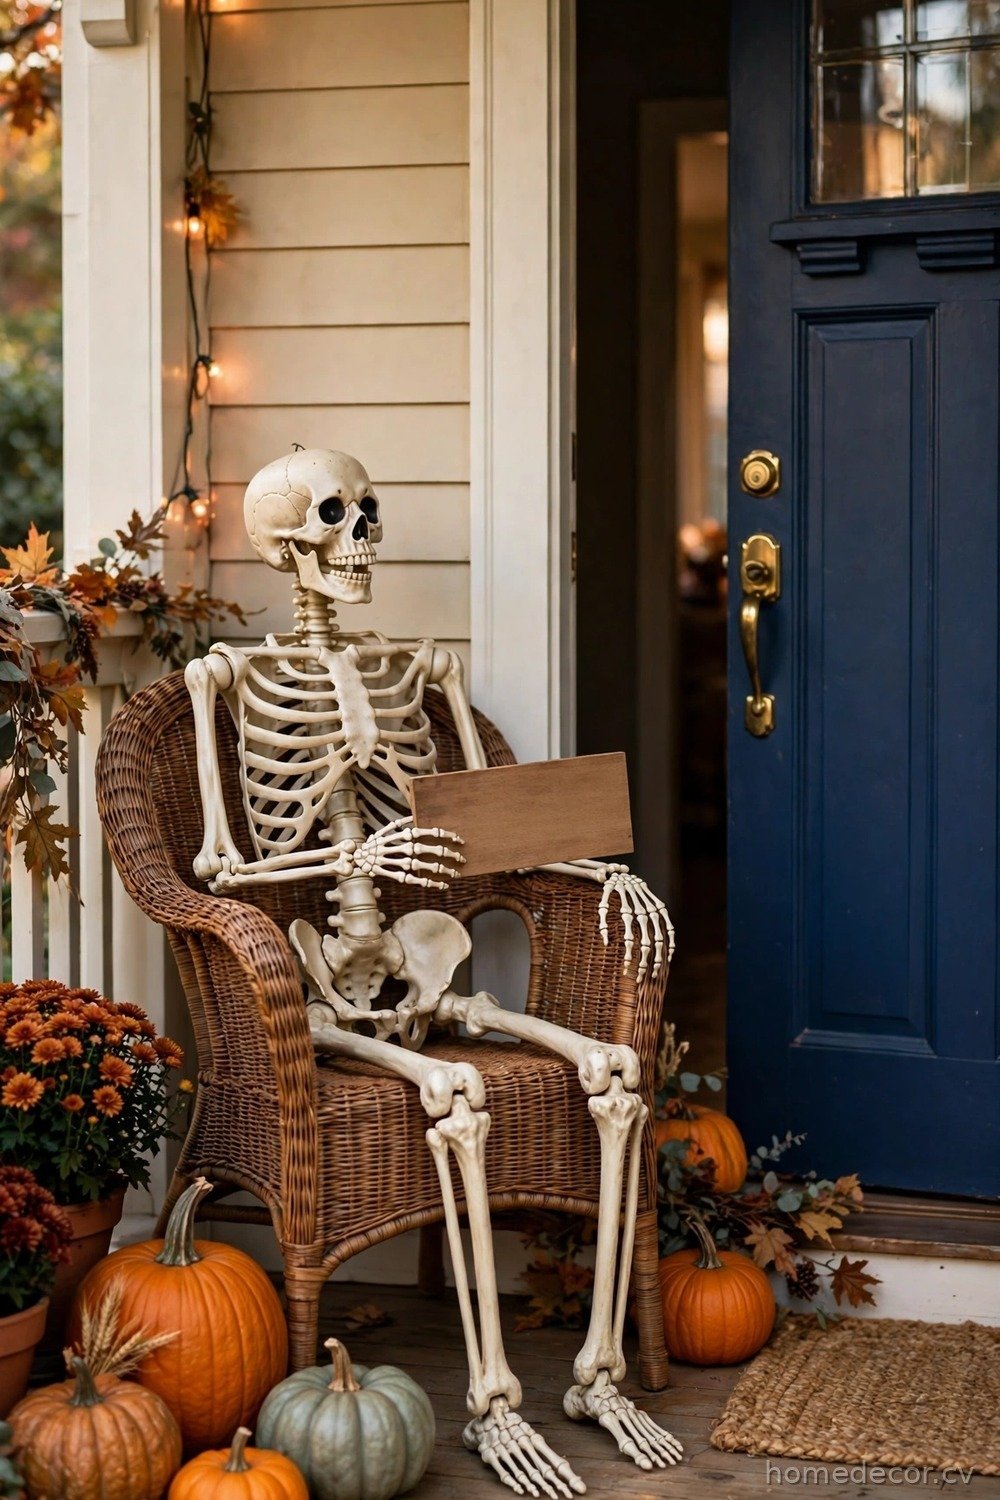
A life-size skeleton posed at your door is an instant classic, and a few small details turn it from a store-bought prop into a memorable greeter. Pose the skeleton sitting in a chair beside the door, leaning against the frame, or even “knocking” on the door itself, and dress it in a witch hat, a scarf, or a pair of sunglasses for personality. Place a small sign in its bony hands that says “Trick or Treat” or “Take One, If You Dare,” and set a candy bowl nearby so the skeleton appears to be handing out treats. The humor and charm of a posed skeleton appeal to all ages, and you can change the pose every few days to keep neighbors guessing.
For Halloween night, add glow-in-the-dark paint to the skeleton’s bones or position a spotlight behind it so it casts a long, spooky shadow across the porch. You can also add a second, smaller skeleton pet, like a dog or cat skeleton, sitting at its feet for extra delight. Store-bought skeletons are widely available and inexpensive, but check thrift stores after Halloween for deep discounts on next year’s display. Make sure the skeleton is secured so wind does not knock it into the walkway, using fishing line tied to the porch railing or a heavy base hidden under fabric. With a little creativity, your skeleton greeter becomes the most photographed decoration on the block.
Bat Swarm Door
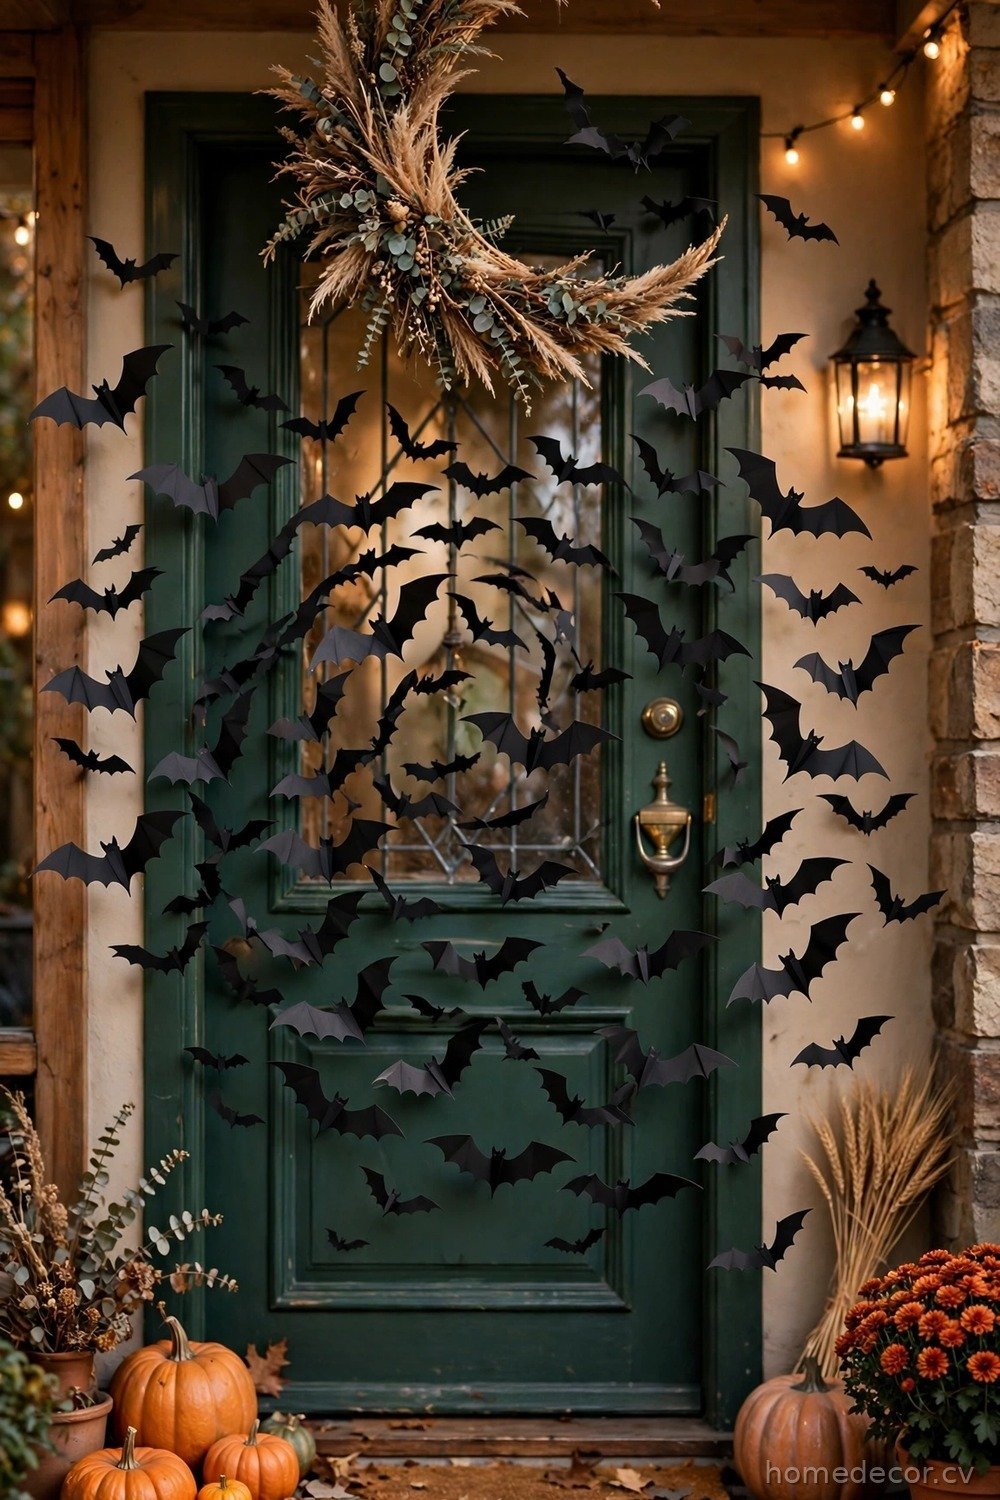
A swarm of bats flying across your door creates movement and drama, even though every bat is completely still. Cut dozens of bat shapes from black cardstock or craft foam in three different sizes, fold each one slightly down the middle so the wings angle outward, and attach them to your door and surrounding wall in a flowing, swirling pattern. Start with a dense cluster near one corner and let the bats thin out as they “fly” across the door, which creates a sense of motion. Add a large crescent moon in the opposite corner to anchor the design, and your door looks like a scene from a Halloween movie. This idea is cheap, quick, and works on any door color.
For durability outdoors, use black craft foam or laminated cardstock instead of plain paper, and attach the bats with removable mounting putty or small pieces of double-sided tape. If you want the swarm to glow, use a few bats cut from glow-in-the-dark foam mixed in with the black ones, so the pattern shifts subtly after dark. Kids can help cut and fold the bats, making this a perfect family craft project for a rainy October afternoon. You can find free bat templates in many sizes online, or draw your own by folding paper in half and cutting a wing shape. When the season ends, peel the bats off and save them in an envelope, since foam bats last for years and the swarm can be rearranged into a new pattern next Halloween.
Candy Corn Color-Block Door
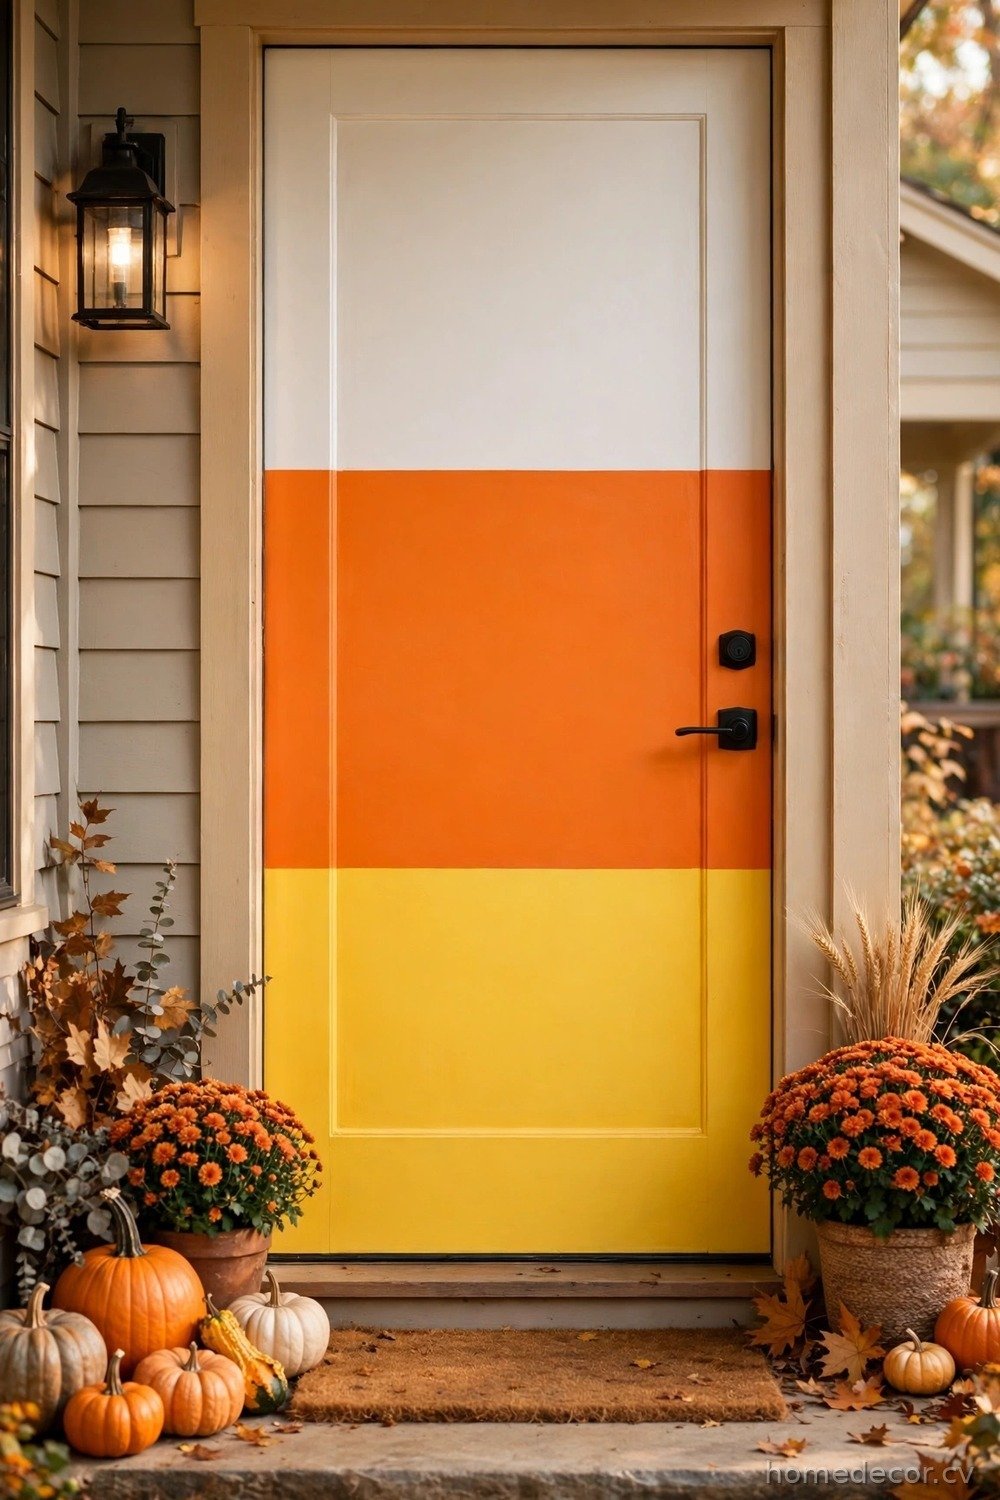
Candy corn is the most recognizable Halloween treat, and a color-block door inspired by it is bright, cheerful, and instantly festive. Divide your door visually into three horizontal sections using large sheets of paper or fabric in white, orange, and yellow, mimicking the classic candy corn layers. Secure the sheets with painter’s tape around the edges, add a few candy corn cutouts or a garland of candy corn shapes across the middle, and finish with a sign that says “Sweet Treats Inside.” The bold stripes are visible from far down the street, and the design is simple enough for anyone to make in under an hour. It is also one of the most kid-friendly ideas on this list.
To make the color blocks last outdoors, use plastic tablecloths in white, orange, and yellow instead of paper, cutting them to fit your door and taping them on the back side. Add a candy corn wreath on top of the color blocks for extra dimension, or hang a garland of real candy corn bags along the frame. If you prefer a subtler version, paint three large candy corn shapes on a single white board and hang the board on the door instead of covering the whole surface. This approach keeps your door paint safe and lets you reuse the board year after year. Pair the door with a bowl of actual candy corn on the porch, and your entry becomes the sweetest stop on the trick-or-treat route.
Jack-o’-Lantern Door Wreath
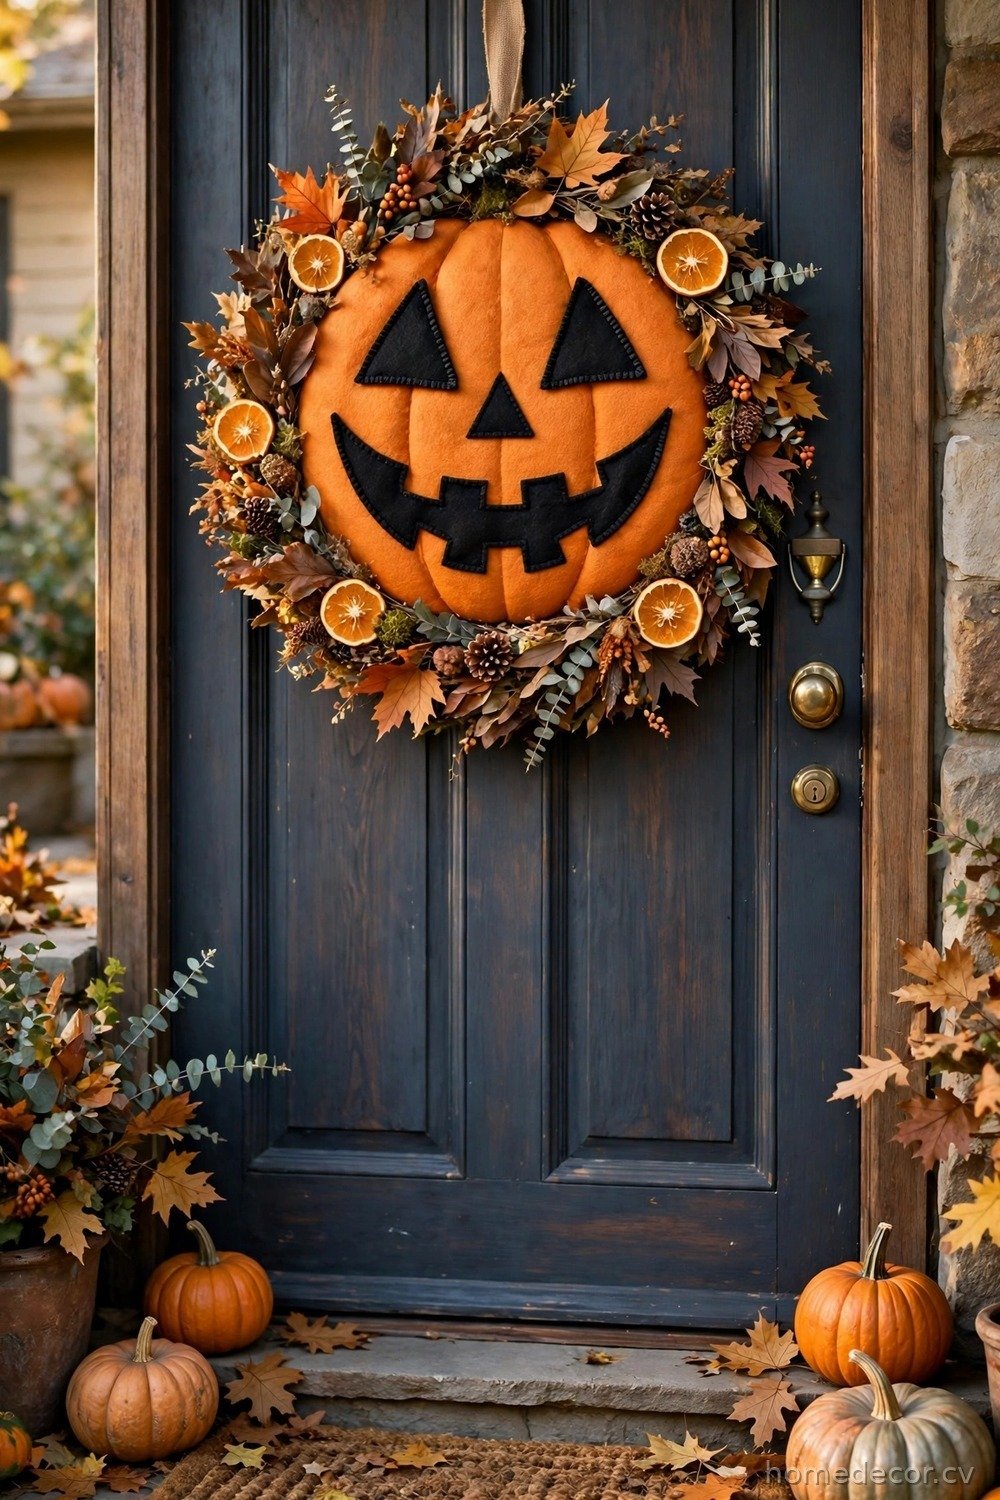
A wreath shaped like a jack-o’-lantern face brings classic Halloween charm to your door without any carving mess. Start with a round orange wreath form or wrap a foam wreath in orange fabric, then add triangle eyes, a nose, and a wide grin cut from black felt or foam. Top the wreath with a green stem made from twisted fabric or a small branch, and add a few autumn leaves around the edges for a finished look. Hang it at eye level so the jack-o’-lantern face greets every visitor, and your door instantly feels festive. This wreath takes about an hour to make and lasts for many Halloweens with proper storage.
To make your jack-o’-lantern wreath stand out, add battery-operated fairy lights woven through the orange fabric so the face glows softly at night. You can also make the grin mischievous or friendly depending on your style, using different mouth shapes to change the whole personality of the wreath. For a more rustic version, use burlap in burnt orange and add dried corn husks or mini pumpkins around the base. If you would rather buy than make, many craft stores sell jack-o’-lantern wreath kits that include all the pieces and take less than thirty minutes to assemble. Hang your finished wreath with a sturdy over-the-door hook, and pair it with a matching doormat for a polished, coordinated entry.
Eerie Glow Door with Lanterns
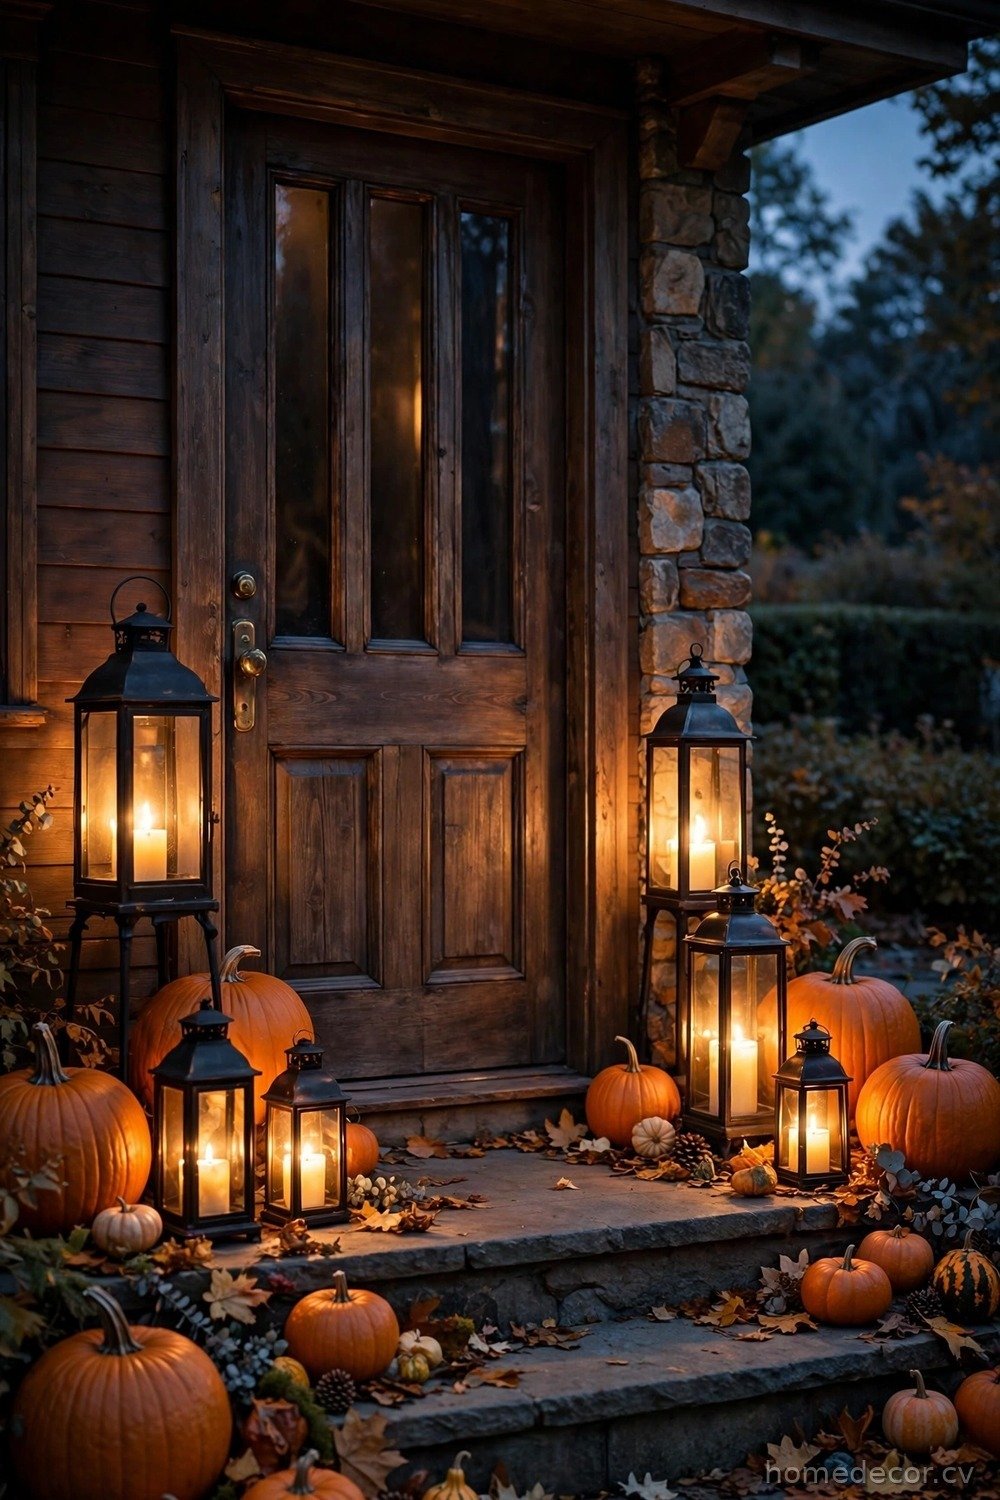
Sometimes the simplest Halloween door decoration is also the most magical: surround your door with glowing lanterns and let the light do the work. Place lanterns of different heights on both sides of the door, fill them with battery-operated candles or orange string lights, and add a few carved or painted pumpkins among them. Hang a lantern from a hook above the door as well, so the entry glows from all directions. The warm, flickering light creates an enchanting, slightly spooky atmosphere that feels welcoming rather than scary, which makes it perfect for families with young children. This idea requires almost no crafting skill and looks stunning in photos.
To deepen the eerie effect, use colored bulbs or tinted lantern glass in orange, purple, or green, and mix in a few mason jars wrapped in cheesecloth to look like ghost lanterns. Add a string of lights around the door frame itself, choosing warm white for an elegant look or orange for a classic Halloween feel. Solar lanterns are a great option if you do not want to deal with batteries, since they charge during the day and turn on automatically at dusk. Keep the walkway clear and the lanterns stable so nobody trips, using heavier lanterns or sand-filled bases on windy porches. This glowing entry works beautifully all October long, and the lanterns can be reused for fall gatherings and Thanksgiving too.
Vintage Halloween Door
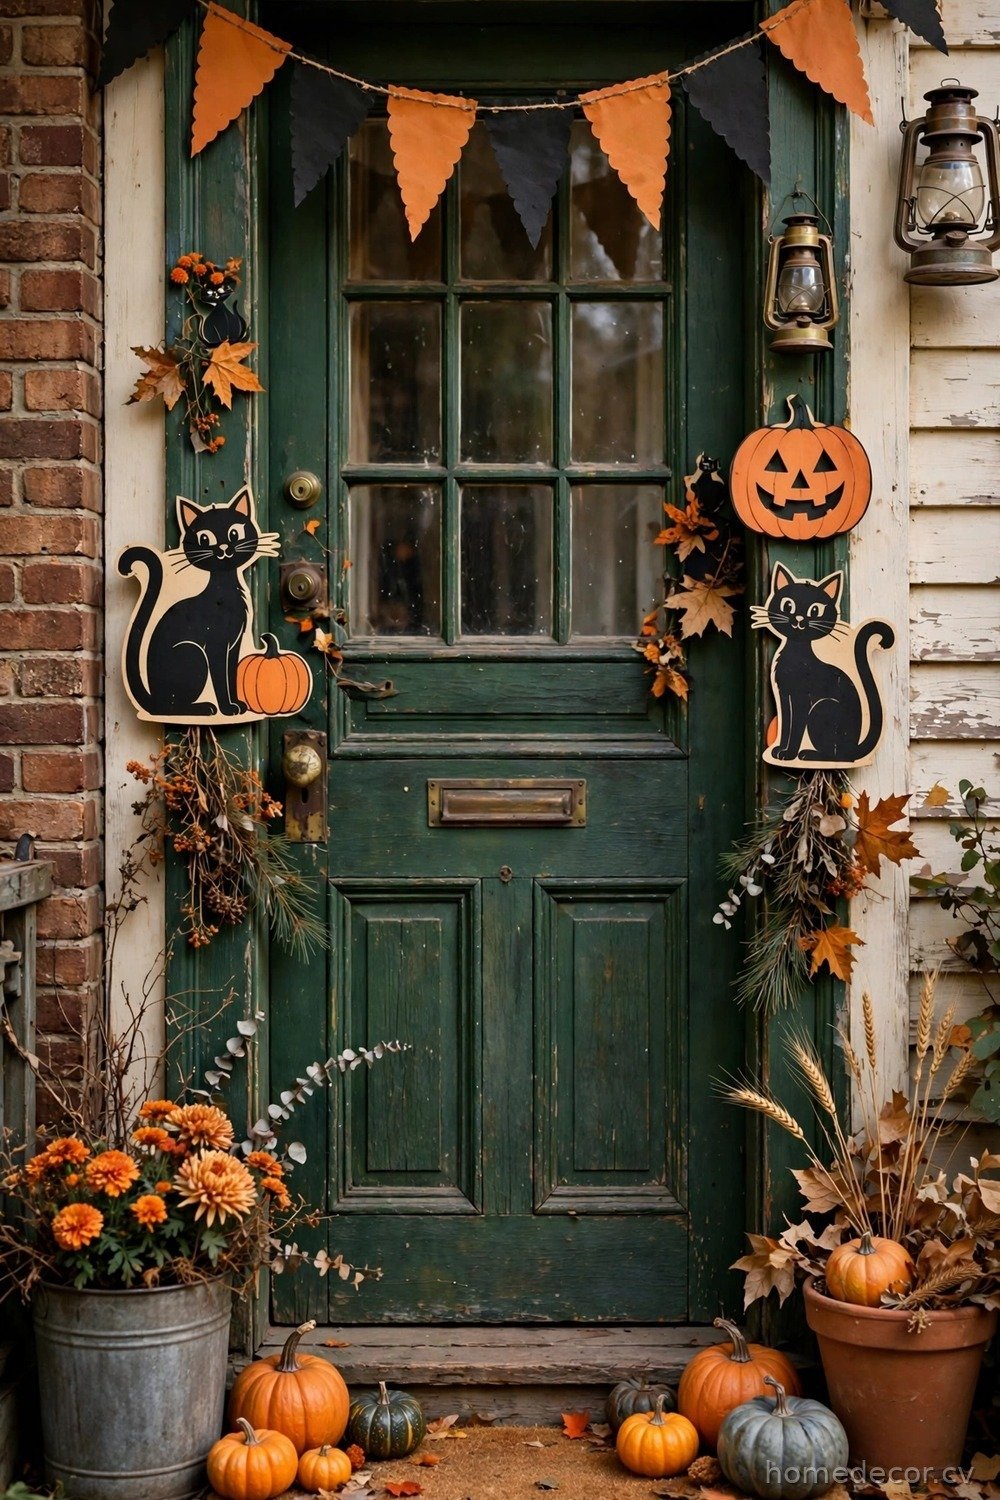
A vintage Halloween door brings nostalgic charm with retro colors, classic imagery, and old-fashioned details. Start with a black and orange color scheme, hang a banner of vintage-style paper flags across the top of the door, and add retro cutouts of black cats, jack-o’-lanterns, and witches printed in the style of old Halloween cards. Place a couple of antique-looking lanterns beside the door, add a stack of old books or a vintage crate filled with pumpkins, and finish with a sign in retro lettering that says “Happy Halloween.” The result feels like stepping back in time, and it stands out beautifully among all the modern, plastic-heavy decorations on the block.
To find authentic vintage pieces, check thrift stores, flea markets, and online marketplaces for old Halloween decorations, which are often inexpensive and full of character. You can also print vintage Halloween images from public domain archives onto cardstock, giving you an endless supply of retro art for almost no cost. Add orange and black crepe paper streamers twisted into garlands for a classic party feel, and place a bowl of old-fashioned candy like candy corn and wax lips on the porch for visitors. Keep the palette limited to black, orange, cream, and a touch of gold so the display looks curated rather than cluttered. This vintage door is a wonderful choice if you love Halloween history and want an entry that feels warm, nostalgic, and beautifully old-fashioned.